5
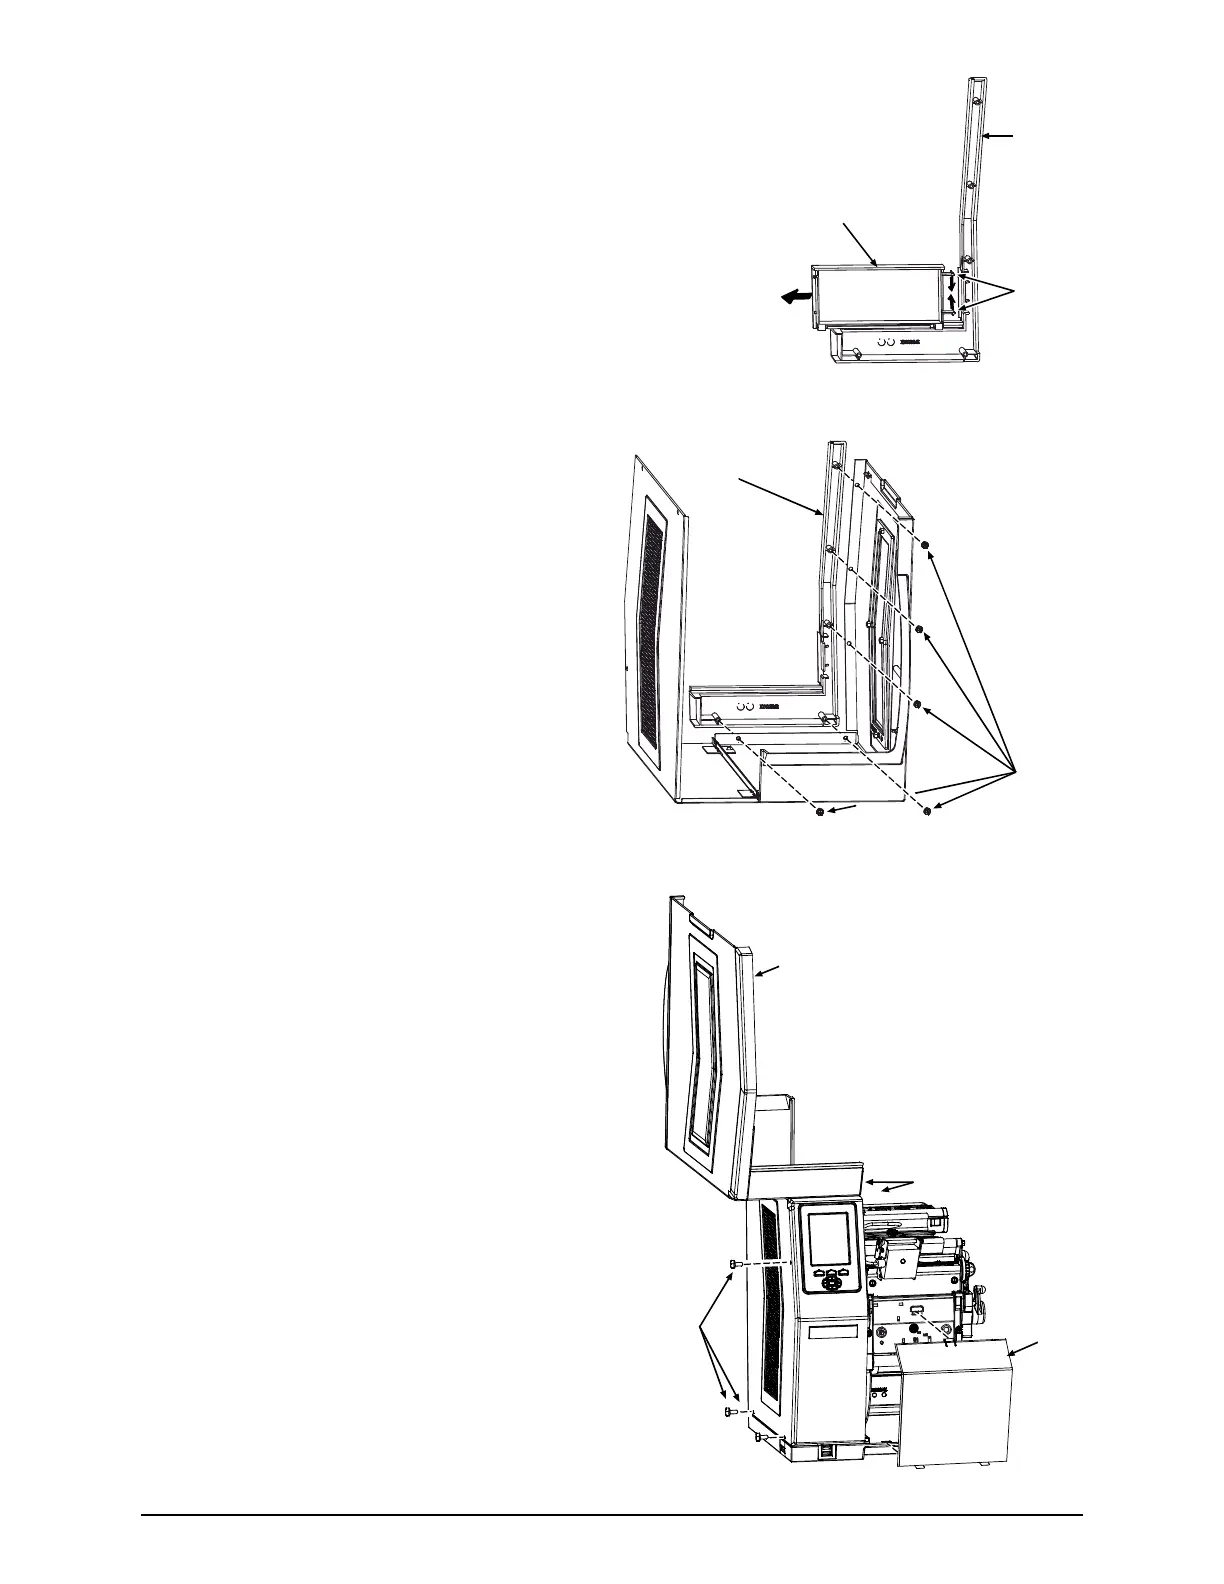
10) Press the Tabs of the Lens together. Then slide the Lens off
the Fascia. (Store the Lens in a safe place, for future use.)
Lens
Fascia
Tabs
11) Secure the Fascia to the Cover using the five
previously removed Screws.
Fascia
Screws
12) Lower the Cover onto the printer. Reinstall and
tighten the three Cover Screws. Tighten both
Hinge Screws. Reinstall the Door and lower
the Cover.
Plug the power cord into the AC
Receptacle. Align the scanner; see “Alignment”
section, below.
Door
Cover
Hinge
Screws
Cover
Screws