page – 6
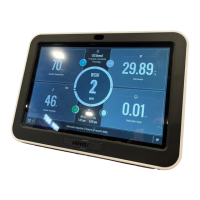
DAVIS | WeatherLink Console User Guide
davisinstruments.com
DISPLAY FORMAT SETTINGS
Make sure the display formats are as you want them to be.
Tap Next.
UNIT OF MEASUREMENT SETTINGS
Make sure the unit measurements are as you want them to be.
Tap Next.
GENERAL CONSOLE SETTINGS
1. On this screen, you can change your Local Archive Rate
from the default of 5 minutes to 1 minute, 15 minutes,
30 minutes, or 50 minutes. You can change the Online
Archive Rate in this screen as well.
Note: Understanding Data Rates
Your console will display current data as well as store it
internally and optionally upload data to the WeatherLink
Cloud for you to view on the WeatherLink app or website.
Current Conditions: Sensor suite data is transmitted
every 2.5 seconds. See sensor update intervals, page 22.
Archive Data: Historical, or archive, data is stored both in
the console, called “Local” archive data and, optionally,
to the WeatherLink Cloud, called “Online” archive data.
“Local” Archive Rate refers to the frequency at which
archive data is recorded on the Console’s internal
database. The Console default archive rate is every
5 minutes. The more frequently data is added to the
database, the faster the database will ll. However, the
Console’s robust database will store historical data for
years before it starts to overwrite the oldest data.
“Online” Archive Rate is the frequency at which the
Console uploads data for online display and storage on
WeatherLink.com. This archive rate depends on the type
of WeatherLink plan you have selected. The default is
set is 15 minutes. You can change it on the Console or on
WeatherLink.com.
Tip: For Online Archive Rates more frequent than
15 minutes, you must be a Pro or Pro+ subscriber.
You can upgrade to Pro or Pro+ on WeatherLink.com.
2. You can also set when you want your yearly rain season to
start. For example, if your rainy season starts in April, you
might want to start yearly accumulations on April 1 rather
than January 1.
3. Choose whether you want your Console to track ambient
lighting and automatically change the brightness depending
on the light levels in the room. Or you can choose the
brightness level yourself using the brightness slider.
4. Tap Next.
CONSOLE USE
On the next screens, select the primary use for your Console.
Choose home or business. This information helps us design
better hardware, software, and services. Tap Next.
Your installation is now complete! You should see data on
your Display screen within 2 to 5 minutes.