page – 11
DAVIS | WeatherLink Console User Guide
davisinstruments.com
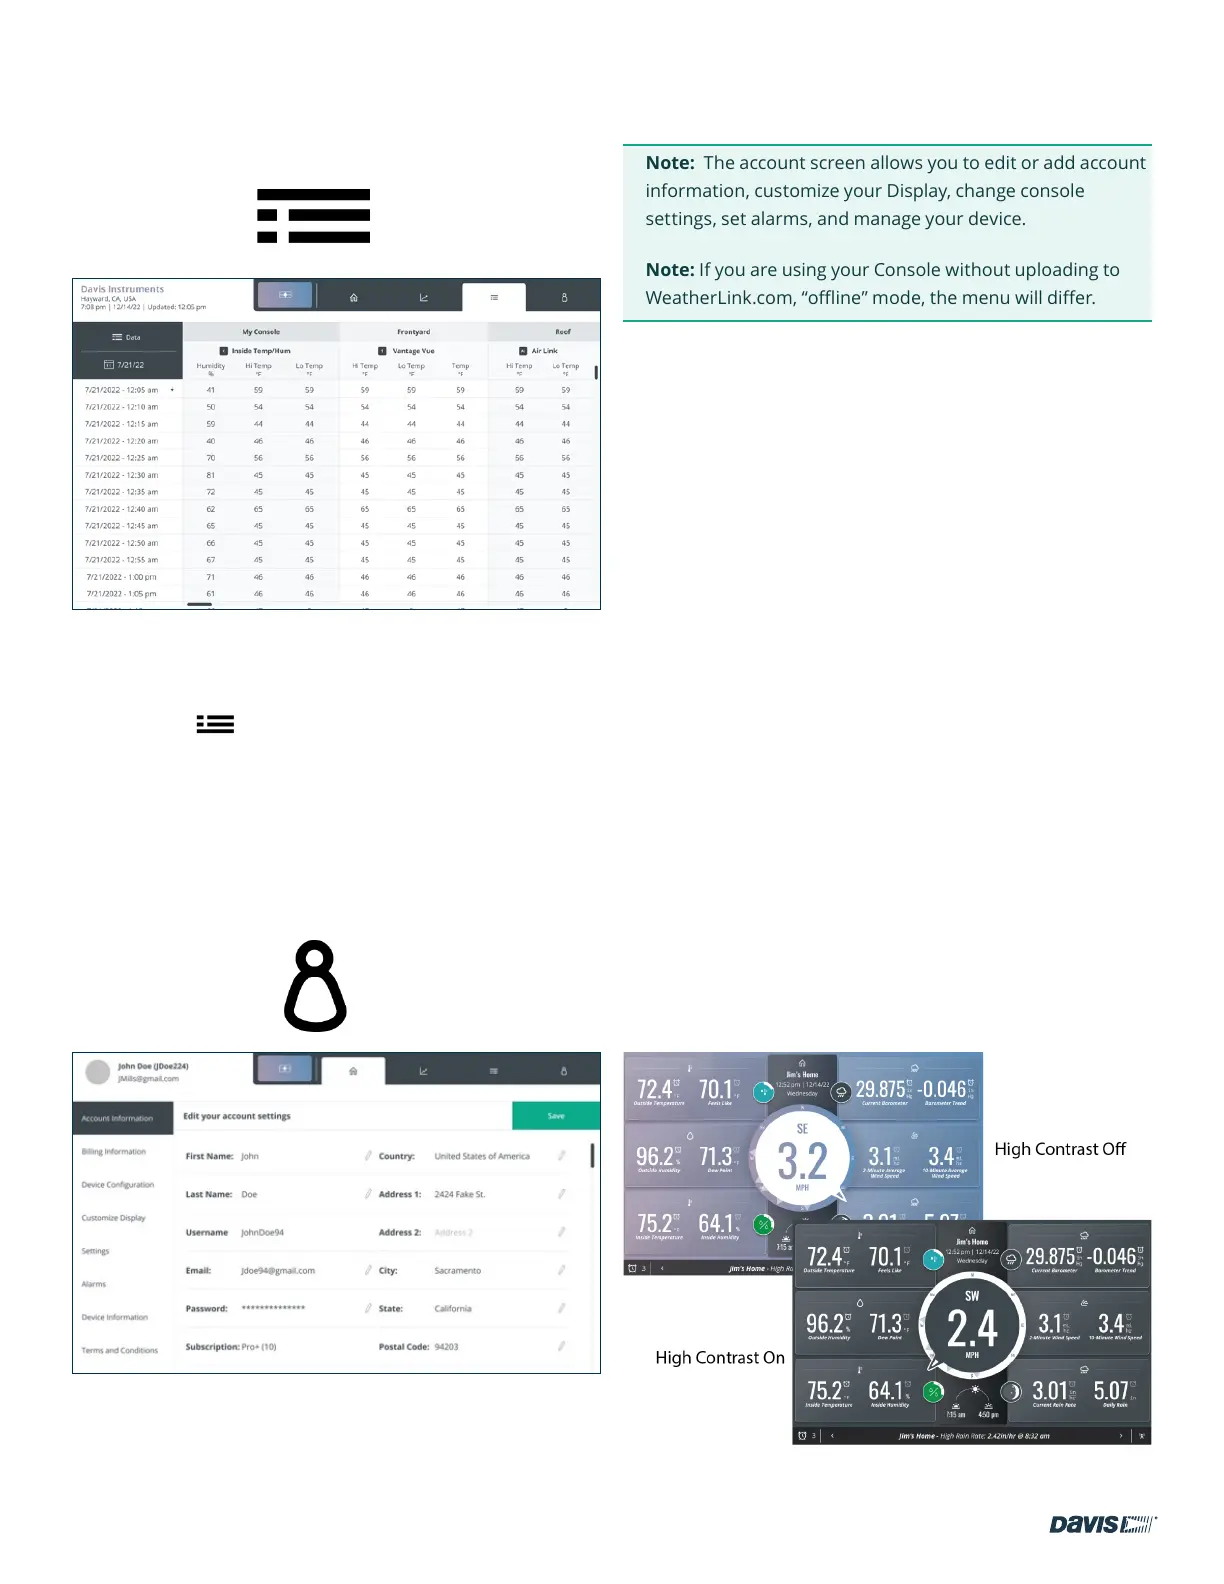
DATA TAB
Tap the data symbol to open the Data screen.
This screen shows your archive, or historical, data over any
selected day. You can choose which data to see by tapping the
data symbol: in the upper left corner, and the day and
start time by clicking the calendar symbol below it.
Scroll down and side to side to see all the data in your
Console’s database for that day.
ACCOUNT TAB
Tap the Account symbol to open the Account screen.
At the top left, you will see your name, your username, and
your email address.
Note: The account screen allows you to edit or add account
information, customize your Display, change console
settings, set alarms, and manage your device.
Note: If you are using your Console without uploading to
WeatherLink.com, “offline” mode, the menu will differ.
Account Tab Menu items
1. Account Information
Tap this option to edit your account information such as
your name, address, or email address. Your WeatherLink
subscription status and when your subscription is due for
renewal are also shown. Tap the pencil to edit the eld.
2. Console Conguration
Tap this option to see your Console’s name, Wi-Fi network,
location, and time zone. To edit, tap the pencil.
3. Customize Display
To customize your Display, tap the Customize Display
menu item.
1. Choose the layout. Choose a 3 X 2 layout for a total
of 6 different tiles, plus the center wind rose. Within
each tile, you can choose up to 2 different data
points. (For example, Outside Temperature and
Outside Humidity in one tile.)
Or choose the 2 X 2 layout for 4 different tiles, plus
the center wind rose, with two or just one aspect in
each.
2. You can choose to turn High Contrast Mode on for
easiest viewing.