page – 4
DAVIS | WeatherLink Console User Guide
davisinstruments.com
Chapter 1: Get Ready
1. SET UP YOUR WEATHER STATION SENSOR SUITE
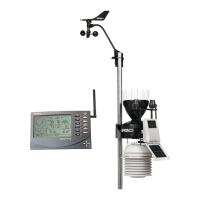
If you have a purchased your WeatherLink Console along with
a new Vantage Pro2 or Vantage Vue sensor suite, you should
set up your sensor suite rst and have it up and running. Do
this by following the instructions included with your sensor
suite, but it might be easier if you wait to mount the sensor
suite outside.
If you already have a Vantage Pro2 or Vantage Vue sensor suite
up and running, you don’t need to unmount it.
2. GATHER THE STATION IDS.
You will need to know what ID number your sensor suite is
transmitting on. The default factory setting is ID1, but you
may have changed this setting. If you have more than one
transmitting station, each will be set to a different ID and you
must know which station is transmitting on which ID.
Tip: If you have a Vantage Pro2 sensor suite, the ID is set
by moving the DIP switches in the transmitter shelter of
your sensor suite.
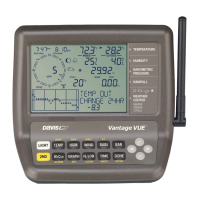
If you have a Vantage Vue sensor suite, the ID is set by
pressing the transmitter ID button.
Refer to your sensor suite’s manual if you need more
information on conrming or changing your ID number.
3. SIGN UP FOR WEATHERLINK.COM.
A WeatherLink account is not required for this Console. It
is a fully functional and powerful data display, storage, and
analysis tool on its own. However, using it with a WeatherLink
account will add considerable benets including access to
your data on your phone or computer, the option to store and
access your archive data in safe cloud data archive, the ability
to share your data with others, and the opportunity to be
part of the WeatherLink global community of Davis weather
stations. A basic account is free, but you can upgrade to Pro or
Pro+ to enjoy added features.
Chapter 2: Set Up Your
WeatherLink Console
POWER UP AND CONNECT TO WI-FI AND WEATHERLINK.COM
Note: You’ll need your Wi-Fi password.
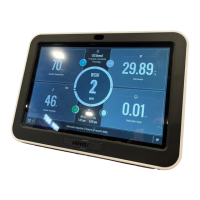
1. Plug your Console into AC power using the AC adapter
and power cable. The Console is AC-powered, with battery
backup. The backup battery is meant to keep data logging
when there is no AC power and will last less than a day.
On the back of the Console, remove the plastic kickstand
stand and any cardboard packaging.
Plug the USB A connector into the AC adapter and the USB
C connector into the port on the back of the Console. Then
plug the AC connector into AC power. Tuck the cable into the
channel below the USB C jack.
Your Console will automatically power up.