Preliminary
941322_VMS Instruction Book 2006.pdf2009-09-07
No. Name Range Default Description/optionsNo. Name Range Default Description/options
0 = no acidic cleaning0 = no acidic cleaning
1 = one alkaline, one acidic cleaning1 = one alkaline, one acidic cleaning
2 = two alkaline, one acidic cleaning2 = two alkaline, one acidic cleaning
3 = etc.3 = etc.
Maintenance an calibration
The following points are important to sustain
correct dosing of etergents. Note that
these two tasks should be performed by an
authorised DeLaval service engineer.
• The tubes in the peristaltic pumps should
be replaced at least two times a year.
• The dosing volume (P6-P8) of the
detergent pumps should be checked
every third month. The dosing capacity
(P32-P34) may need to be adjusted.
Starting cleaning or rinsing
from the touch screen
Note: Any ongoing backflush process must
first be finished before cleaning or rinsing
can be started.
1. Ensure that the milking station is in
manual mode.
2. Remove any cow that might be in the
milking station.
After treatment window
Note: Both gates should be closed to
prevent a cow from entering before the
system cleaning has been started. Closing
and opening gates is done in the Stall
control window.
3. Press the tab After Treatment on the
touch screen to display the After treatment
window.
4. In the After treatment window, press the
Cleaning and Rinsing button. This will open
the Cleaning and rinsing window.
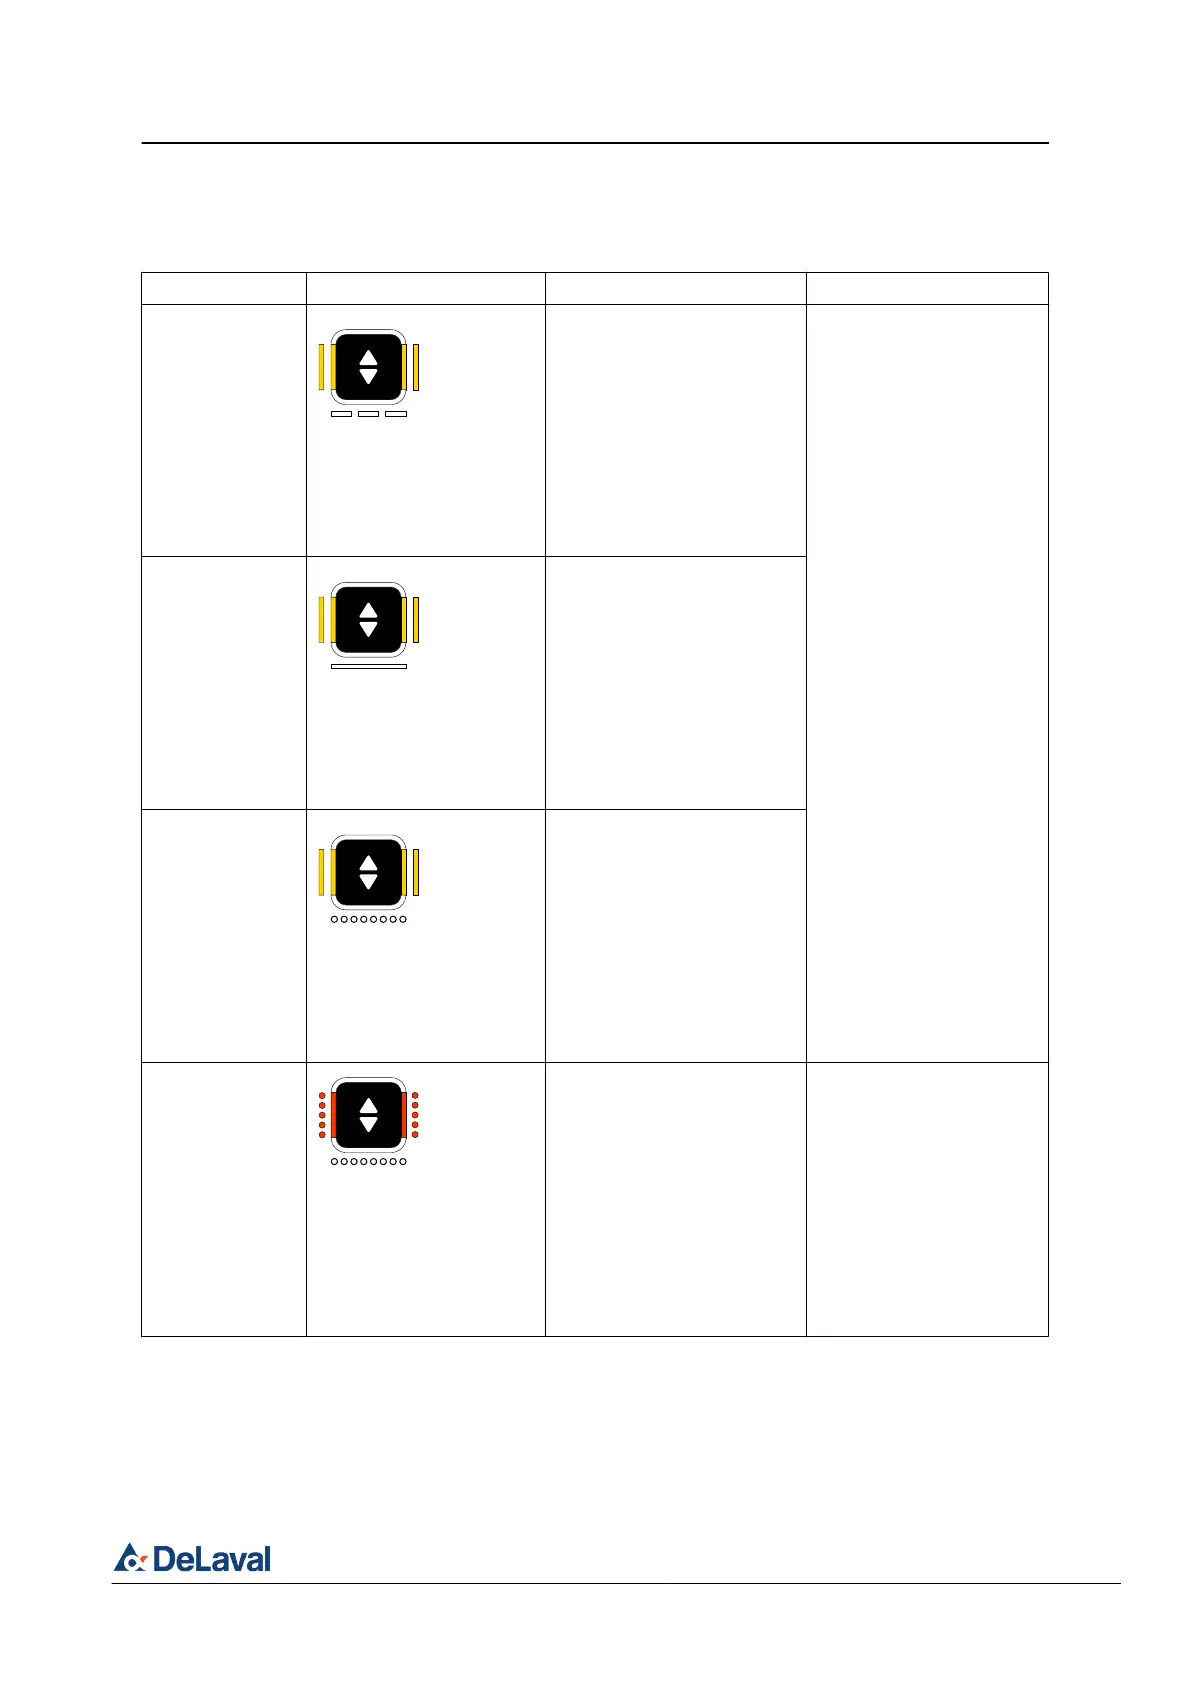
Manual milking indications
Status Indication Description Possible actions
Pre milking
phase
The indicator is solid yel-
low on the left and right
segments while the top
and bottom are white slow
flashing
The cluster is attached to the
udder, the milk flow is below
low milking flow limit.
Press:
Automatic milking, refer to
Ä
Chapter 1.1.2 "Milk flow
phases" on page 13.
Press and hold:
Take-off, refer to
Ä
Chapter 4.3 "Taking off
a cluster manually" on
page 44.
Main milking
phase
The indicator is solid yel-
low on the left and right
segments while the top
and bottom are white
solid.
The milk flow has reached
the low flow limit.
Post milking
phase
The indicator is solid yel-
low on the left and right
segments while the top
and bottom are white rapid
flashing.
The flow rate is reaching the
take-off limit.
Overmilking
alarm
The indicator is flashing
rapidly red the left and
right segments synchron-
ised together with rapid
flashing of the top and bot-
tom segment.
The milk flow has reached
the take-off limit.
Press:
Automatic milking, refer to
Ä
Chapter 1.1.2 "Milk flow
phases" on page 13.
Press and hold:
Take-off, refer to
Ä
Chapter 4.3 "Taking off
a cluster manually" on
page 44.
DeLaval milking automation MA200 (Test installation)
Quick guide
© DeLaval 2019.
2019-05-31, Version 1 15 (62)