EasyManuals Logo

Dell EMC Unity Series Installation Guide

Dell EMC Unity Series
70 pages
To Next Page IconTo Next Page
To Previous Page IconTo Previous Page
Page #45 background imageLoading...
Page #45 background image
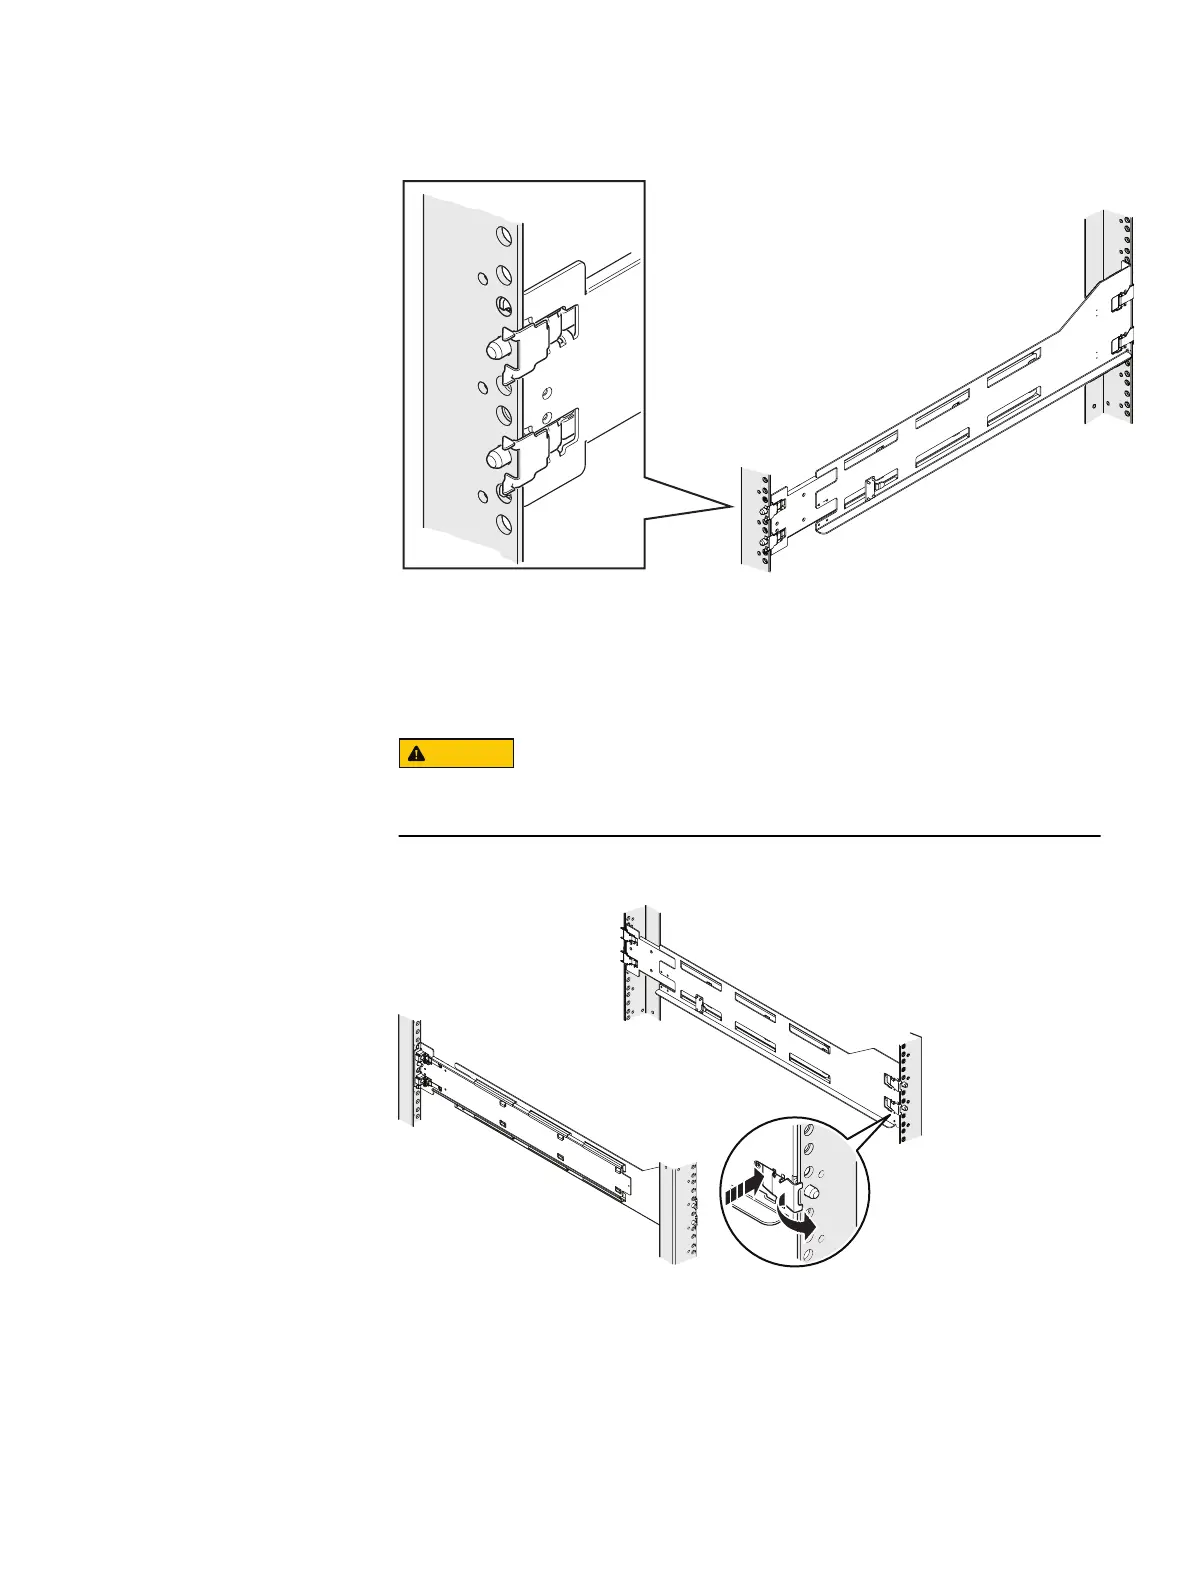
Figure 15 Aligning the rear adaptors (left rear of cabinet shown)
CL5867
3. At the front of the cabinet, making sure the rail is level, pull it forward and align
the rail adaptor with the mounting hole in the channel. Push in on the spring clip
while pulling forward on the rail. When the spring clip is forward of the front
cabinet channel, and the adaptor is in the mounting holes, release the spring clip
so it holds the rail in place.
CAUTION
Ensure the spring clip is securely attached to the channel. It may be
necessary to push in on the clip to assist in snapping it into place.
Figure 16 Securing the Spring Clips
CL5868
Front
4. From the rear of the cabinet, secure the rail in place using one M5 screw on
each rail.
Install your DAE components into a rack
Install 15-drive DAE 45

Table of Contents

Other manuals for Dell EMC Unity Series

Questions and Answers:

Question and Answer IconNeed help?

Do you have a question about the Dell EMC Unity Series and is the answer not in the manual?

Dell EMC Unity Series Specifications

General IconGeneral
Snapshot SupportYes
Storage TypeHybrid Flash, All-Flash
Drive SupportSAS, SSD
ProtocolsiSCSI, NFS, SMB
Data ServicesSnapshots, Replication, Thin Provisioning, Deduplication, Compression
ManagementUnisphere, REST API, CLI
Data Reduction FeaturesDeduplication, Compression
High AvailabilityRedundant components
Redundancypower supplies, fans
RAID Levels SupportedRAID 5, RAID 6, RAID 10
Replication SupportYes
Cloud TieringYes
Security FeaturesEncryption at rest, secure erase, role-based access control
ModelDell EMC Unity Series

Related product manuals