About this task
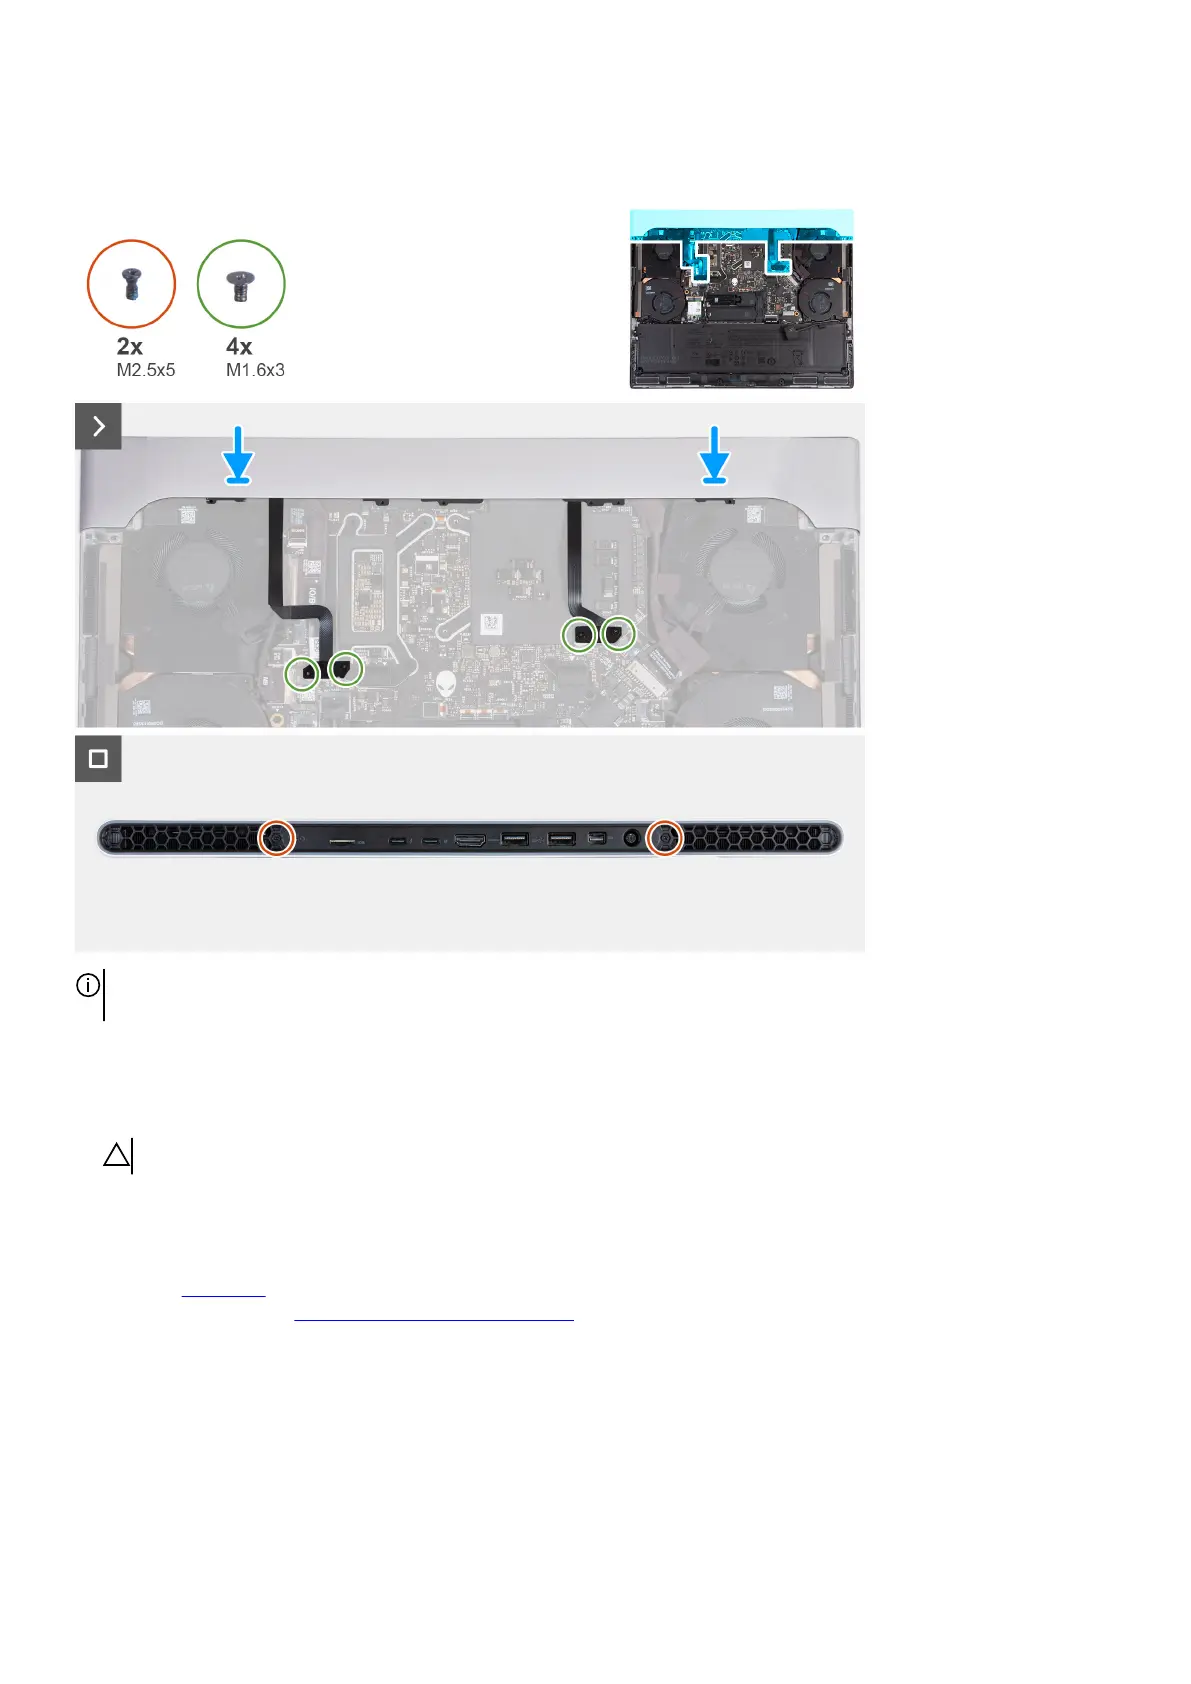
The following image(s) indicate the location of the rear I/O-cover and provides a visual representation of the installation procedure.
NOTE: To avoid damaging your computer, ensure that the Tron-light cable is not pinched when sliding the rear I/O-cover into
palm-rest and keyboard assembly.
Steps
1. With the correct orientation, slide the rear I/O-cover into the palm-rest and keyboard assembly, and snap it into place.
2. Replace the four screws (M1.6x3) that secure the left and right Tron-light cables to the palm-rest and keyboard assembly.
CAUTION: Do not pull at the bend points of the Tron-light cables and check for damage while removing and installing.
3. Replace the two screws (M2.5x5) that secure the rear I/O-cover to the palm-rest and keyboard assembly.
Next steps
1. Install the base cover.
2. Follow the procedure in After working inside your computer.
27
 Loading...