4. Lift the processor fan and heat-sink assembly from the system board.
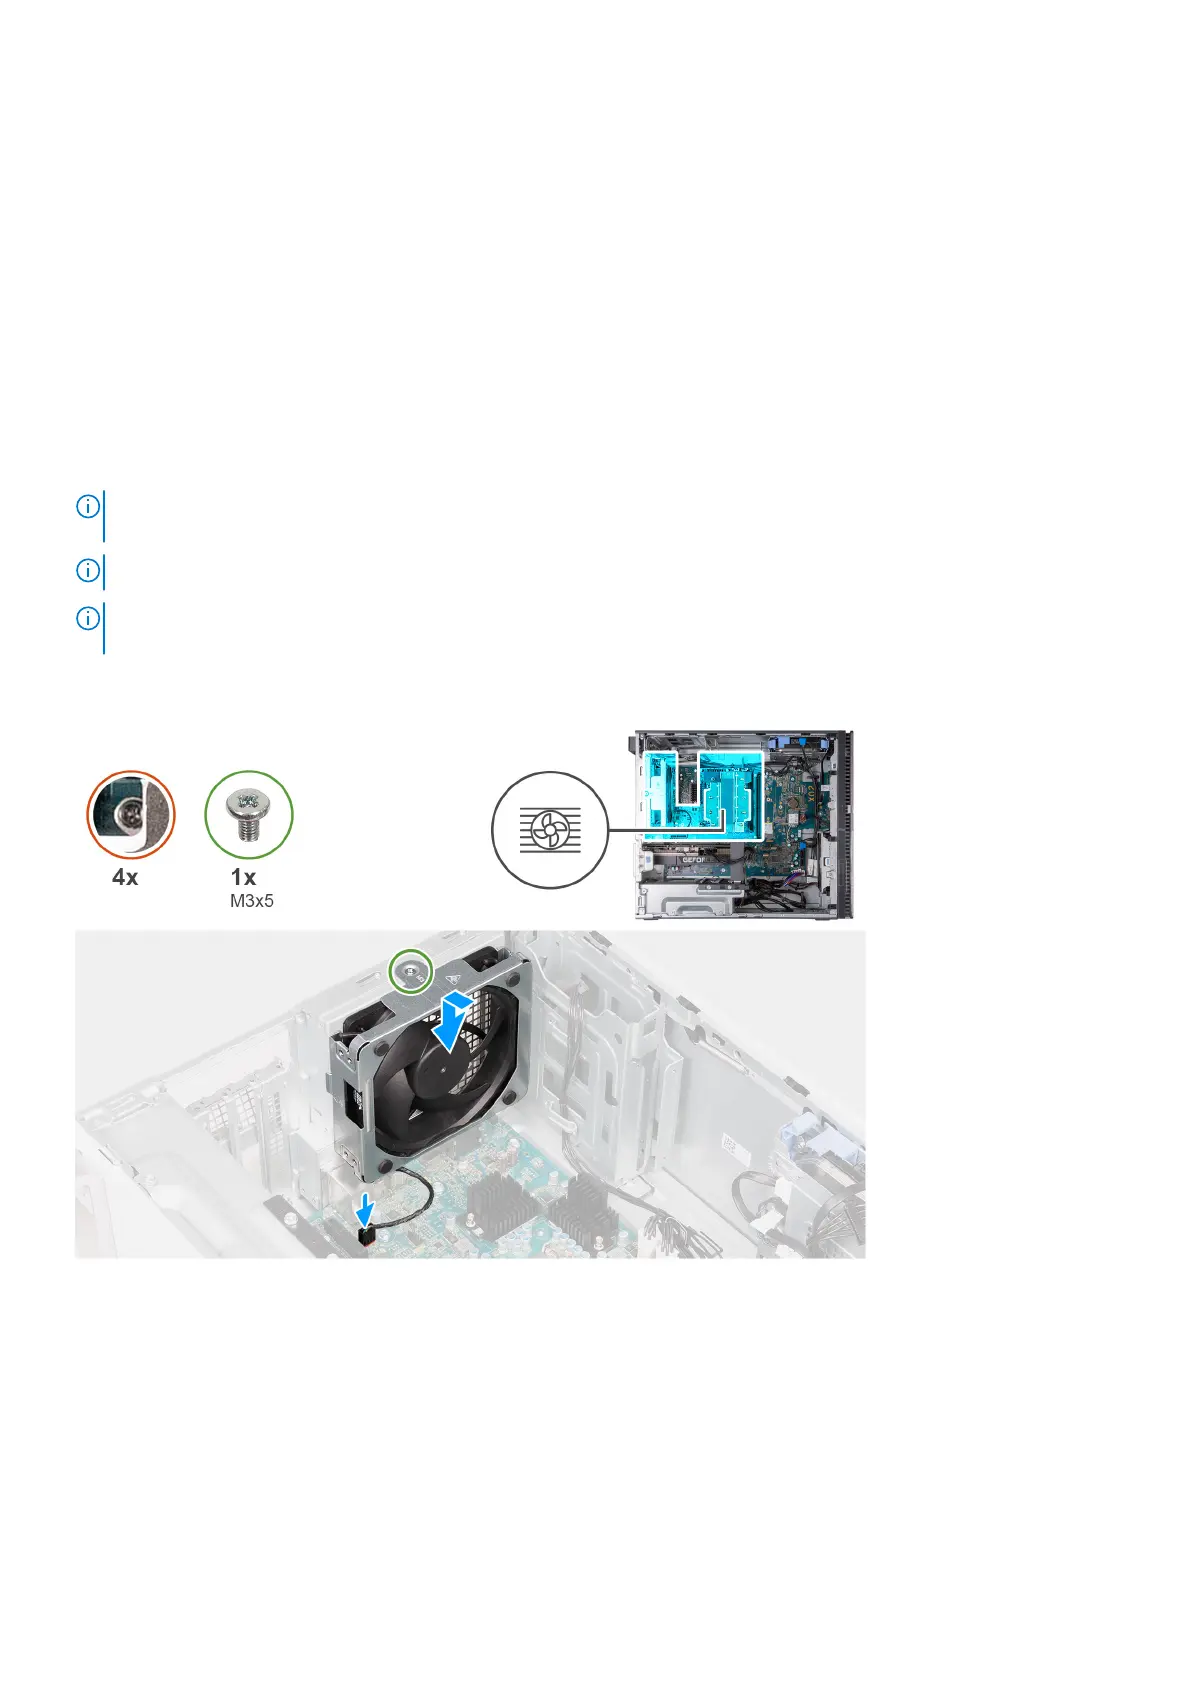
5. Disconnect the back-chassis fan cable from the system board.
6. Remove the screw (M3x5) that secures the back-chassis fan to the chassis.
7. Slide and lift the back-chassis fan off the chassis.
Installing the processor fan and heat-sink assembly (125 W, air
cooling)
Prerequisites
If you are replacing a component, remove the existing component before performing the installation process.
About this task
NOTE: If either the processor or the fan and heat-sink assembly is replaced, use the thermal grease provided in the kit to
ensure that thermal conductivity is achieved.
NOTE: This procedure only applies for computers shipped with a 125 W processor.
NOTE: This procedure also includes the specific back-chassis fan that is installed on your computer with the use of the
processor fan and heat-sink assembly (125 W, air cooling)
The following image(s) indicate the location of the processor fan and heat-sink assembly (125 W, air cooling) and provides a
visual representation of the installation procedure.
48
Removing and installing components