80 Removing and Installing Parts
5
Connect the power and data cables to the drive.
6
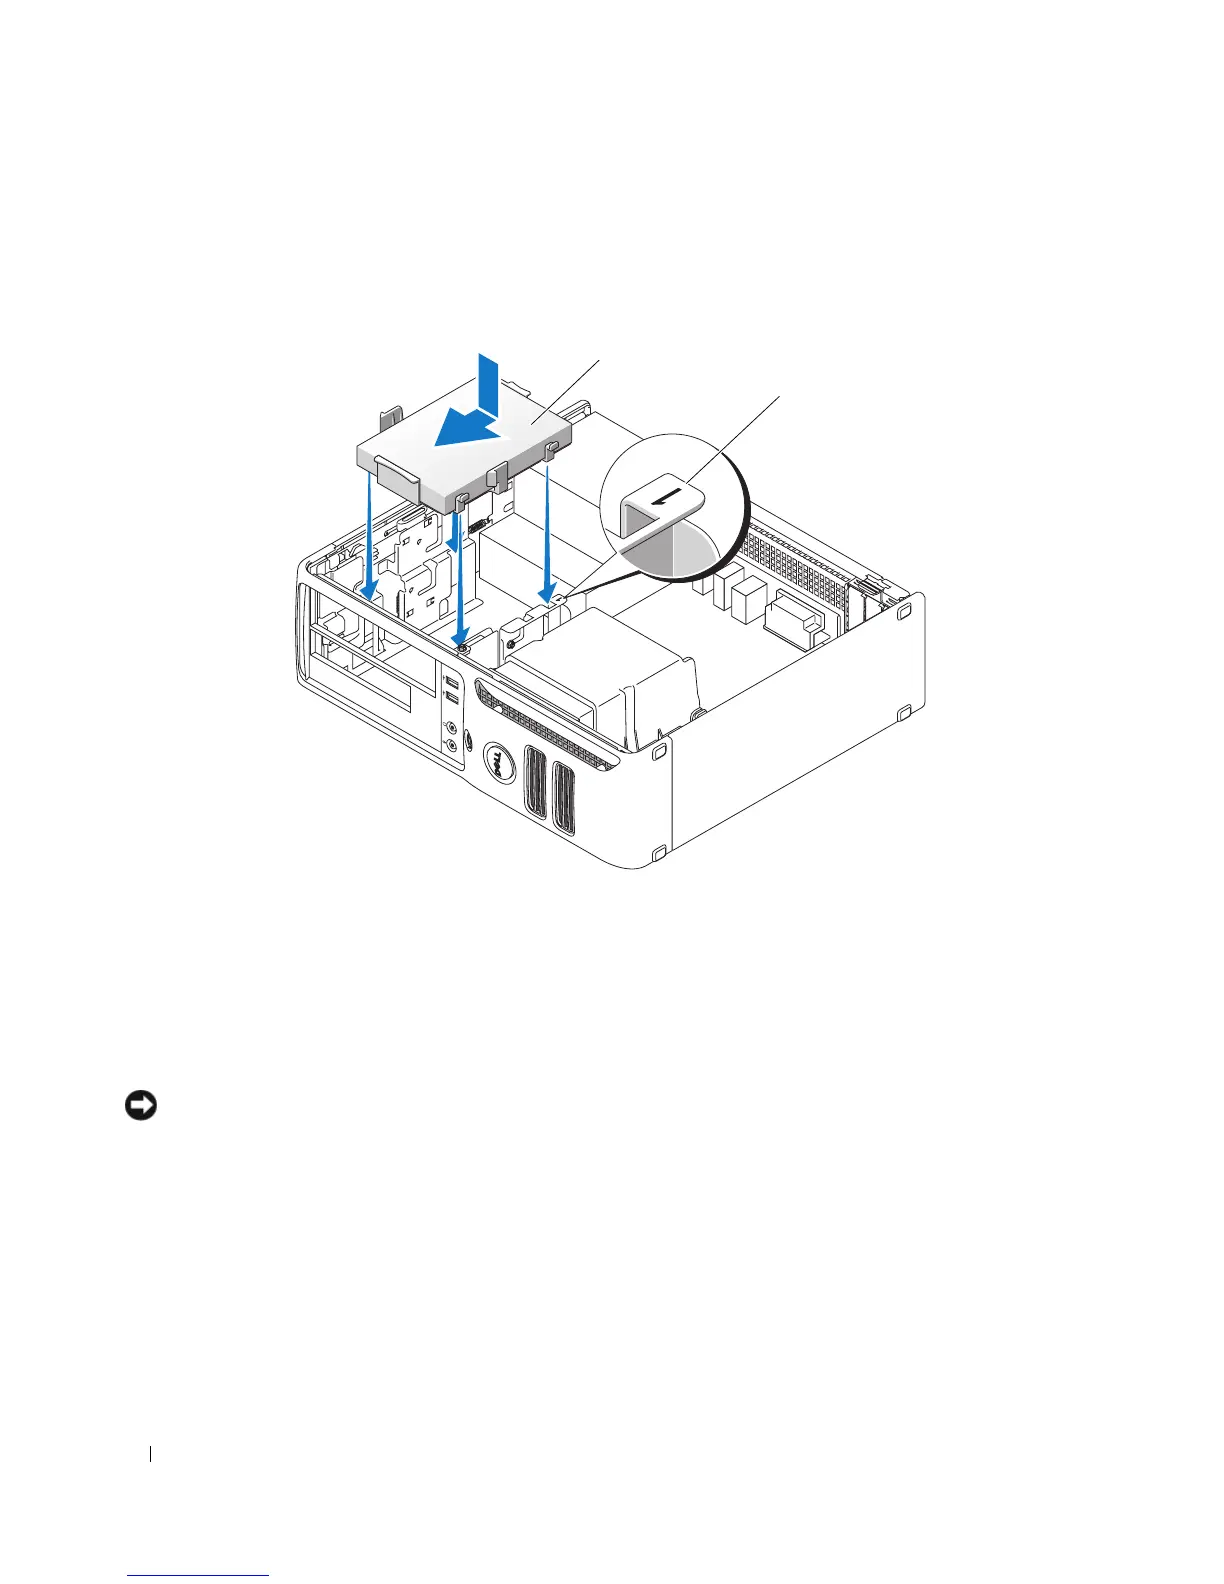
Locate the correct guidance-slot for the drive (slot 1) and align the release tabs with the alignment
guides.
7
Slide the drive into the bay until it clicks into place.
8
Replace any drives or readers that you removed.
9
Check all connectors to ensure that they are properly cabled and firmly seated.
10
Replace the computer cover (see "Replacing the Computer Cover" on page 90).
NOTICE: To connect a network cable, first plug the cable into the network port or device, and then plug it into the
computer.
11
Connect your computer and devices to electrical outlets, and then turn them on.
12
If the drive that you installed is the primary drive, insert bootable media into your boot drive.
13
Enter system setup (see "Entering System Setup" on page 97) and update the appropriate
Primary
Drive
option (
0
or
2
).
14
Exit system setup, and reboot the computer.
15
Partition and logically format your drive before you proceed to the next step.
For instructions, see the documentation that came with your operating system.
1 hard drive 2 slot verification number
1
2