88 Removing and Installing Parts
3
If you are installing a new drive:
a
Press the two snaps on the top of the drive-panel insert and rotate the insert toward the front of
the computer. Remove it from the computer.
b
Remove the three shoulder screws from the drive-panel insert.
4
If you are replacing an existing drive:
a
Remove the existing drive.
b
Remove the three shoulder screws from the existing drive.
5
Insert the three shoulder screws into the sides of the new drive and tighten them.
6
Connect the power and data cables to the drive.
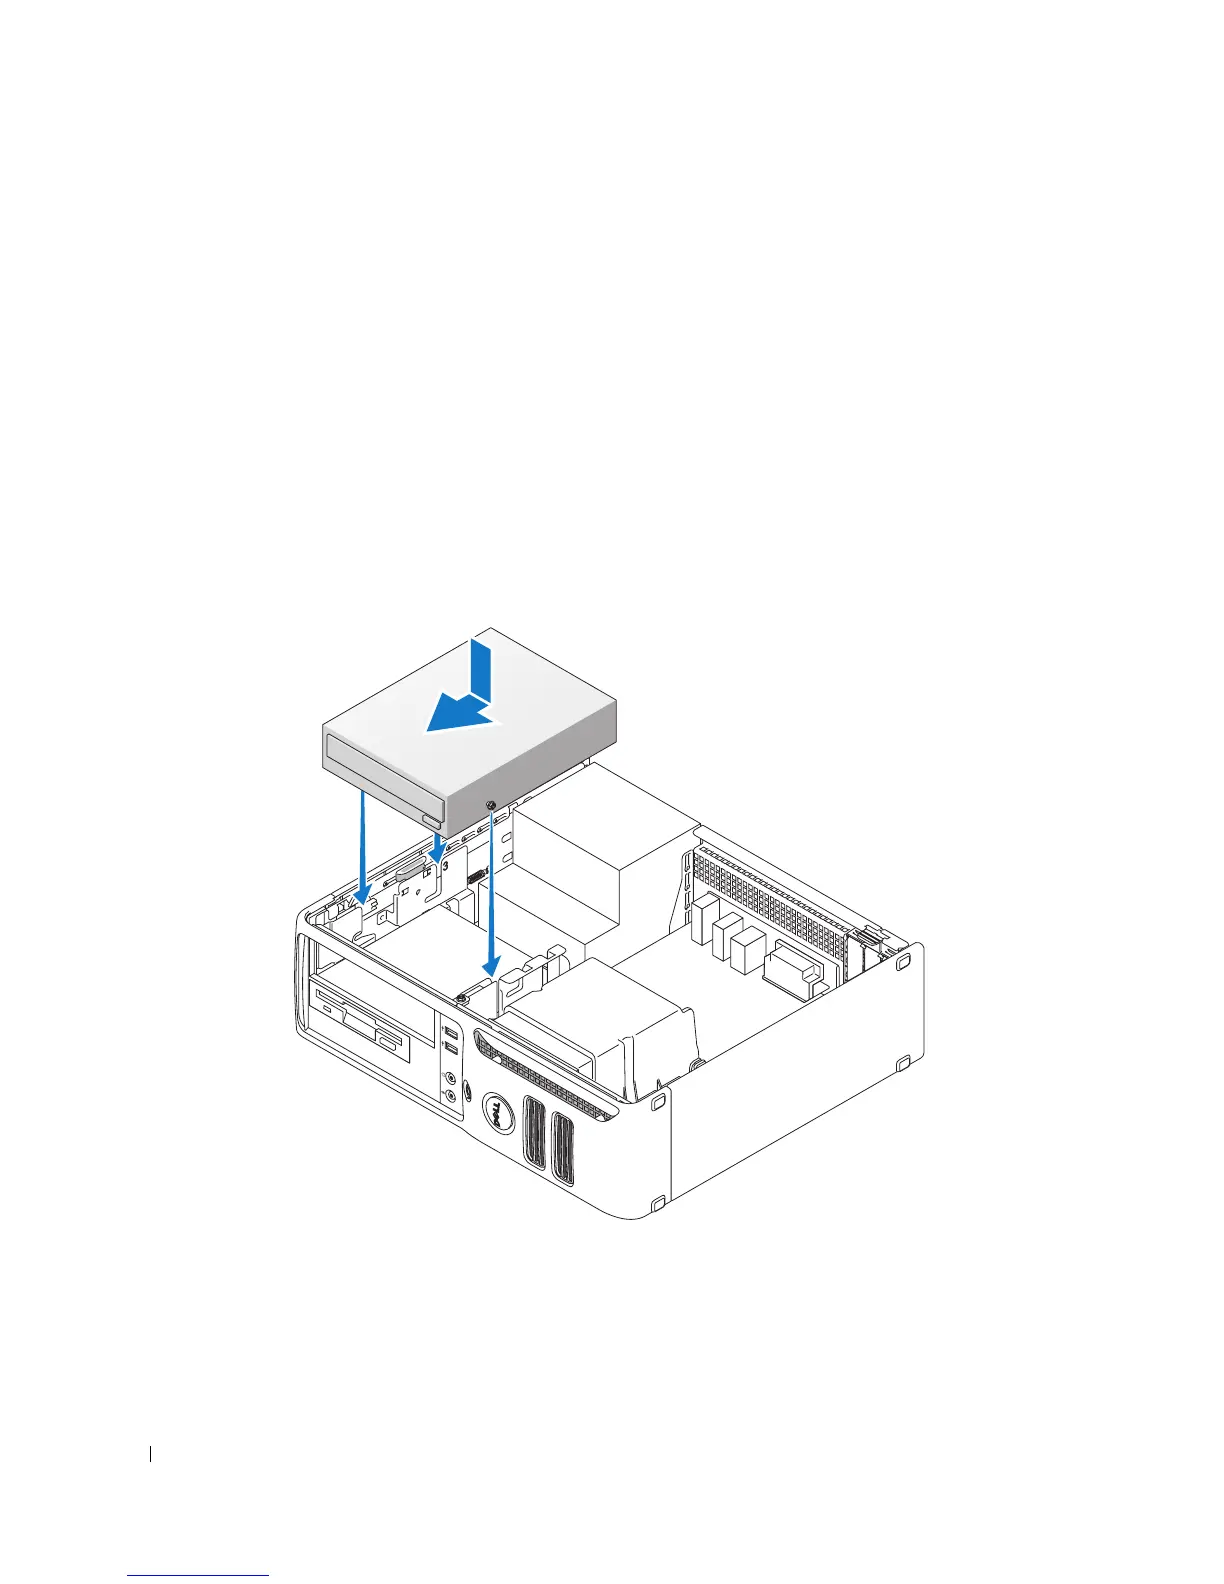
7
Align the shoulder screws with the screw guides, and slide the drive into the bay until it clicks into
place.
8
Check all cable connections and fold cables out of the way to avoid blocking airflow between the fan
and cooling vents.