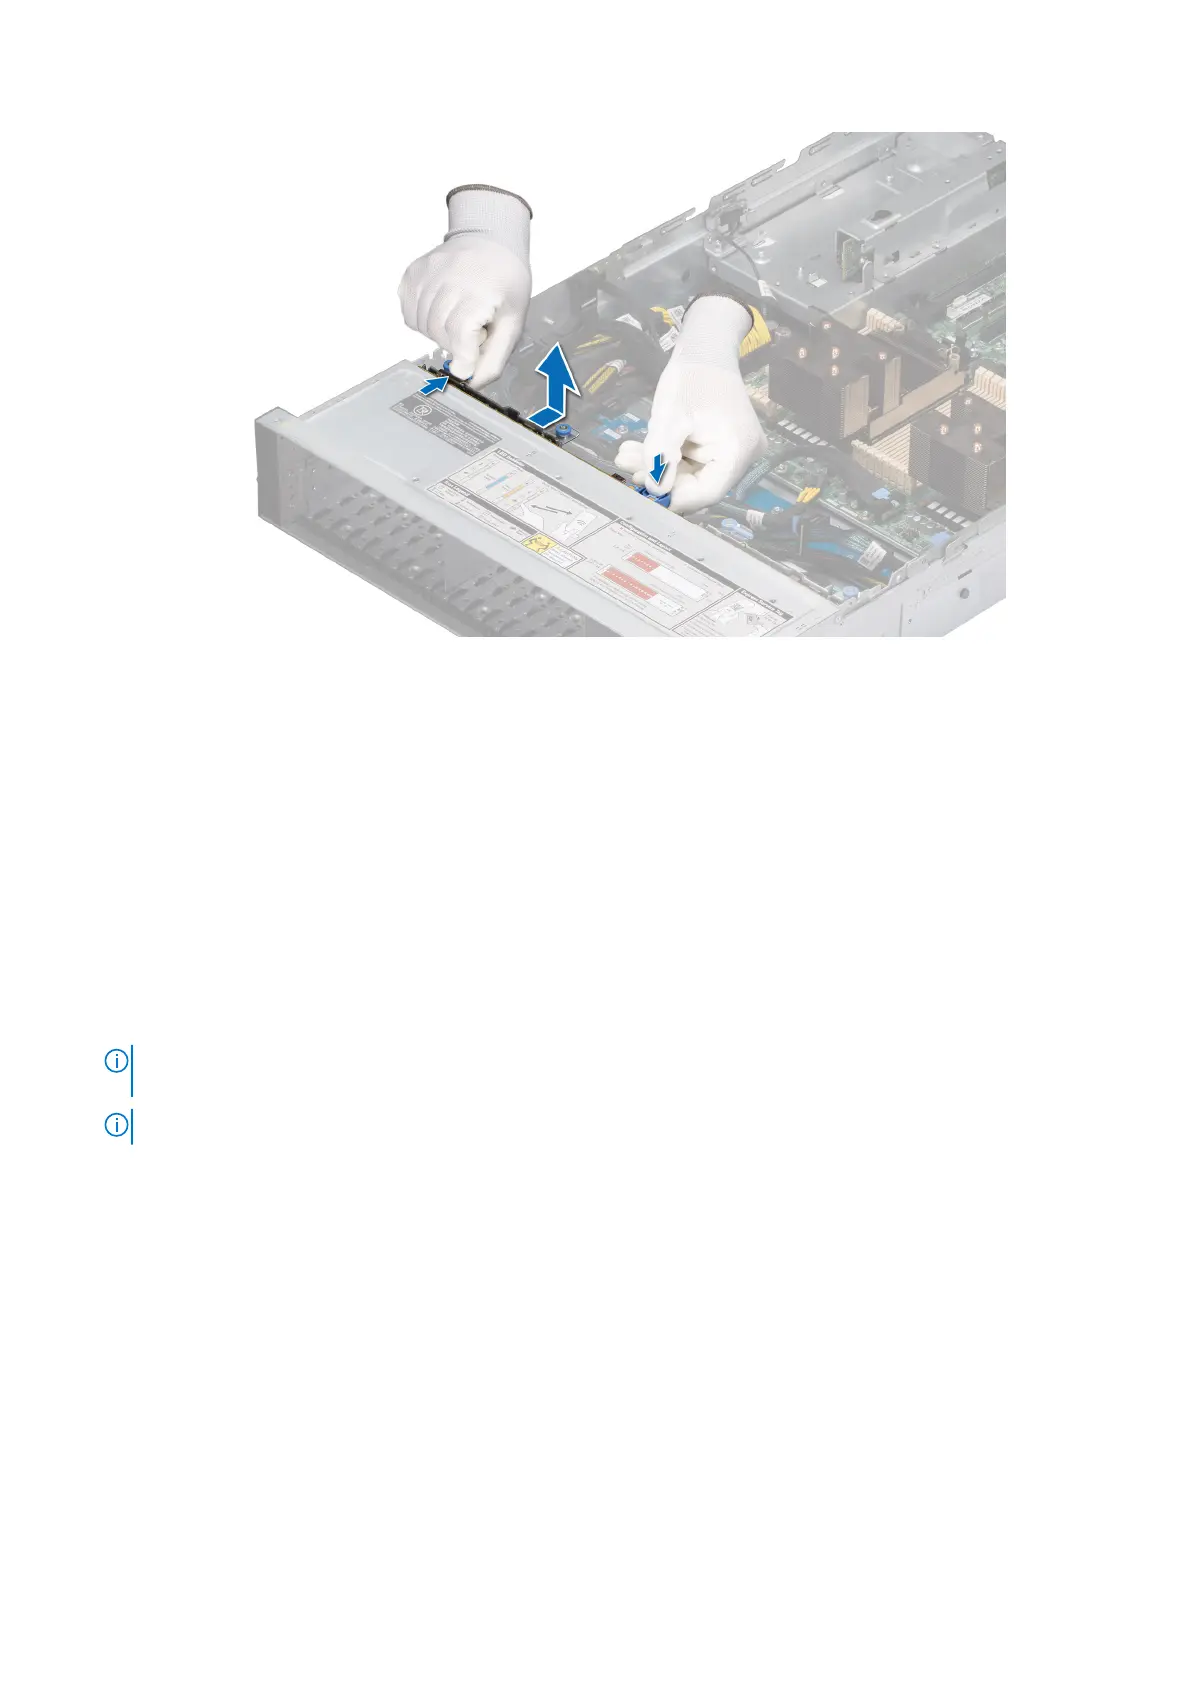
Figure 49. Removing the drive backplane
Next steps
Replace the drive backplane.
Installing the drive backplane
Prerequisites
1. Follow the safety guidelines listed in the Safety instructions.
2. Follow the procedure listed in the Before working inside your system.
3. Remove the air shroud.
4. Remove the drive backplane cover.
5. Remove all the drives.
NOTE:
To avoid damaging the backplane, ensure to move the control panel cables from the cable routing clips before
removing the backplane.
NOTE: Route the cable properly when you replace it to prevent the cable from being pinched or crimped.
Steps
1. Use the hooks on the system as guides to align the slots on the backplane with the guides on the system.
2. Slide the drive backplane into the guides and lower the backplane until the blue release tabs click into place.
Installing and removing system components
57