4. Verify the drive operation.
Removing a tape drive
v Ensure that all host activity, including library operations are stopped to the drive being removed.
v Ensure that the tape cartridge is removed from the tape drive. Use the Management GUI to move the
cartridge to a storage slot or I/O station.
v Remove the FC or SAS cables from the tape drive.
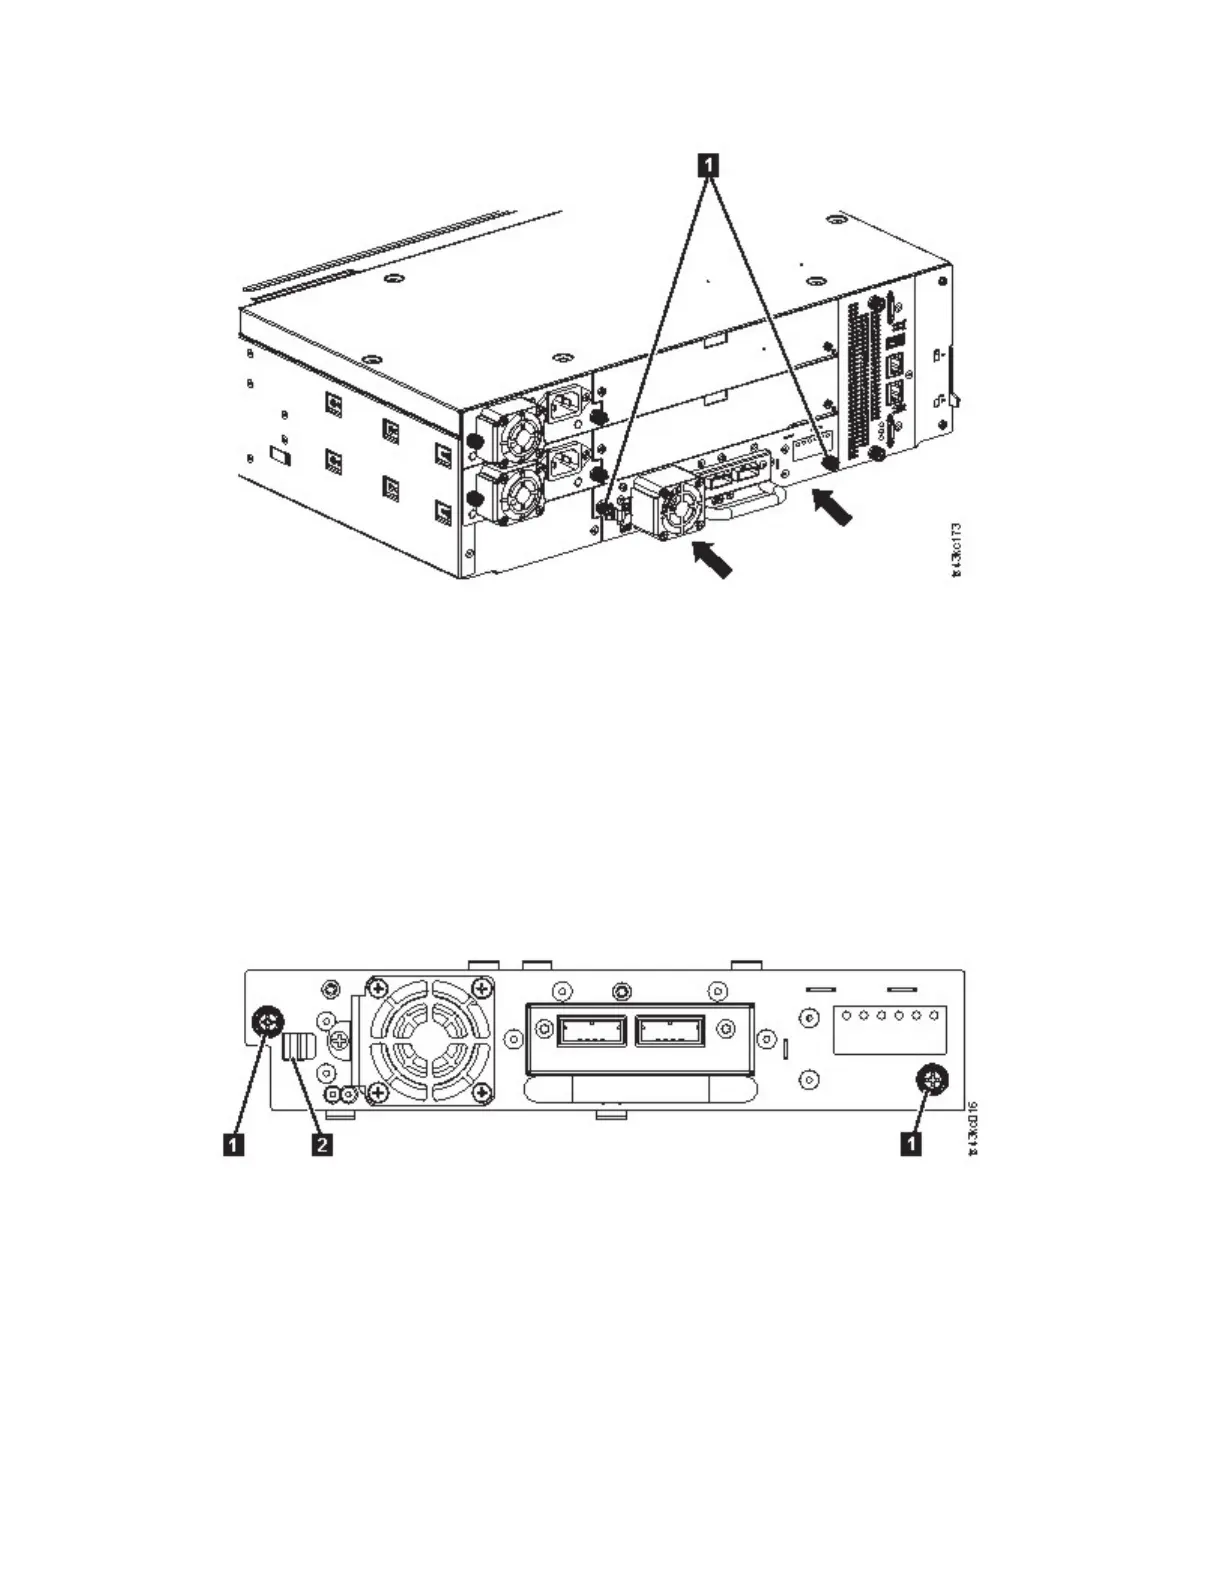
v Loosen the blue captive thumbscrews (▌1▐ in Figure 62) on the tape drive. Press the lock lever (▌2▐
Figure 62) to the right and pull straight back on the tape drive handle while the bottom of the drive is
supported to remove it from the unit.
Attention: Support the bottom of the tape drive when it is removed to avoid damaging any of the
internal connections.
v Reset the list of known drives and modules. See “Locating Management functions” on page 63.
v Confirm that the drive is logically removed by checking the Operator Panel or Management GUI.
v If there is no replacement drive, install the drive bay cover.
v If you are replacing the drive, see “Adding a tape drive” on page 106.
Figure 61. Installing a tape drive
Figure 62. Unlocking the drive
108 Dell EMC ML3 Tape Library: User's Guide