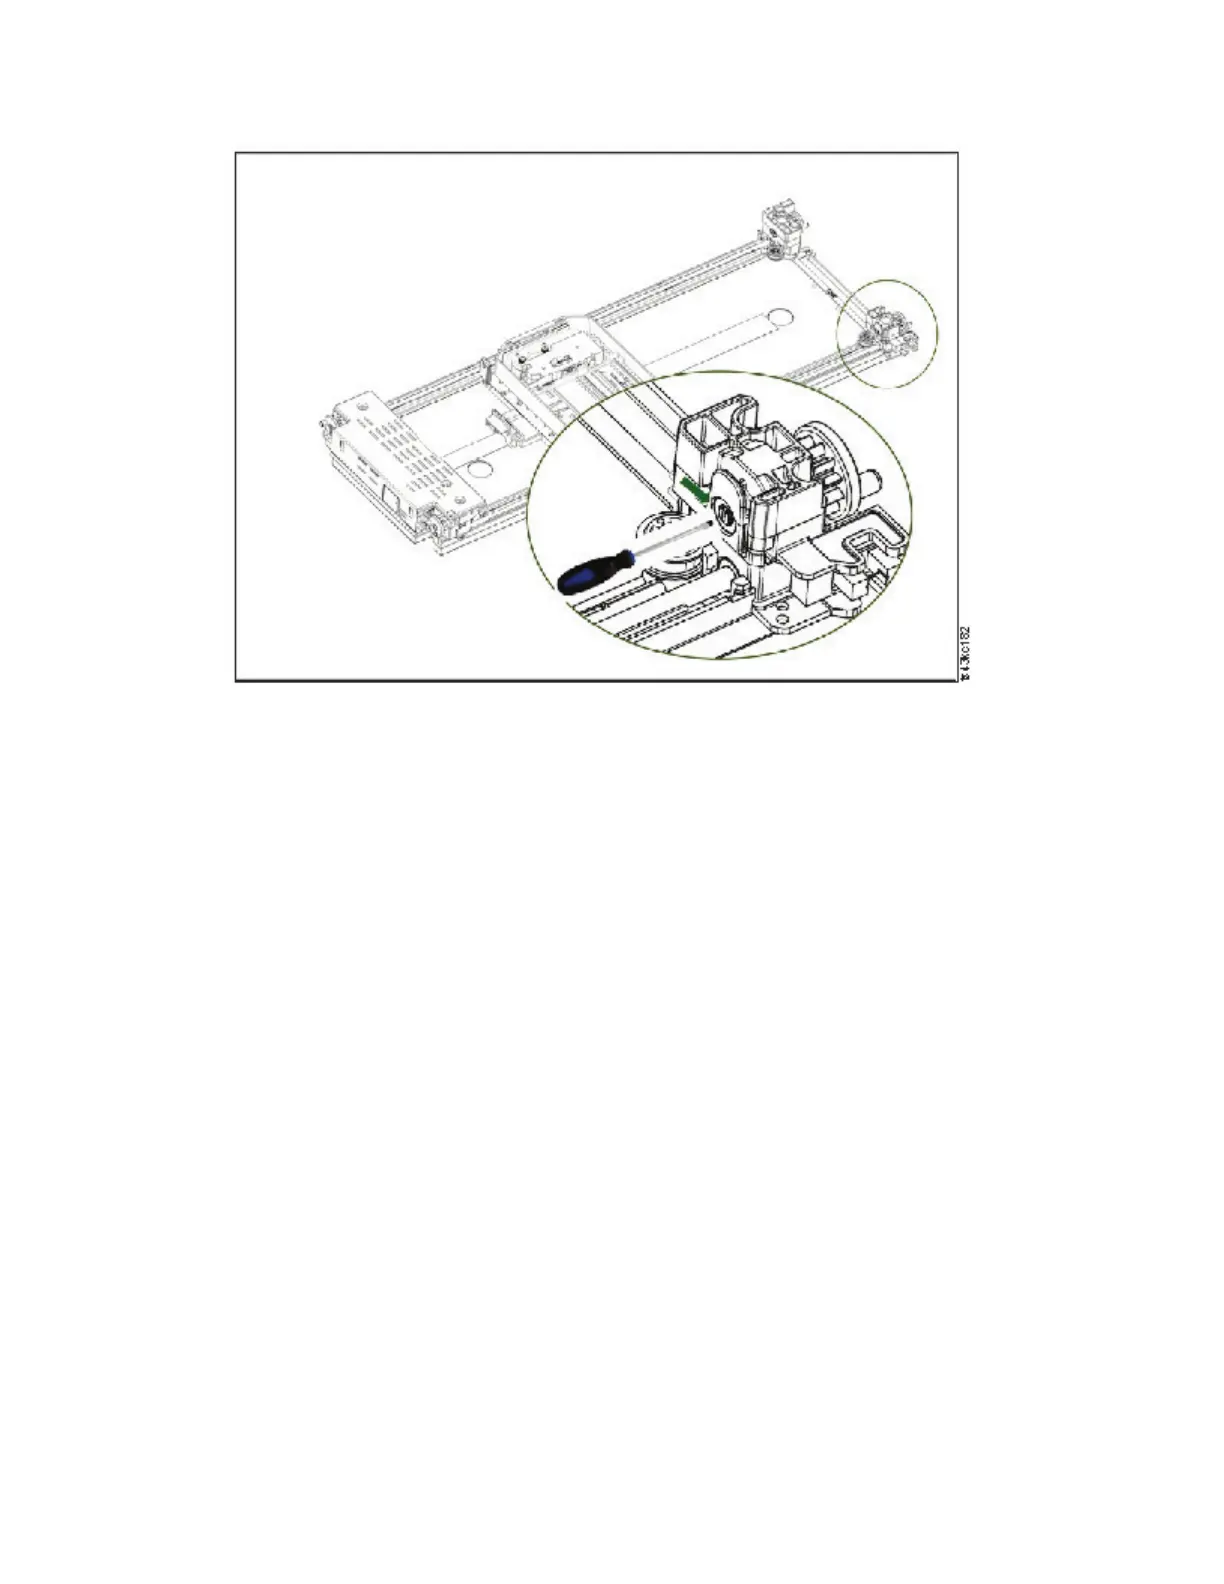
3. Turn the screwdriver to manually operate the accessor gear train and move the accessor into the Base
Module.
4. Lock the accessor. Standing at the front of the module, move the blue lever to the left, then away from
you, then to the right.
5. Reinstall the bezels that were previously removed.
6. Remove the accessor and spooling mechanism. See “Preparing to remove the accessor and spooling
mechanism from the Base Module” on page 120.
7. Install the new accessor and spooling mechanism. See “Installing the accessor into the Base Module”
on page 124.
8. Slide the Base Module back into the rack. See “After the accessor and spooling mechanism
installation” on page 126.
If the accessor is stopped in an Expansion Module that is not near the Base
Module or it cannot move vertically.
1. Remove the left magazine of the Base Module. See “Removing or replacing a magazine” on page
133. The library must already be powered off. Therefore, you must unlock the magazine by using the
manual release.
2. Disconnect the power supply cables from all of the modules.
3. Using plastic-handled scissors, reach through the left magazine opening of the Base Module and
carefully cut the spooling cable.
4. Extend the expansion module that contains the accessor while carefully guiding the free spooling
cable. See “Preparing to remove the accessor and spooling mechanism from the Base Module” on
page 120. While minor differences might occur, these instructions for a Base Module also apply to an
Expansion Module.
Figure 78. Inserting the screwdriver to manually operate the accessor
Figure 79. Left magazine opening
128 Dell EMC ML3 Tape Library: User's Guide