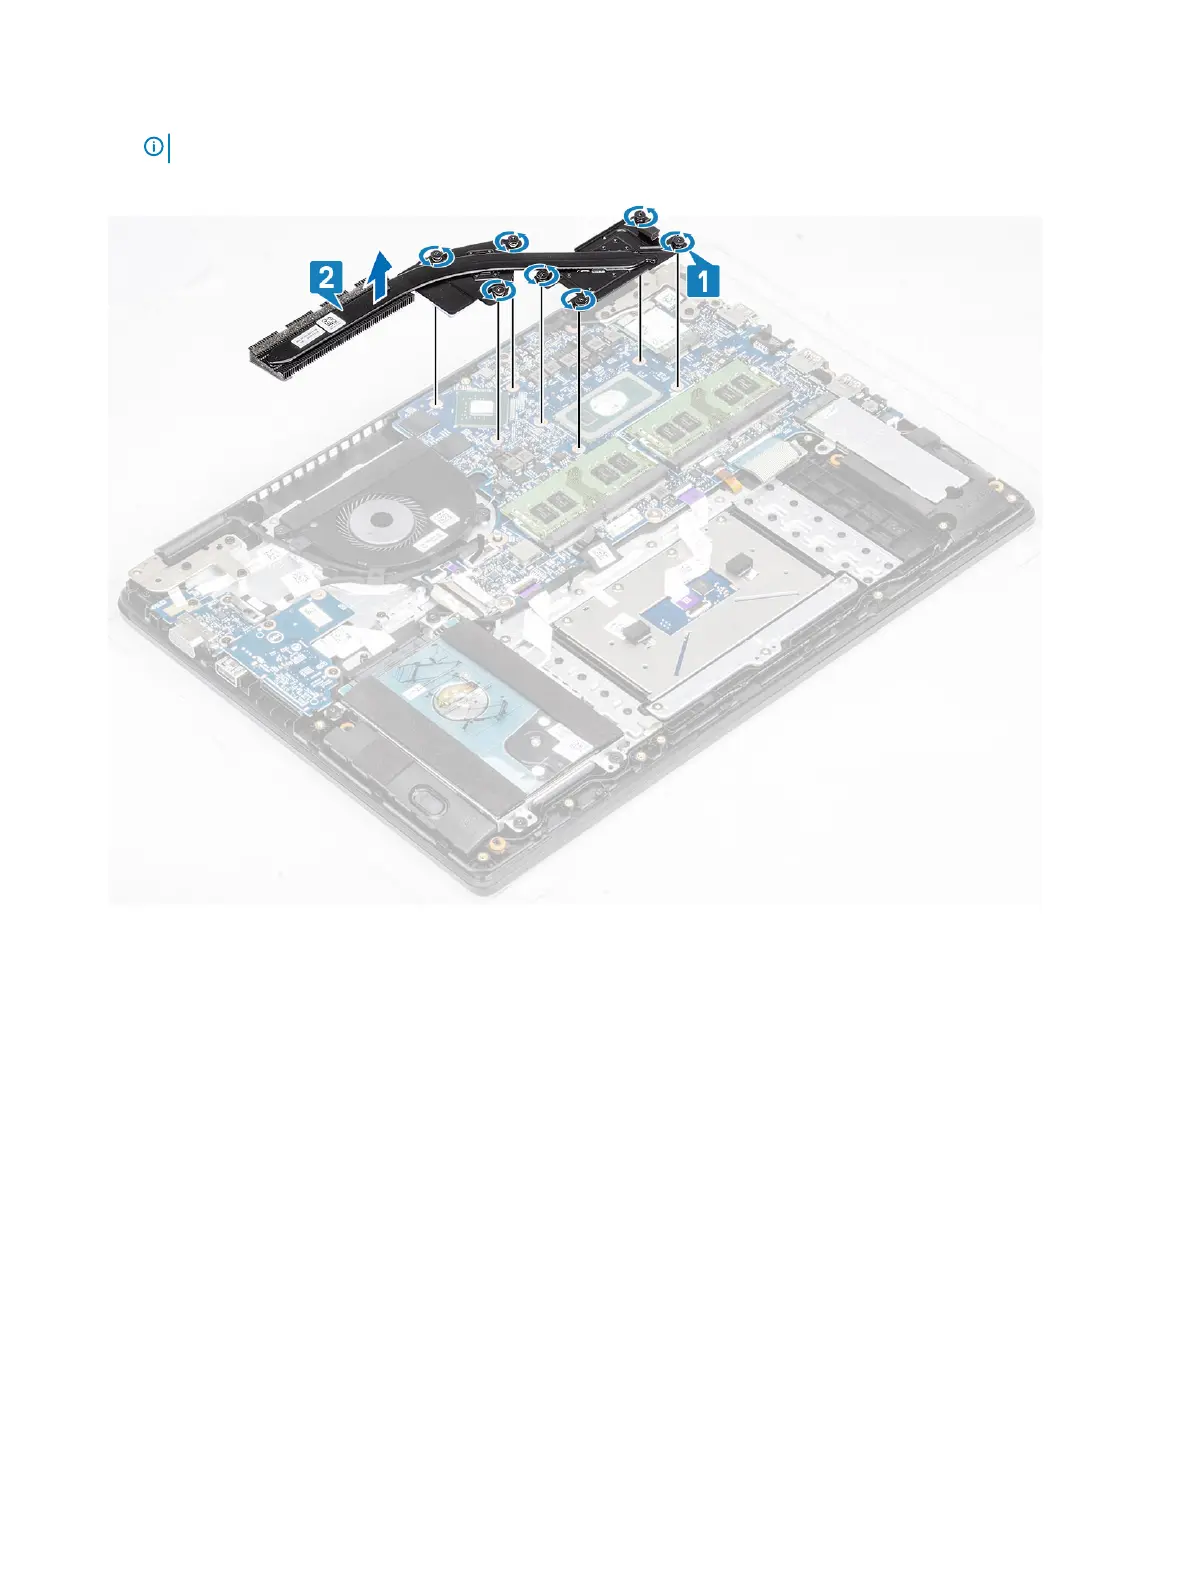
Steps
1 Loosen the seven captive screws that secure the heatsink to the system board [1].
NOTE: Loosen the screws in the order of the callout numbers [1, 2, 3, 4,5,6,7] as indicated on the heatsink.
2 Lift the heatsink o the system board [2].
Installing the heatsink—discrete
Steps
1 Place the heatsink on the system board and align the screw holes on the heatsink with the screw holes on the system board [1].
2 In sequential order (as indicated on the heatsink), tighten the seven captive screws that secure the heatsink to the system board [2].
62
Removing and installing components