8. Remove the speakers.
9. Remove the fan.
10. Remove the heat sink.
11. Remove the I/O board.
12. Remove the hard drive assembly.
13. Remove the touchpad.
14. Remove the display assembly.
15. Remove the power-adapter port.
16. Remove the power button or power button with optional FPR.
17. Remove the system board.
NOTE: The system board can be removed along with the heat sink.
About this task
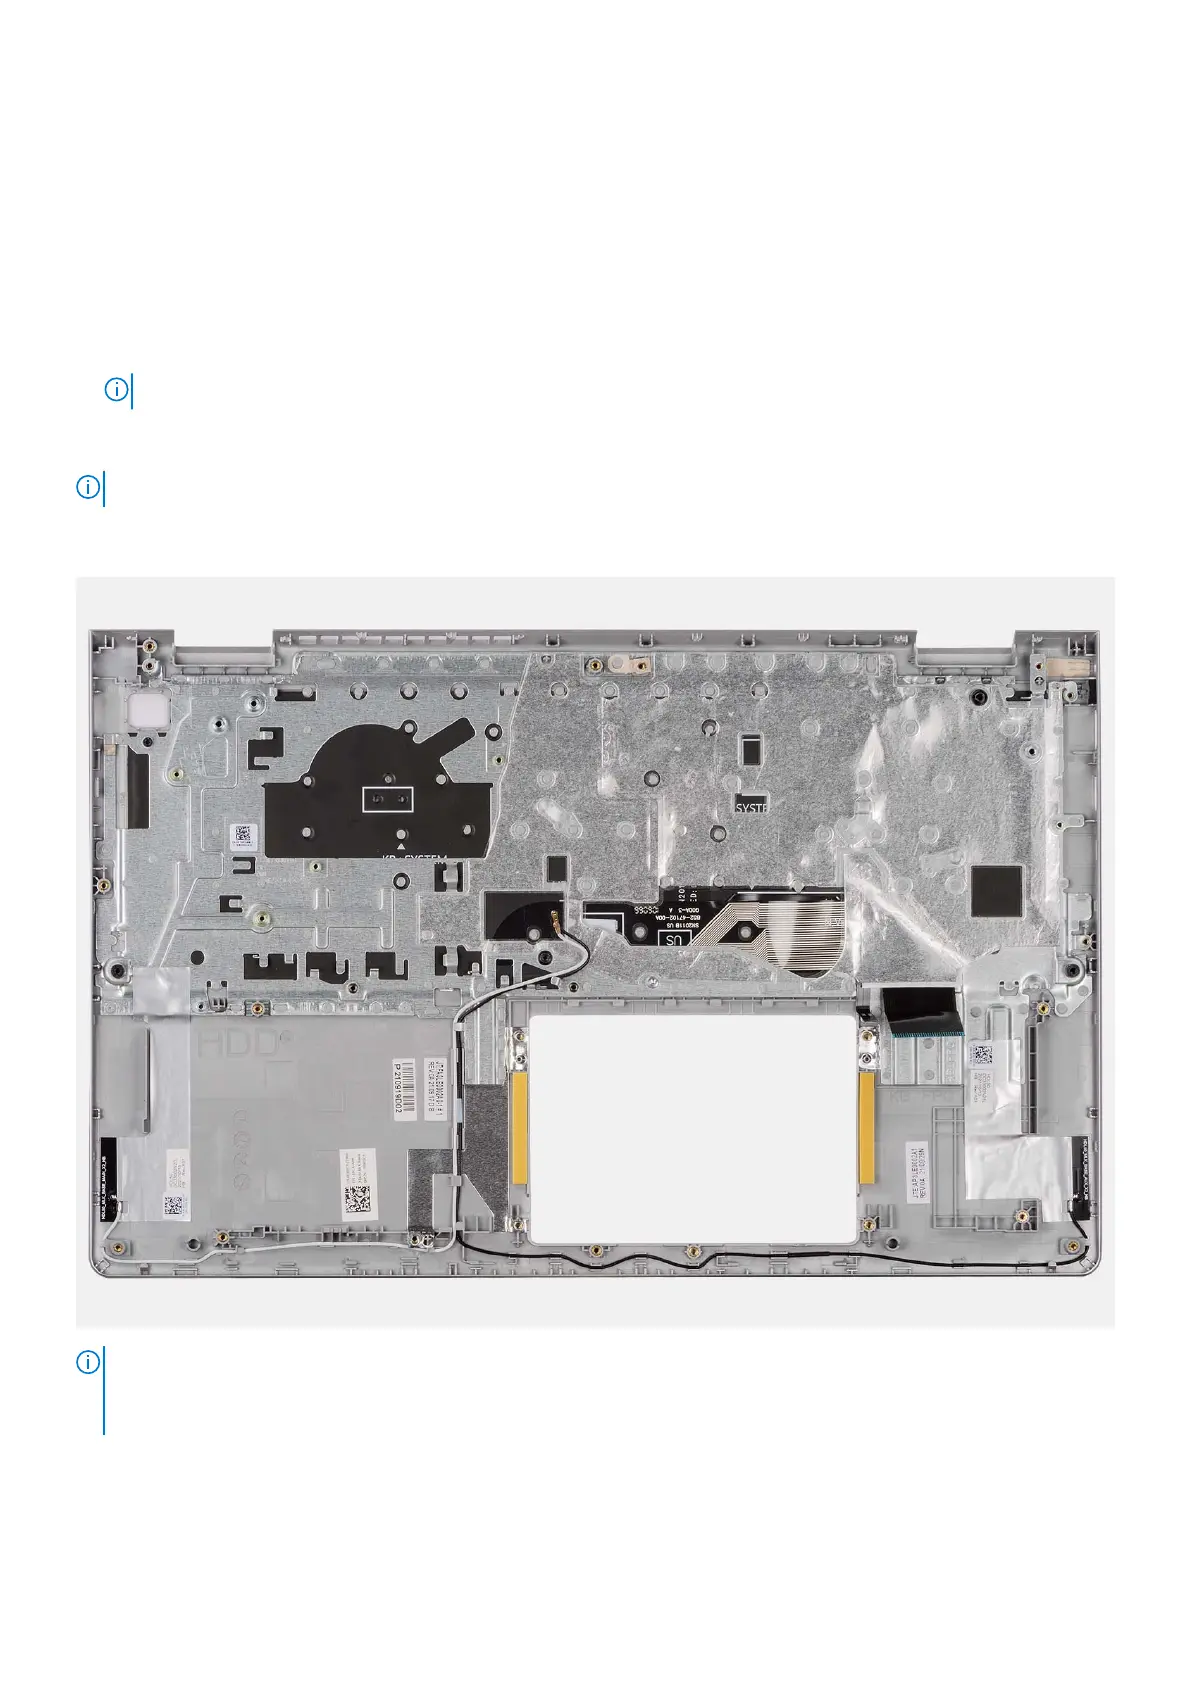
NOTE: The following image shows the palm-rest for aluminum chassis which has WLAN antennas attached to it.
The following image indicates the location of the palm-rest and keyboard assembly and provides a visual representation of the
removal procedure.
NOTE:
For systems with an aluminum chassis, both the left and right RF metal brackets MUST be transferred to the replacement
palm-rest.
102 Removing and installing components
 Loading...