EasyManuals Logo

Dell PowerVault NX3100 User Manual

Dell PowerVault NX3100
164 pages
To Next Page IconTo Next Page
To Previous Page IconTo Previous Page
Page #126 background imageLoading...
Page #126 background image
126 Installing System Components
11
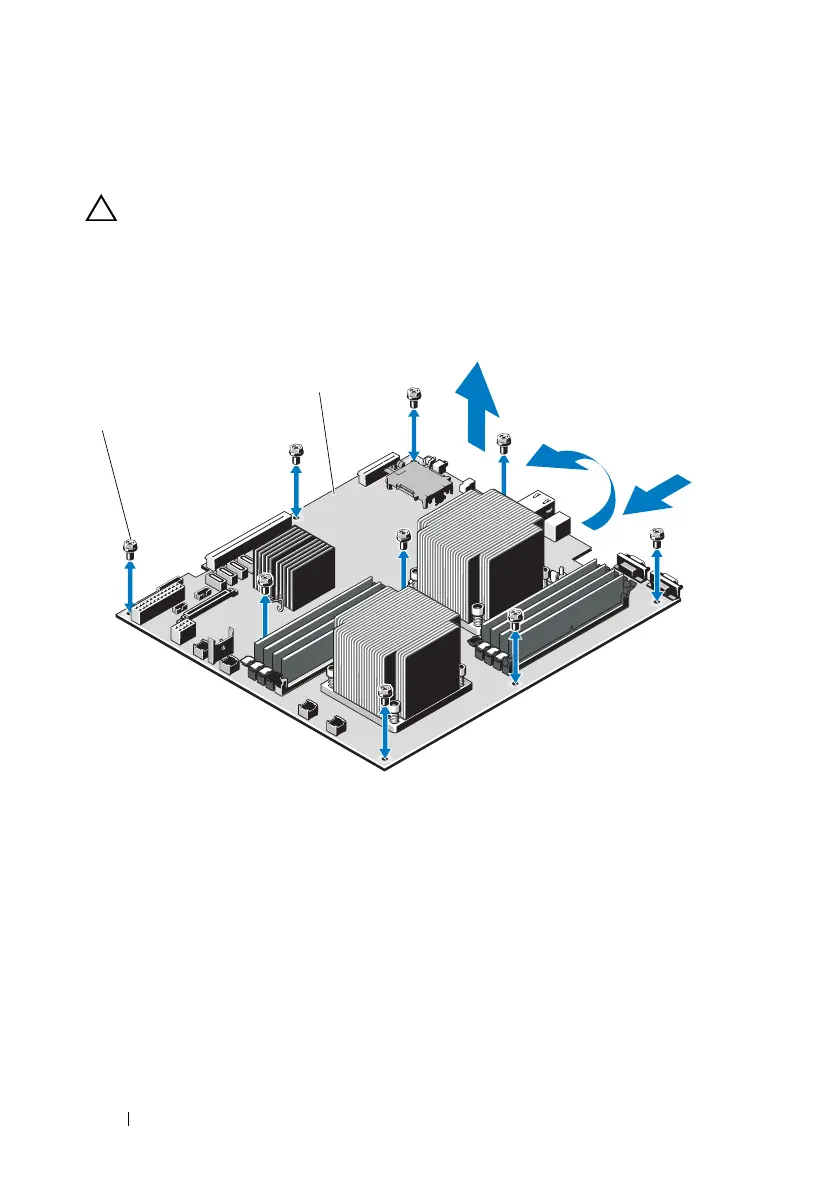
Remove the nine screws securing the system board to the chassis and then
slide the system board assembly toward the front end of the chassis.
CAUTION: Do not lift the system board assembly by grasping a memory module,
processor, or other components.
12
Grasp the system board assembly by the edges and lift the system board
assembly away from the chassis. See Figure 3-26.
Figure 3-26. Removing and Installing the System Board
1 screws (9) 2 system board assembly
1
2
book.book Page 126 Wednesday, March 3, 2010 10:37 AM

Table of Contents

Other manuals for Dell PowerVault NX3100

Questions and Answers:

Question and Answer IconNeed help?

Do you have a question about the Dell PowerVault NX3100 and is the answer not in the manual?

Dell PowerVault NX3100 Specifications

General IconGeneral
BrandDell
ModelPowerVault NX3100
CategoryServer
LanguageEnglish

Related product manuals