Placa del botón de encendido
Removing the power button board
1. Follow the procedure in Before working inside your computer.
2. Remove the:
a. battery
b. optical drive
c. keyboard
d. base cover
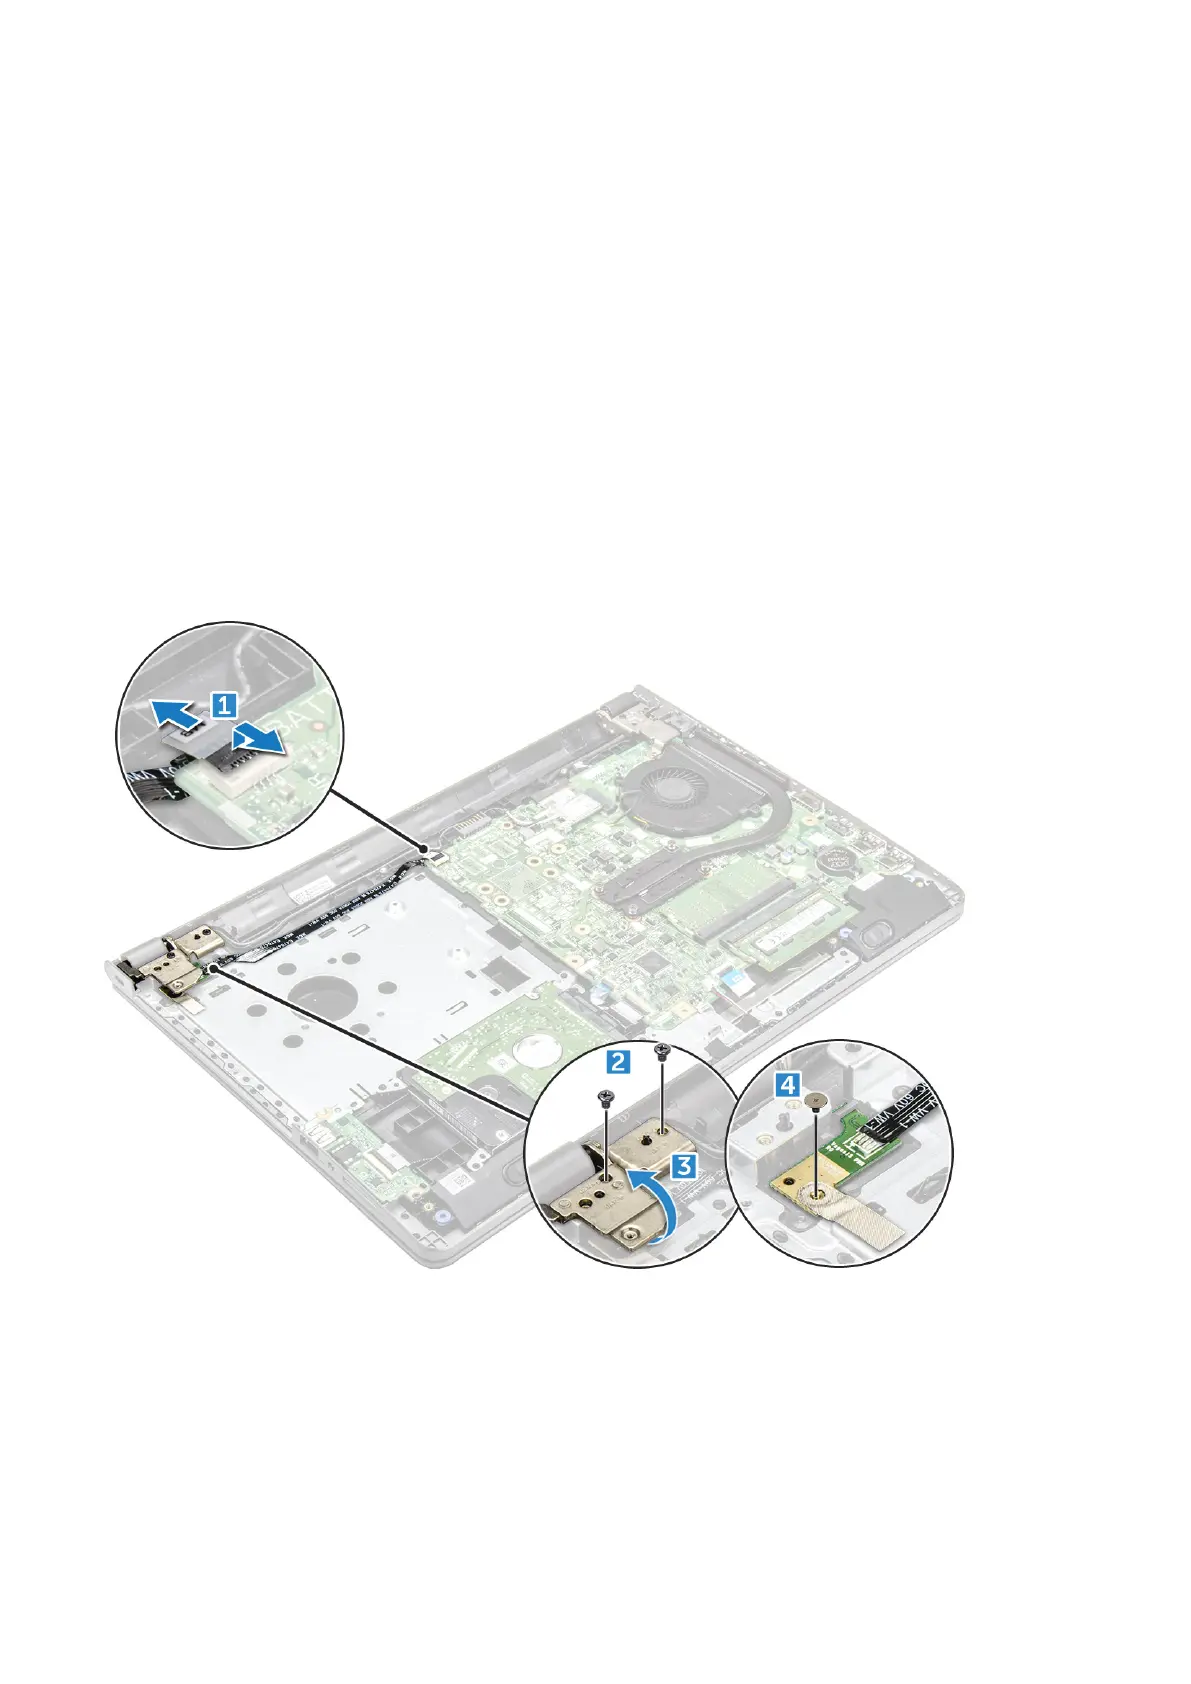
3. To remove the power button board:
a. Disconnect the system board cable from the computer [1].
b. Remove the two display hinge screws (M2.5L8) from the computer [2].
c. Flip the display hinge to reveal the power button board beneath the hinge [3].
d. Remove the single screw [M2L2(Big head07)] that secures the power button board to the chassis [4].
e. Peel the system board cable from the chassis and then peel the tape that holds the power button board.
f. Slide the Power button board away from the chassis.
Installing the power button board
1. Place the button board on the chassis.
2. Affix the tape that holds the power button board.
3. Affix the system board cable to the chassis.
4. Place the power button board and tighten the single [M2L2(Big head07)] screw.
5. Connect the system board cable to the power button board.
Disassembly and reassembly
27