6. Tighten the two (M2.5L8) screws to secure the display hinge to the power button board.
7. Install the:
a. base cover
b. keyboard
c. optical drive
d. battery
8. Follow the procedures in After working inside your computer.
Heat sink
Removing the heat sink
1. Follow the procedure in Before working inside your computer.
2. Remove the:
a. battery
b. optical drive
c. keyboard
d. base cover
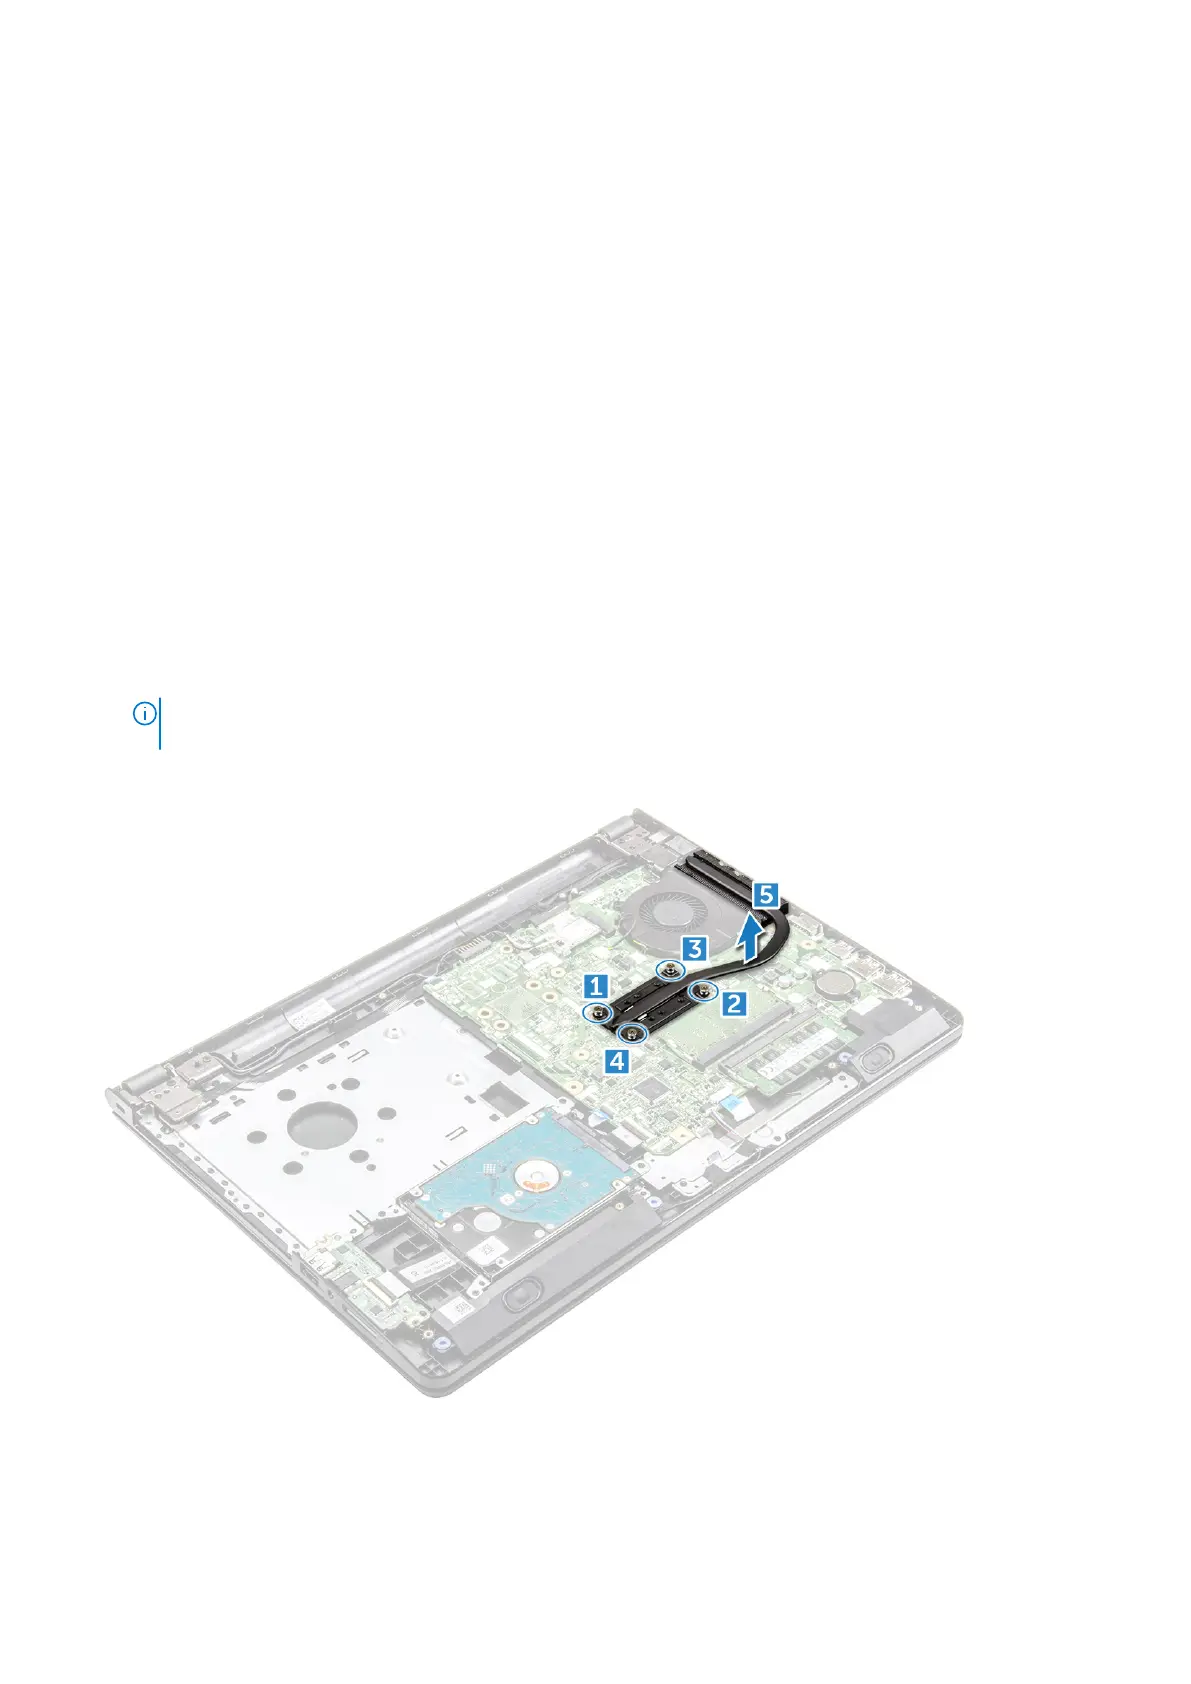
3. To remove the heat sink:
a. Loosen the four captive screws that secure the heat sink to the system board [1, 2, 3, 4].
NOTE:
Loosen the screws in the order of the callout numbers [1, 2, 3, 4]. These screws are retention screws and
cannot be fully removed.
b. Remove the heat sink from the system board [5 ].
Installing the heat sink
1. Align the screws on the heat sink with the screw holders on the system board.
28
Disassembly and reassembly