EasyManua.ls Logo

Delta 22-790X - OPERATING CONTROLS AND ADJUSTMENTS; How to Start and Stop the Machine; How to Lock the Switch in the OFF Position; How to Adjust for Depth of Cut

Delta 22-790X
72 pages
Print Icon
To Next Page IconTo Next Page
To Previous Page IconTo Previous Page
Loading...
14
OPERATING CONTROLS AND ADJUSTMENTS
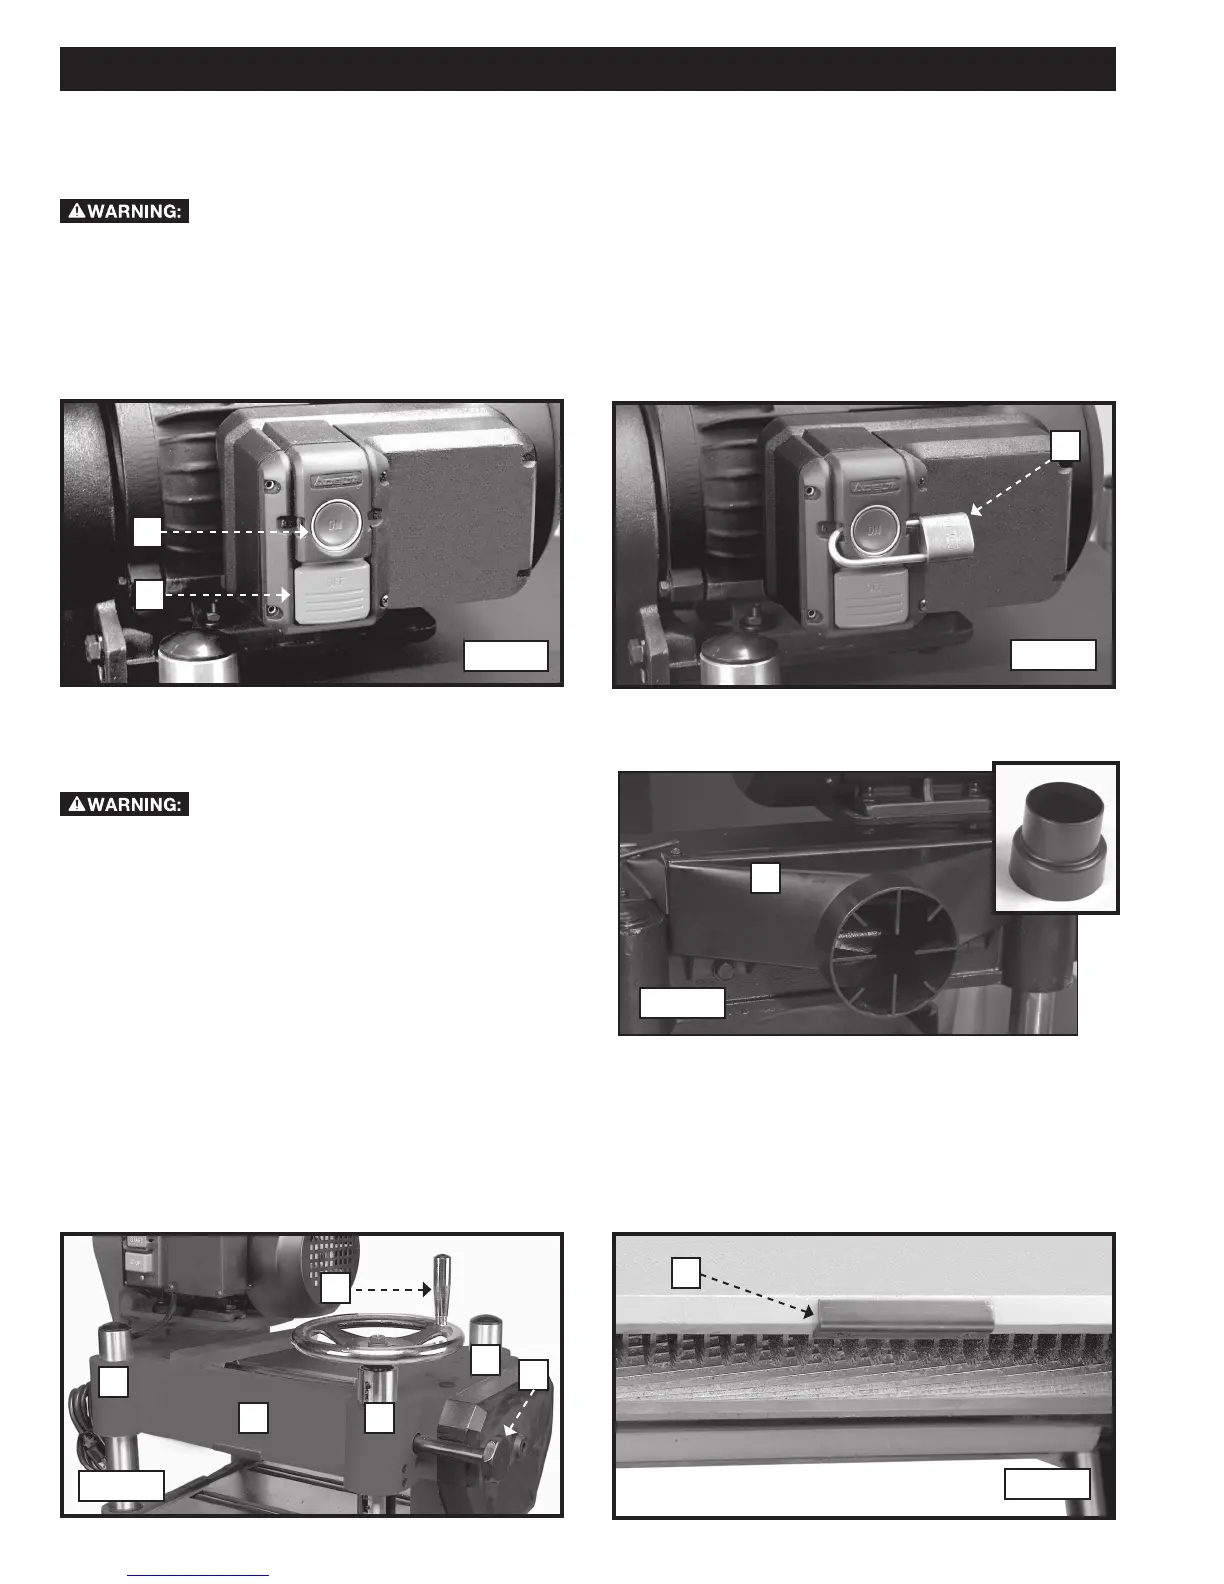
IMPORTANT: When the machine is not in use, the switch should be locked in the “OFF” position to prevent unauthorized

HOW TO START AND STOP THE MACHINE
A
Fig. 30
B
Fig. 31
B
1. 
 
Make sure that the switch is in the “OFFposition before plugging cord into outlet. Do not touch
the plug’s metal prongs when unplugging or plugging in the cord.
HOW TO LOCK THE SWITCH IN THE "OFF" POSITION
HOW TO ADJUST FOR DEPTH OF CUT






A
B
C
B
D
E
Fig. 33
Fig. 34
B
A dust chute (N) Fig. 32 is attached to the
machine. Never use this machine without the dust chute
attached. 
flexible dust collection hose directly to the dust chute for
optimal chip and dust collection. Or, you can attach the

      
collection hose.
Fig. 32
N

Related product manuals