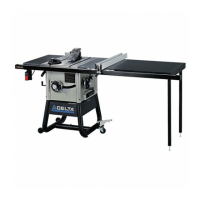
CUTTING AIDS AND ACCESSORIES
PUSH STICK
In order to operate your table saw safely, you MUST use a push stick whenever the size or shape of the workpiece would otherwise cause
your hands to be within 6 inches (152mm) of the saw blade or other cutter. A push stick is included with this saw.
No special wood is needed to make additional push-sticks as long as it is sturdy and long enough with no knots, checks or cracks. A
length of approximately 16 inches (400mm) is recommended with a notch that ts against the edge of the workpiece to prevent slipping.
It’s a good idea to have several push sticks of the same minimum length, 16 inches (400mm), with dierent size notches for dierent
workpiece thicknesses.
The shape can vary to suit your own needs as long as it performs its intended function of keeping your hands away from the blade.
Angling the notch so the push stick can be held at a 20° to 30° from the saw’s table will help you to hold down the workplace while also
moving workpiece past the saw blade.
To construct a push stick, refer to the layout see Figure 52.
Figure 52
AUXILIARY RIP FENCE FACING
Use an auxiliary rip fence facing when needed for special cuts, such
as ripping material that is thin enough to slide under the rip fence
provided with your saw, or when a taller rip fence is necessary to
complete your cut. To add an auxiliary wood facing to one or both
sides of the rip fence, select a piece of wood with smooth surfaces.
Attach the wood to the rip fence with two clamps. See Figure 53.
For most work, 3/4 inch (19mm) or 1 inch (25mm) stock is suitable.
Figure 53
AUXILIARY MITER GAUGE FACING
An auxiliary miter gauge facing is used to increase the surface area
of the miter gauge face.
The use of miter gauge with auxiliary facing is the same as original
miter gauge (without auxiliary facing). See Page 28 for the use of
miter gauge.
If desired, you can t the miter gauge with an auxiliary wood facing
that should be at least 1 inch (25mm) higher than the maximum
depth of cut, and at least as wide as the miter gauge.
This auxiliary wood facing can be fastened to the front of the miter
gauge by using two wood screws through the holes
A
provided
in the miter gauge body and into the wood facing. See Figure 54.
Make sure the screws are long enough to secure the facing, but DO
NOT extend all the way through the wood.
Figure 54
A
Make sure clamps DO NOT interfere with
workpiece or blade guard assembly.
1 3/4 Inch (44.5MM)
90°
20°-30°
3 3/8 Inch (85.7mm)
10 3/4 Inch (273mm)
1 1/16 Inch (27mm)
41
 Loading...