33
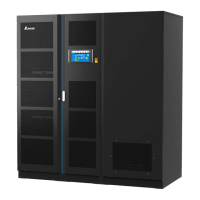
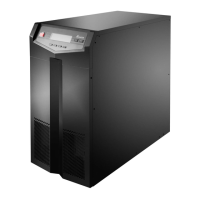
Chapter 6 Installation
2
Attach the provided M5 nuts to the rack. Use the provided M5 screws to rmly
install the PDB on the rack. Ensure that the screws are tightly xed.
O
U
T
P
U
T
B
R
E
A
K
E
R
-
4
2
5
0
V
A
C
3
0
A
O
U
T
P
U
T
B
R
E
A
K
E
R
-
3
2
5
0
V
A
C
3
0
A
O
U
T
P
U
T
S
O
C
K
E
T
-
3
3
0
A
M
A
X
.
O
U
T
P
U
T
S
O
C
K
E
T
-
4
3
0
A
M
A
X
.
O
U
T
P
U
T
B
R
E
A
K
E
R
-
2
2
5
0
V
A
C
2
0
A
O
U
T
P
U
T
S
O
C
K
E
T
-
2
2
0
A
M
A
X
.
M5 NUT
× 2 (Left: 1
& Right: 1)
U
PS
O
U
T
P
U
T
L2
L1
A
C
I
N
PU
T
L2
L1
PDB
O
U
T
P
U
T
B
R
E
A
K
E
R
-
4
2
5
0
V
A
C
3
0
A
O
U
T
P
U
T
B
R
E
A
K
E
R
-
3
2
5
0
V
A
C
3
0
A
O
U
T
P
U
T
S
O
C
K
E
T
-
3
3
0
A
M
A
X
.
O
U
T
P
U
T
S
O
C
K
E
T
-
4
3
0
A
M
A
X
.
O
U
T
P
U
T
B
R
E
A
K
E
R
-
2
2
5
0
V
A
C
2
0
A
O
U
T
P
U
T
S
O
C
K
E
T
-
2
2
0
A
M
A
X
.
U
PS
O
U
T
P
U
T
L2
L1
A
C
I
N
PU
T
L2
L1
M5 Screw
× 2 (Left: 1
& Right: 1)
PDB
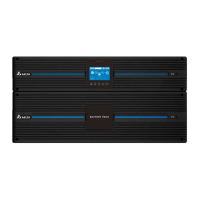
6.4 Battery/ Battery Pack Replacement
NOTE :
1. Turn off the UPS and cut off the AC source before performing battery/
battery pack replacement.
2. A battery can present a risk of electric shock and high short-circuit
current.
3. Servicing of batteries and battery packs must be performed or supervised
by qualied service personnel knowledgeable in batteries, battery packs
and the required precautions. Keep unauthorized personnel away from
batteries and battery packs.
Replace the battery/ battery pack by following the procedures below.
1
Unscrew the screws and remove the battery pack’s front bezel
1
.
2
Disconnect the battery terminals
2
.
3
Use the Phillips screwdriver to remove the screws from the protective cover
located in front of the battery
3
.
 Loading...