13
Fig. 23
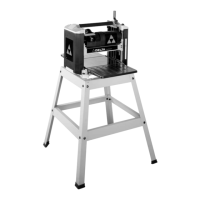
LIFTING STRAPS
Your planer is provided with two lifting straps (A) Fig. 23,
located on the top of the planer, for ease in transporting
the planer.
Fig. 25
When using your machine, you may want to follow these few simple steps for achieving the best results possible.
1. T
rue Up One Face – Feed one face of the board over a jointer, making thin cuts with each pass, until the entire
surface is flat.
2. Plane
to Thickness – Place the side you just surfaced in STEP 1 face down and feed the board through the planer,
as shown in Fig. 25, plane until this side is flat. Then plane both sides of the board until you are satisfied with the
thickness, making thin cuts, alternating sides with each pass. If during the planing operation you notice the board
twisting, warping or bowing, repeat STEP 1 and true up one face.
3. When planing long stock, provide table extensions to support the infeed and outfeed end of the workpiece.
4. Plane with the grain only, and keep planer table clean. Occasionally, wax table surface to reduce friction during the
planing operation.
5. Cr
oss-cut to Final Length – Cross-cut lumber to final length.
THE KNIVES ON THE PLANER WILL NOT WEAR EVENLY IF THE WOOD IS FED THROUGH THE
SAME SPOT ON THE TABLE EVERY TIME. FEED THE WOOD THROUGH THE PLANER AT DIFFERENT SPOTS
ON THE TABLE WHEN POSSIBLE, TO HELP ELIMINATE UNEVEN WEAR OF THE KNIVES.
A
OPERATION
 Loading...