Shenzhen Dericam Technology Co., Ltd. User Manual V1.0.7
Email: support@dericam.com Website: www.dericam.com
18
recommend you to add the camera by scanning on the network, so you do not need to enter the
long UID code.
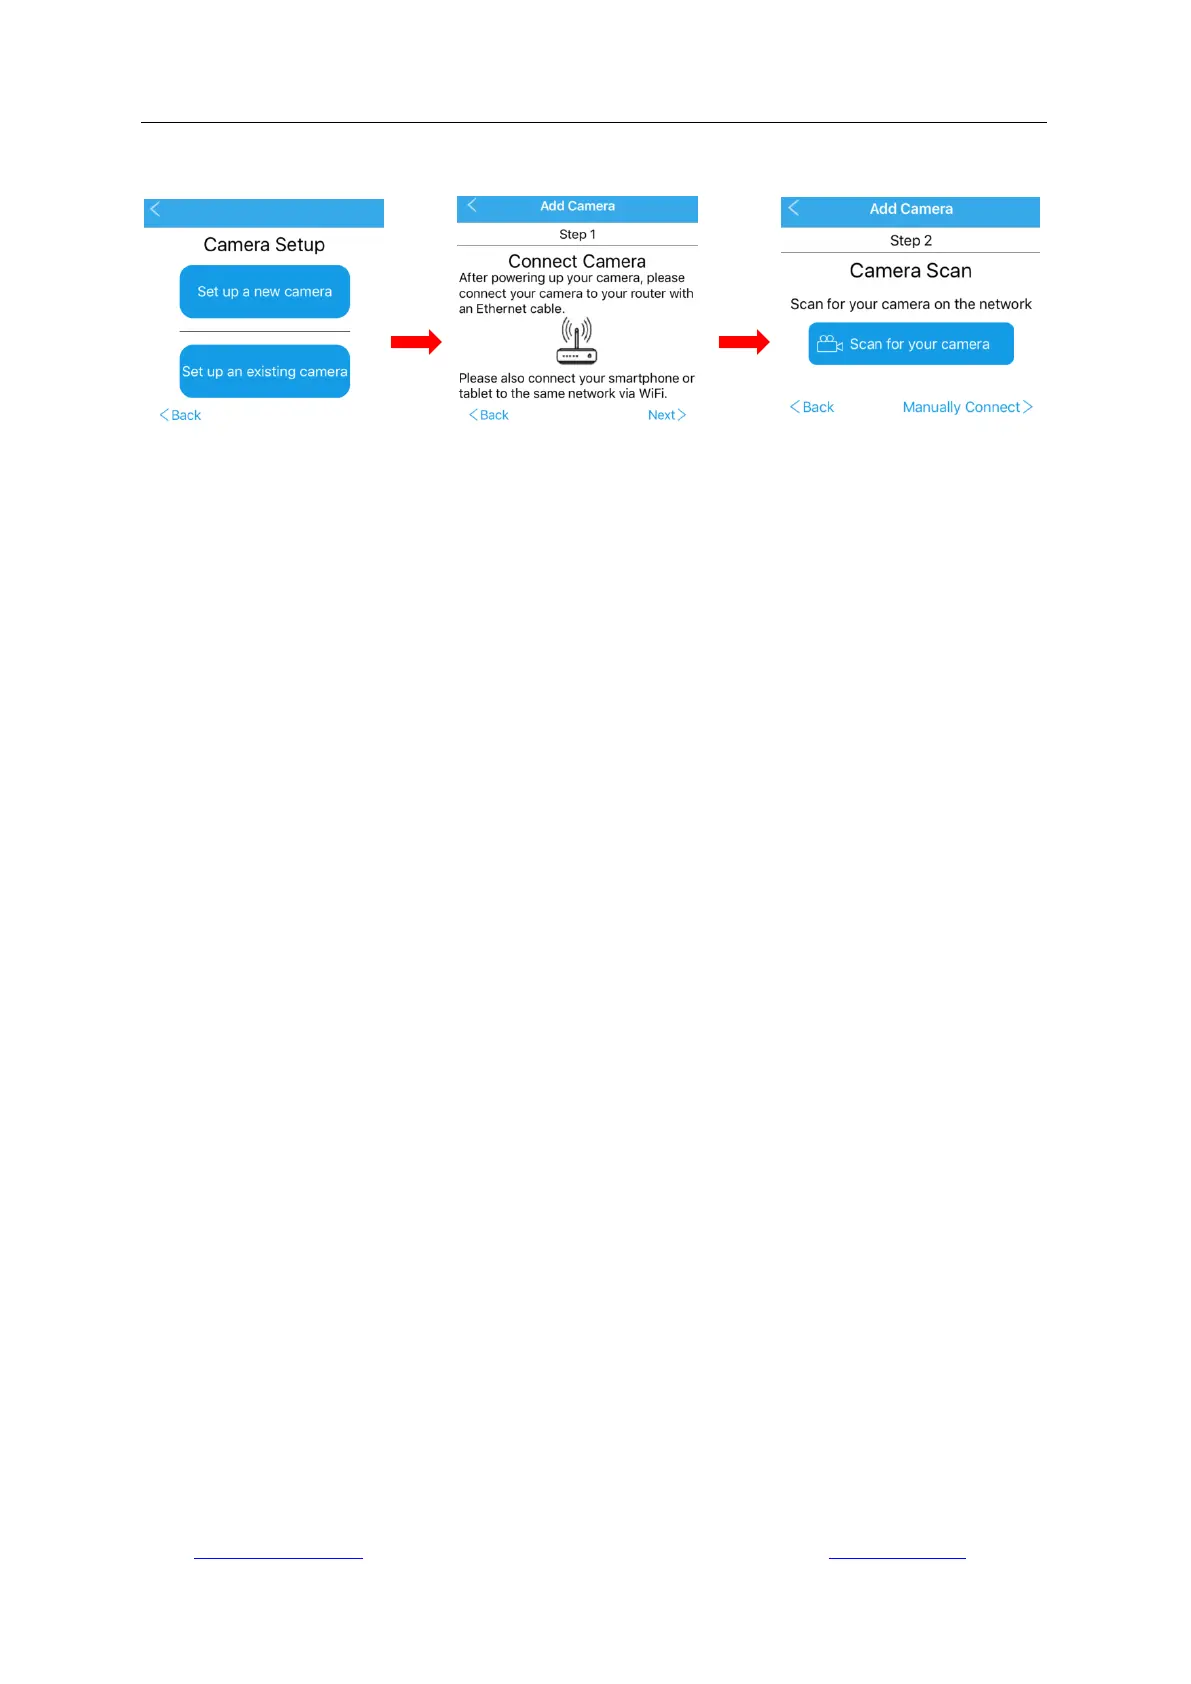
4.1.1.1 Scan for your camera
Here are the steps with screenshots about adding the camera by scanning.
-Choose “Scan for your camera”. Select the camera you want to set up from the camera list
detected by scanning.
-Give the camera a name, and enter right username and password to login it. The default
username/password is admin/admin. Note, the username and password are case sensitive.
-It is required to change the default password for secure policy. Please remind that you should
remember the username and changed password for future login.
-For continue Wi-Fi setup now, choose “Yes”; or tap "NO" or “Done” to finish setting and directly
go to live view with Ethernet cable connection. You can also configure your Wi-Fi connection later.
-After tapping “Yes” for Wi-Fi setup, the program will auto scan Wi-Fi networks and list all detected
Wi-Fi networks. Select the one you want to apply the camera on. Please tap the refresh icon to
search the Wi-Fi AP list again if the Wi-Fi SSID you want was not found.
-Enter the Wi-Fi password, tap “Check WiFi connection” and usually a message “WiFi connection
success” will appear. Otherwise, check the Wi-Fi password. Please note that some special
characters like“ \ " & = ”are not supported. If your Wi-Fi password includes any of these special
characters, please login your router to change the Wi-Fi password as a new one supported by the
camera first.
-Tap “Next” and plug out the Ethernet cable. Choose “Start Live View”. Wait about 30 seconds for
live view picture to come.