41
Charging a lead acid battery
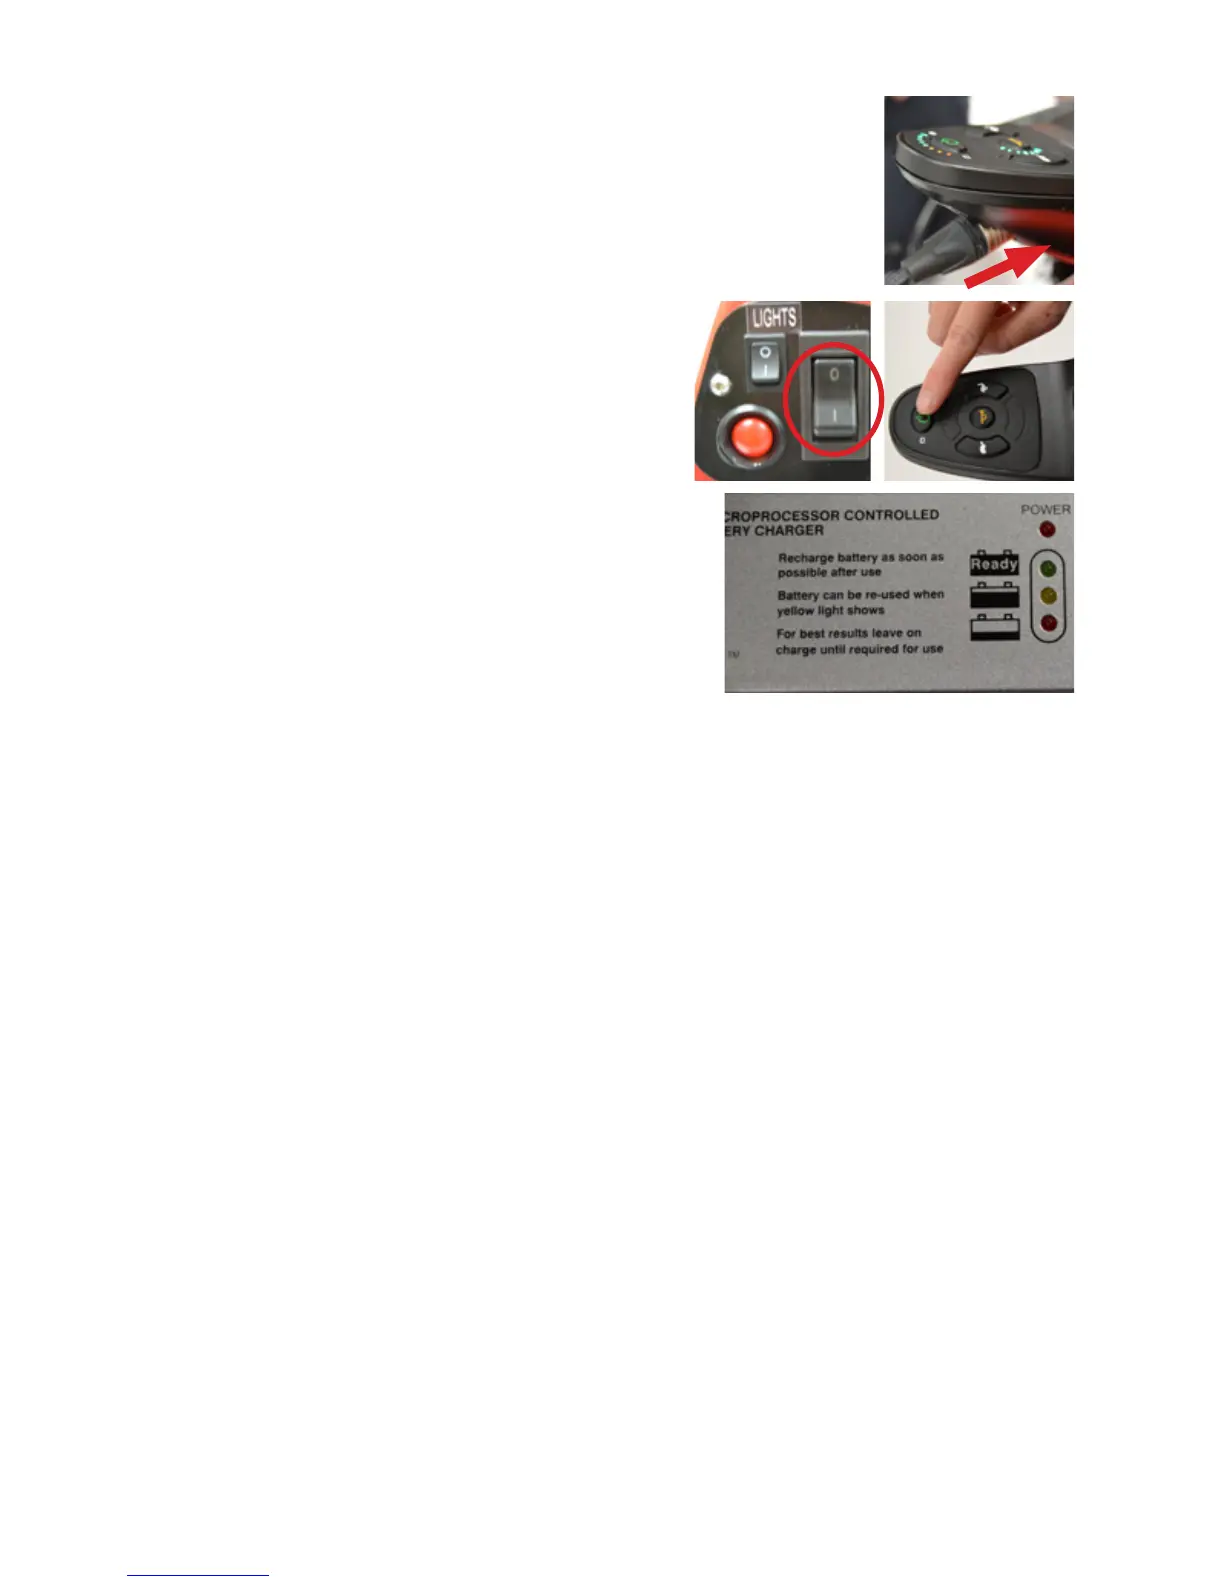
1. Put the silver connector into the charging
socket on the front face of the joystick.
2. Switch on Wizzybug using
the rear main switch, then
switch on at the joystick.
3. Plug the charger into your mains
supply and switch on; the red
power light should come on. After
a few seconds a second LED light
will illuminate on the charger. A red
light shows that the bulk charging
stage has commenced. A yellow light shows that the battery
is being charged on a constant voltage and is about 80%
charged. A green light shows that the charger has switched
to a oat charge and the battery is ready for use. The charger
may be left connected until Wizzybug is ready for use.
4. Wizzybug must be switched on when charging. However, whilst
charging, Wizzybug will not respond to joystick control and
cannot be driven. When Wizzybug is being charged the lights on
the battery indicator on the joystick control will scroll and ash.
5. When you are ready to disconnect the charger, turn off the
mains supply rst, then switch off at the joystick. Unplug
the charger from the mains supply, then unplug the silver
connector from the front of the joystick.
The need to charge your Wizzybug will depend on how much it is
used. However, we would suggest that if it is used daily, then charge
Wizzybug daily. It is not possible to overcharge the lead acid battery.
When the charger is connected the joystick will lock and
Wizzybug will not be drivable.