47
Problem What to do If this doesn’t
work
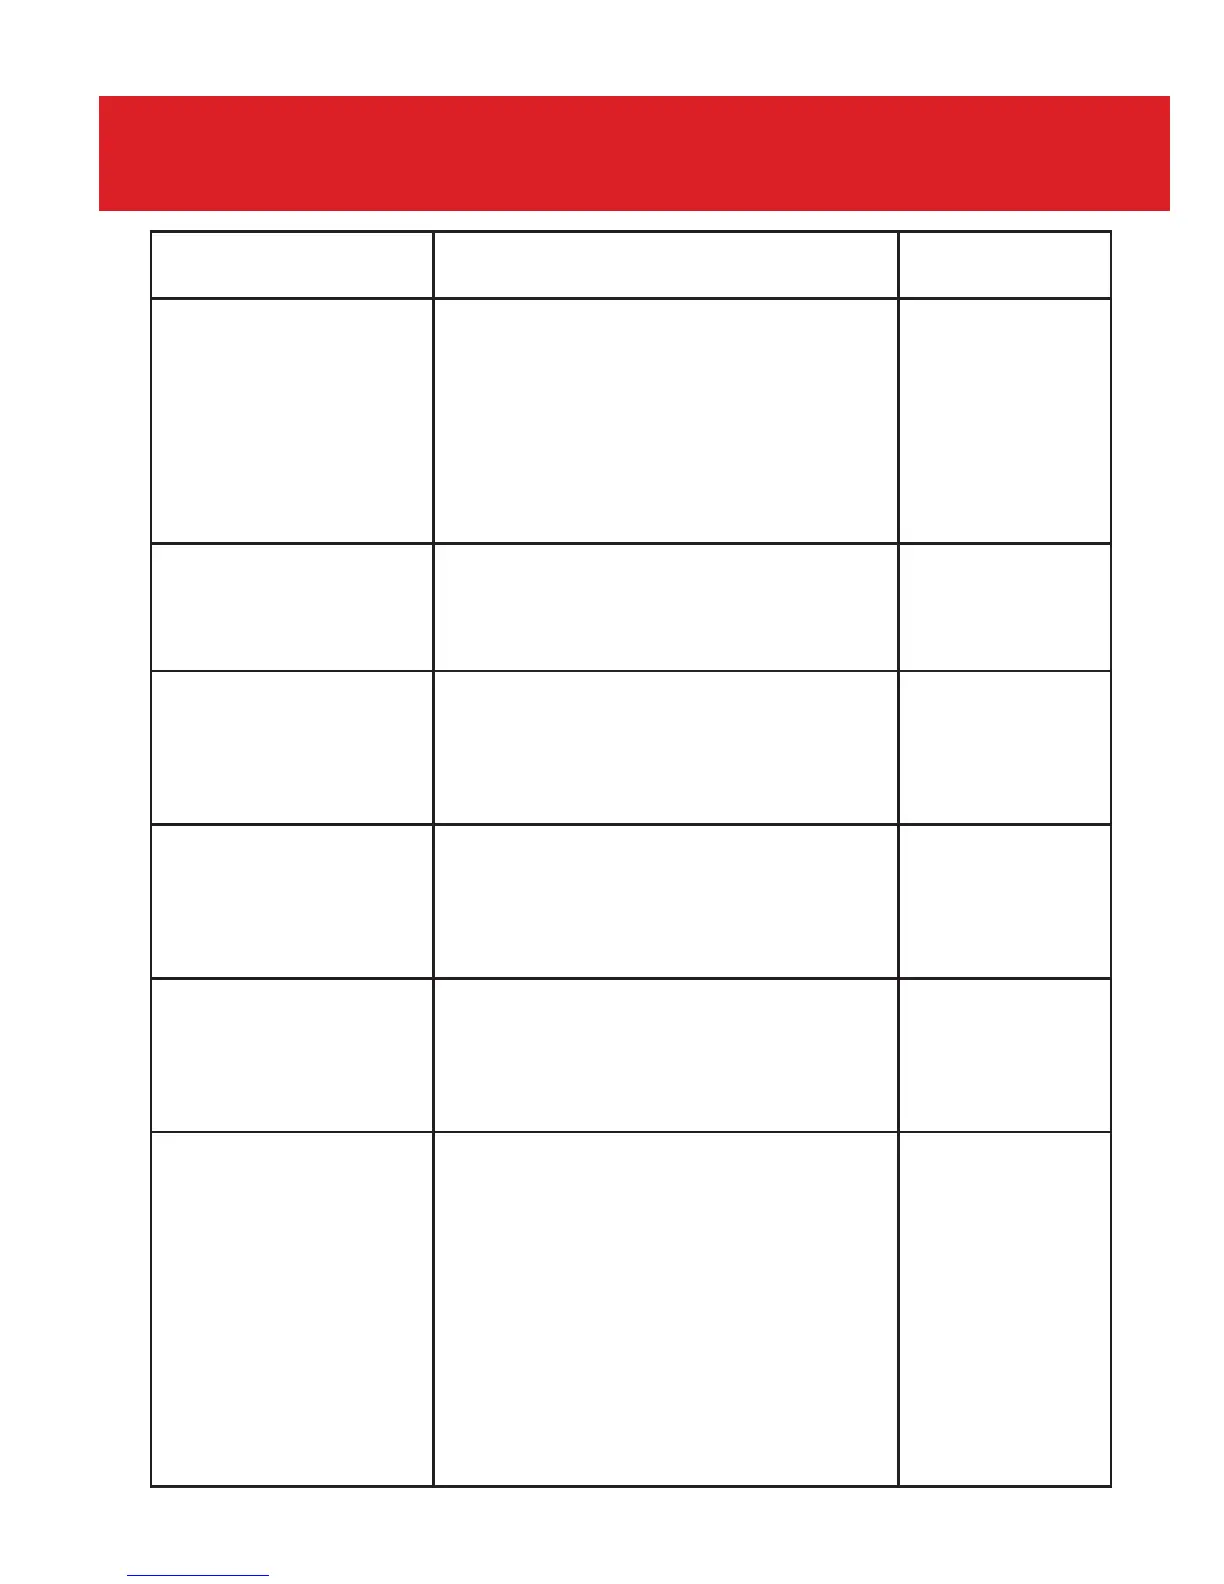
1. Joystick not turning
on.
1. Check main power switch on the rear is
on, then try again.
2. Check battery is properly connected
under the seat.
3. If the battery is nickel metal hydride,
remove battery and press the button that
says “Push to test”. If this indicates zero
power re-connect to Wizzybug.
If you are unable
to resolve
the problem
satisfactorily, stop
using and ring
Designability for
assistance.
2. Joystick turns on then
the lights scroll from right
to left, joystick beeps and
turns off. (Shark Only.)
The joystick has been locked.
Turn on again and press the horn button
3 times in quick succession. This will
unlock the joystick.
Stop using. Ring
Designability for
assistance.
3. The Joystick controller
is not working. The
Spanner light is ashing
on joystick(Shark Only.)
Turn the controller off and on again.
Recheck the joystick. If the spanner is still
ashing then it’s displaying a fault code.
Count the number
of ashes in each
sequence and
ring Designability
for assistance.
4. The Joystick
controller is not working
(DX joystick system
only.) Displays red
ashing key.
The joystick is disabled – use the blue
magnetic key (supplied with Wizzybug)
and slide over the number display to
unlock the joystick.
5. Joystick controller is not
working. (DX only) green
ashing key.
If speed setting 4 or 5 are selected reset to
1, 2 or 3 as 4 and 5 are only available with
the optional switches connected. If speed
settings are correct, then the key is ashing a
fault code.
Count the number
of ashes in each
sequence and
ring Designability
for assistance.
6. The seat fails to
engage in the Wizzybug
body properly.
1. Remove the seat and ensure that the
seat back pivot pin is located in a notch on
both sides.
2. Check the front pegs are
correctly positioned within their location
points (as shown on p.17).
3. Check the pins are locating in the holes.
4. Fully remove the seat and check that the
seat backrest is fully engaged in a seat base
slot. The circles should be aligned. If not,
realign the seat and backrest and try again.
Contact
Designability if this
does not work.
Tel: +44 (0)1225
824103 or
Email: info@
designability.org.
uk
Troubleshooting
Fig 43 Troubleshooting
22)
Contact
Designability (see
page 46) if this
does not work.