Celeris User Manual
14770-A || ECN # 844 || ECN Date: 28 July 2017 Page 16 of 23
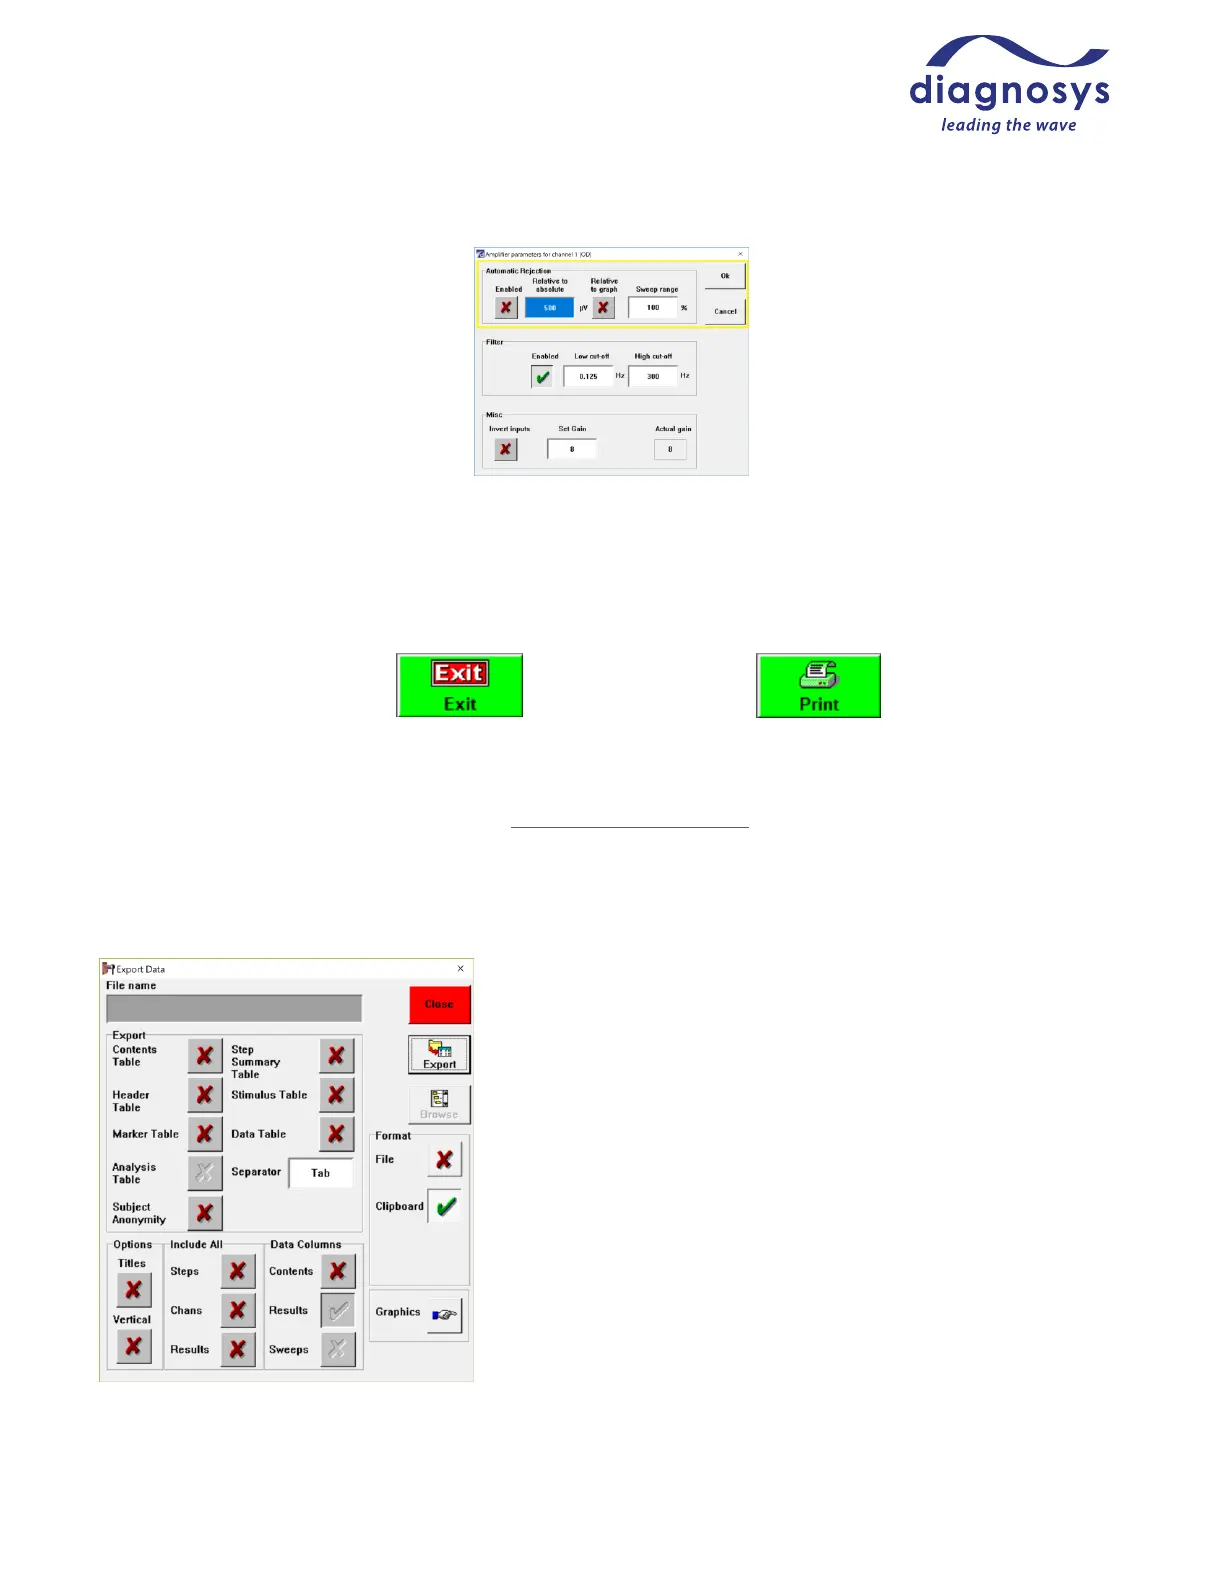
Figure 24 - automatic rejection parameters
Printing, Saving, and Exporting Data
Your data is being saved to the hard drive during testing. To save data to the database, press the Exit button at
the bottom right at the end of the test.
Figure 25 - Exit (and save) Figure 26 – Print
When exiting the test, you will be asked if you wish to save the test to the database. A No answer will require
confirmation. If you discard the test in error, contact Diagnosys support for instructions to retrieve the test.
To print the test, press the Print button on the Control bar. The print options tab on the side of the preview
window will allow you to adjust the print settings and save templates to recall later.
To export data, press the Export button. You can export ASCII data to either a .csv or .txt file or copy the data
directly to the clipboard. Graphics (such as graphs, or images of
marker tables) can also be copied directly to the clipboard.
Contents Table: Tells you the size (in cells) of the data exported.
Header Table: Includes protocol data such as protocol name,
number of channels, stimulator type, time and date of test, and
subject details.
Marker Table: Provides the recorded marker values for the loaded
test.
Analysis Table: N/A to animal testing, exports the Arden ratio for
EOG testing.
Step Summary Table: Provides information on data recorded in
each step, including number of responses recorded, number of
responses rejected, and time and date stamps on recordings.