1 Introduction
ECO 9099 SOP05-5090F Rev.00 Effective Date: 12/20/18 Page 23 of 58
The sample probe assembly (Figure 1-22) is comprised of the probe and the intake tubing. The
assembly can be removed as one-piece from the Aspiration Assembly. To remove,
1. First, if the instrument is on, place in Hold in Maintenance mode to prevent reagents from
cycling.
2. (Main Operations Menu>>>Maintenance>>>Hold in Maintenance)
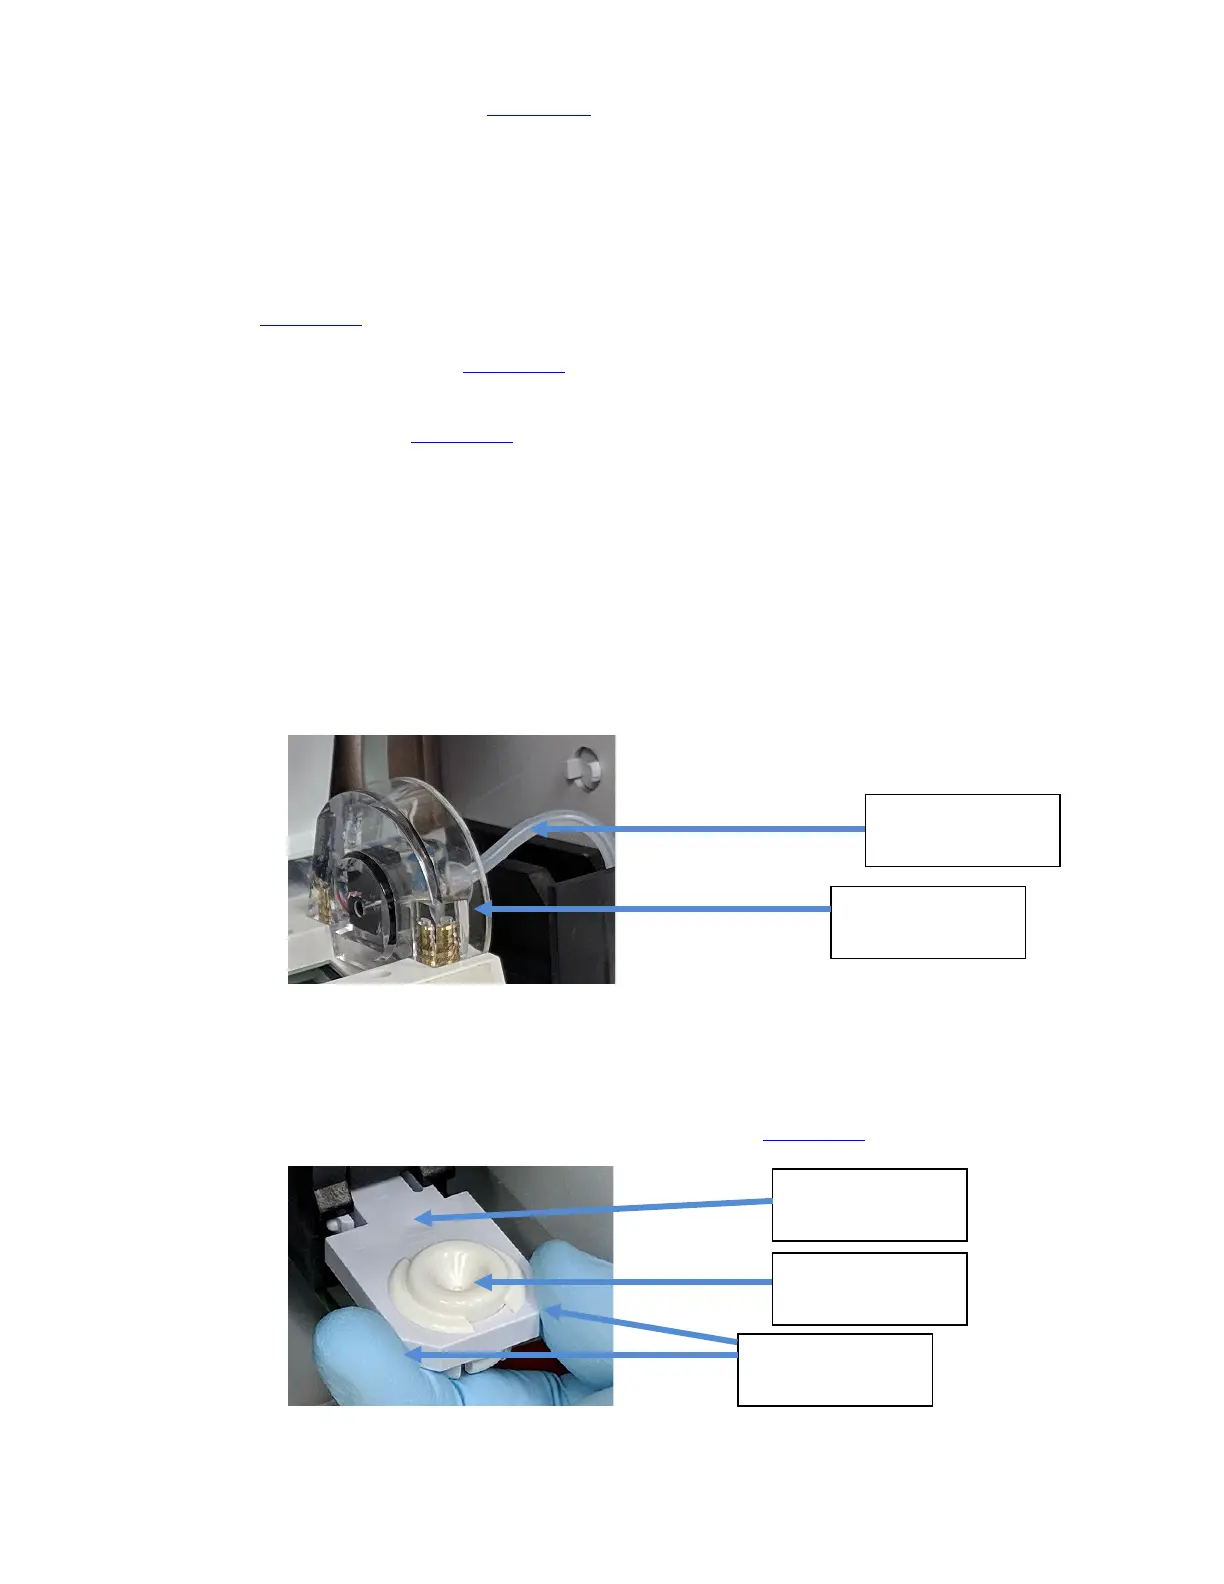
3. Disconnect the intake tubing from the sample sensor on the right side of the electrode tray.
(Figure 1-25
)
4. Open the sample door (Figure 1-23).
5. Grasp the probe near the white holder block, pull up to rotate and unsnap the sample probe
from its position. (Figure 1-21
)
It is recommended to replace the Sample Probe each year. To replace the Sample Probe
assembly;
1. Align the bottom of the sample probe in the white Sample Probe holder block and press the
replacement assembly into place.
2. Press the top of the sample probe near the intake tubing to ensure the probe is completely
snapped into the white Sample Probe Holder.
3. Connect the intake tubing to the sample sensor.
Figure 1-25 Connect Tubing to Sample Sensor
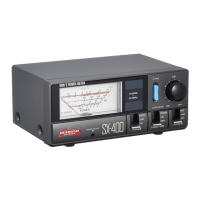
The fill port can be removed and replaced as a complete assembly. It can also be disassembled
and cleaned if desired. To remove the fill port assembly;
1. Pull the fill port holder towards the front for easy access. (Figure 1-26
)
Figure 1-26 Fill Port
Sample Sensor
White Fill Port
Holder
Fill Port
Intake Tubing,
Connected
Fill Port Tabs