35
WARNING: If you do not follow these instructions exactly, a fire or explosion
may result causing property damage, personal injury, or loss of life.
FOR YOUR SAFETY READ BEFORE LIGHTING
OPERATING INSTRUCTIONS
TO TURN OFF APPLIANCE
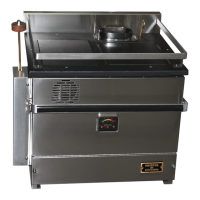
This appliance is equipped with a natural draft breeze burner
which must be primed and ignited manually using a wick.
BEFORE LIGHTING
• check around the appliance area for leaks. Check that the
burner is clean and empty of fuel before allowing priming
fuel to enter the burner.
• Check the metering valve on the appliance and overflow
container for signs of fuel overflow.
NEVER LIGHT
• A flooded burner
• A hot burner or one just recently extinguished
A.
B.
Use only your hand to turn the metering valve control knob.
Never use tools. If the knob will not turn by hand, don’t try
and repair it; call a qualified service technician. Forced or
attempted repair may result in damage to the device.
Do not use this appliance if any part of it has been under
water. Immediately call a qualified service technician to
inspect the appliance and to replace any part of the control
system and any gas control which has been under water.
C.
D.
1. STOP! Read the safety information above on this page.
2. Turn off all electric power to the appliance.
3. 3. Rotate the metering valve knob counter-clockwise to
setting 5 in order to prime the burner
6. Place the (burner ring(s), superheater and low sulfur baffle (if
applicable) into the burner as shown on page 13 (fig 14)
5. After allowing priming fuel to accumulate in the appliance for
five (5) minutes, turn the valve control knob clockwise to
the ‘OFF’ position.
7. Make a wick from a small twist of paper. Carefully light and
drop the wick into the burner and use the auger tool to push it
down into the bottom of the burner and into primer fuel. Do
not attempt to push the burning wick in by hand!
8. Turn fan switch to ON and rotate the fan control knob
clockwise until its indicator points down (6 o’clock
position)
#5 “HIGH”
setting.
1. Rotate the valve control knob clockwise to the ‘OFF’
position. Do not force. The flames will gradually extinguish.
2. Close the shut-off valve on the fuel lines. Do not allow fuel to
continue to flow to the appliance with the valve in the ‘OFF’
position.
3. If you are supplying the appliance with a fuel pump, switch
power to the pump to ‘OFF’
4. Turn off all electric power to the appliance if service is to be
performed.
Valve control
knob is
shown in
“OFF”
position.
#1 “LOW”
setting
Active
setting
indicator
4. Wait five (5) minutes to allow priming fuel to accumulate in
the burner. Primer fuel should fill the burner to a level no
higher than 5/8
th
of an inch. If fuel in the burner is deeper
than this or forms a pool over 3 inches in diameter, do not
light the burner! Call a qualified service technician to service
the appliance.
Fan control knob
is shown in
‘LOW’ position.
High
position
9. Monitor the liquid priming fuel as it burns.
This will take ten to fifteen (10-15) minutes.
• An appliance if the metering valve shows signs of overflow
• An appliance without verifying it has access to fresh air
10. When the priming fuel has almost burned
itself out, rotate the valve knob counter-
clockwise to setting #2 and turn the
fan ON/OFF control switch to ‘OFF’
11. Continue to monitor the flames for ten to
fifteen (10-15) minutes. You should see the
flames rise to the burner ring.
13. Continue to monitor the operation of the appliance for the
entire duration that it is running. Do not leave the appliance to
operate unattended.
12. Maintain a clean, balanced flame (blue-yellow flames without
soot) by adjusting valve and fan controls to keep the air-fuel mix
in the burner balanced.
FIG 58
FIG 59