PRE Guide18
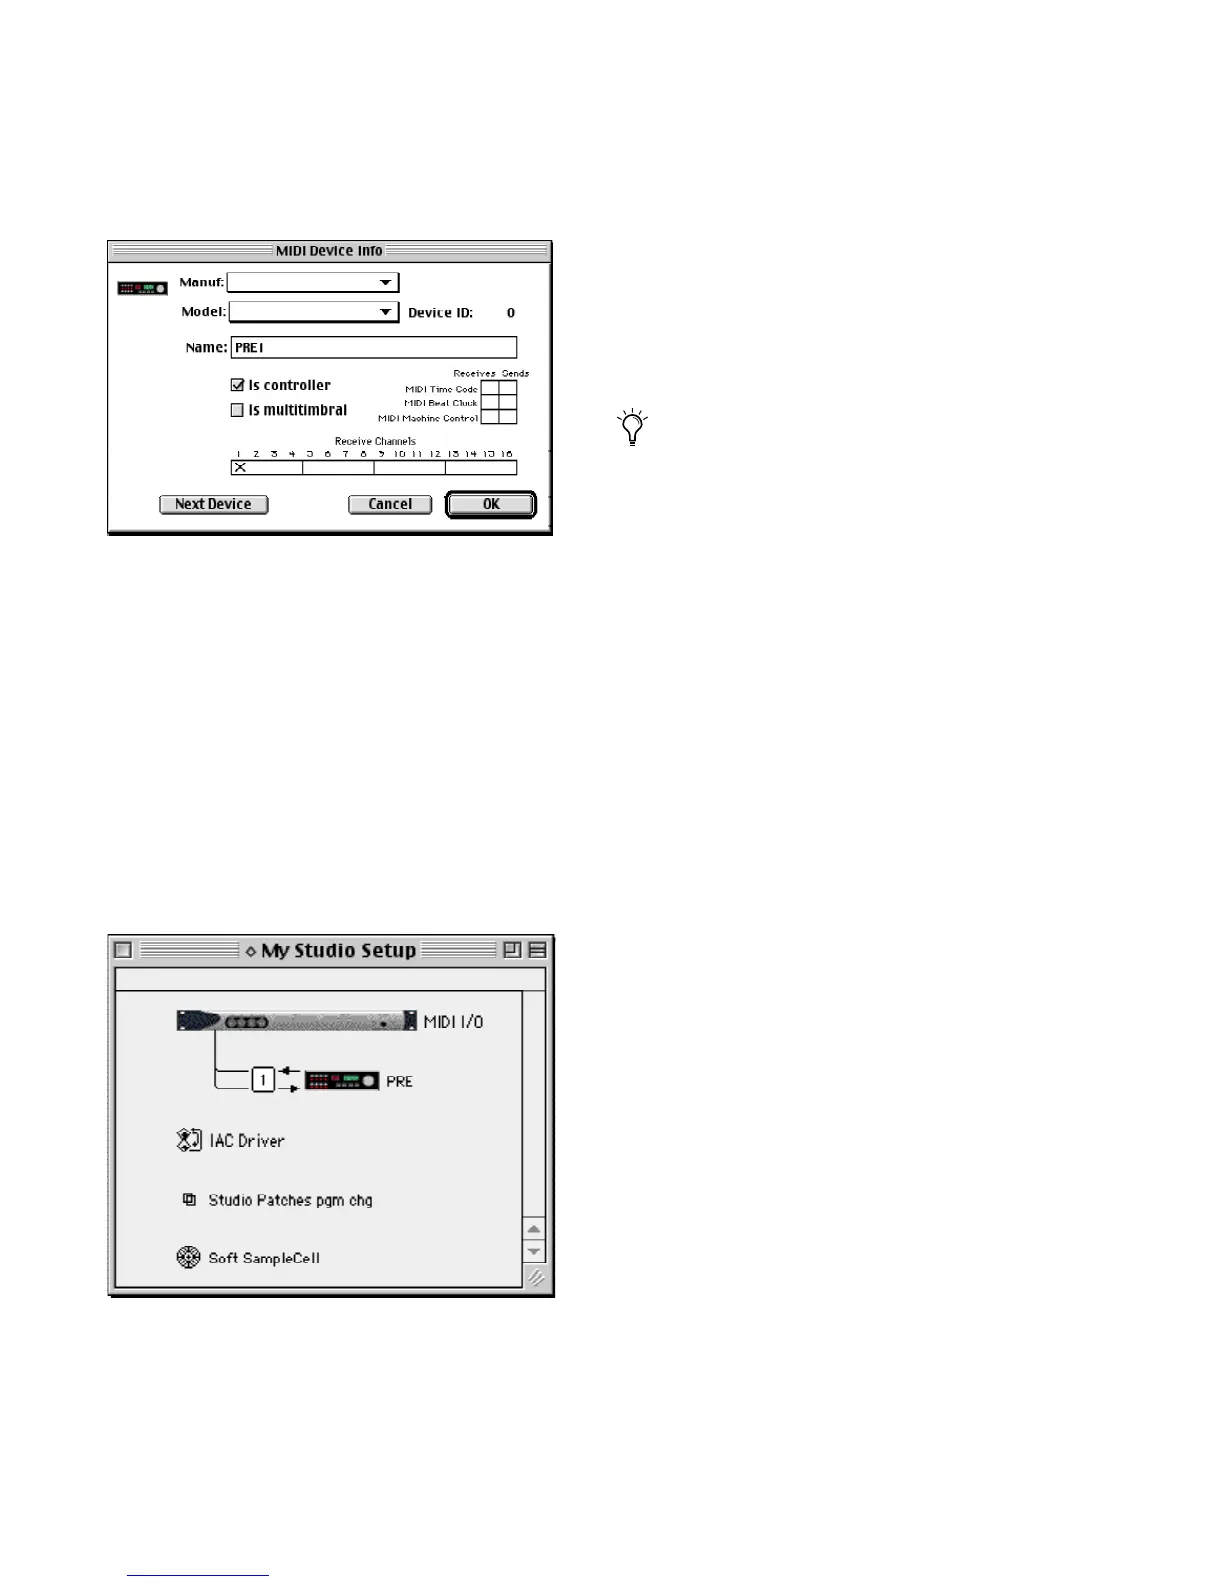
4 In the MIDI Device Info dialog, enter a name
for the device (for example, PRE 1).
5 Make sure the Is Controller option is selected.
6 Make sure the Receives and Sends boxes for
MIDI Time Code, MIDI Beat Clock, and MIDI
Machine Control are deselected.
7 Under Receive Channels, select the channel
for sending and receiving data from PRE.
This should be the same channel number previ-
ously set on the PRE front panel.
8 Click OK.
9 In the OMS Setup window, a number will be
displayed to the left of the arrows connecting
the PRE icon to the MIDI interface icon. This
number indicates the port number that the de-
vice is connected to on the MIDI interface. Ver-
ify that the correct port number is displayed; if
not, click the port number, type the correct
number, and press Return.
10 Save the changes to your current Studio
Setup document.
11 Up to nine PREs can be configured in OMS,
as follows:
• To daisy-chain your PREs in OMS: In the
OMS Setup window, drag the second PRE
onto the first PRE, the third PRE onto the
second PRE, and so on. (Arrows between
the PRE and the MIDI interface signify a
connection has been made.)
• Configure MIDI Device Info for each PRE,
as described above. Make sure that none of
the PREs are assigned to the same MIDI
channel.
12 When finished configuring PREs in OMS,
choose Edit > OMS MIDI Setup.
13 Select Run MIDI in Background, and click
OK.
14 Choose Edit > Preferences and deselect “Use
Apple SerialDMA driver when available,” then
click OK.
15 Quit OMS and select Save.
16 Continue with “Configuring Pro Tools Soft-
ware for PRE” on page 19,
MIDI Device Info Dialog
Connecting the PRE to the correct port or MIDI interface
in the OMS Setup window
You can change the PRE icon to match the
visual look of your PRE by clicking the icon
and choosing the Device Icon command in
the Studio menu.