page 9
Digital Projection E-Vision Laser 7500 & 8500 Series
Installation and Quick-Start Guide
REMOTE CONTROL
Rev B September 2016
11
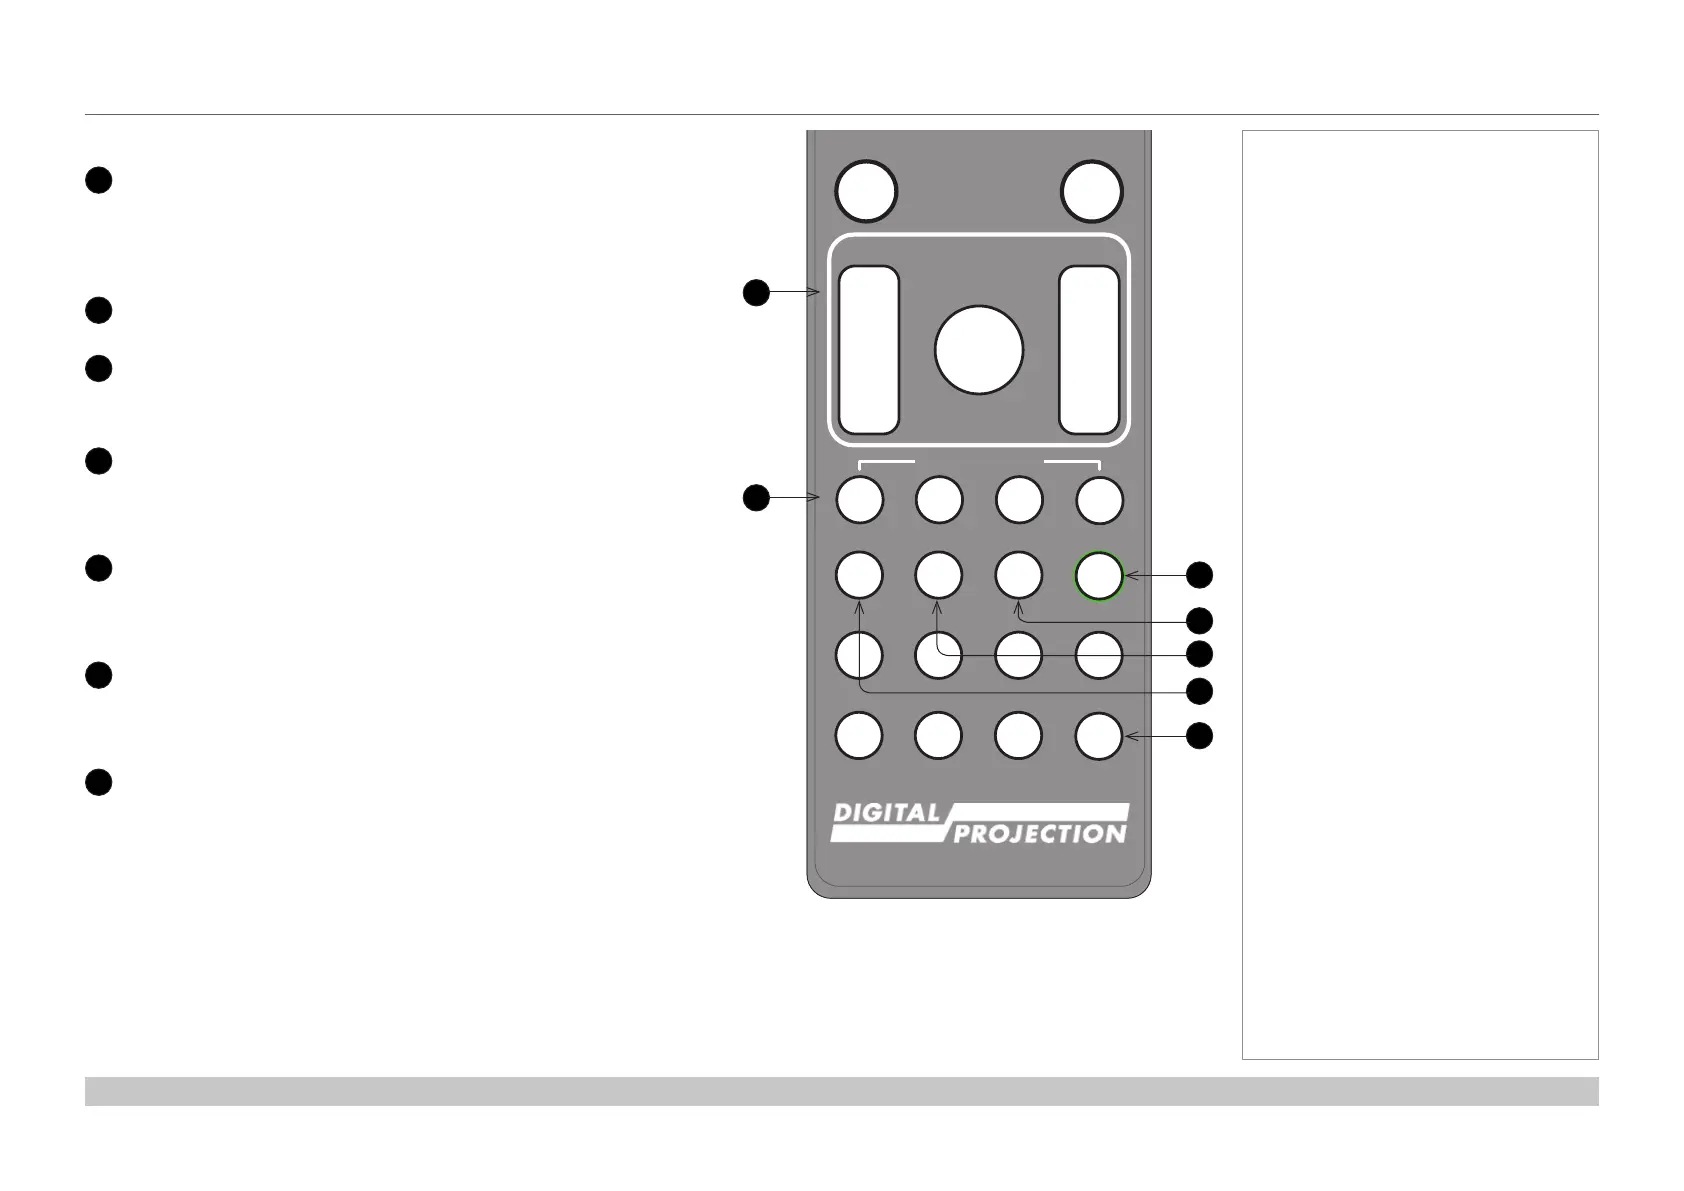
LENS adjustment
FOCUS IN / OUT: adjust focus.
SHIFT: press and hold this button, then use the Navigation arrow
buttons to move the lens.
ZOOM IN / OUT: adjust zoom.
12
USER PRESET A, B, C, D
Load user presets.
13
ALT
Press and hold this button to access alternative functions for all
buttons with a green label.
14
DVI / GAMMA / numeric input 3
Select the DVI input.
Use with ALT to switch to the next Gamma value:
...1.0, 1.8, 2.0, 2.2, 2.35, 2.5...
15
HDMI 2 / CON / numeric input 2
Select the HDMI 1 input.
Use with ALT to bring up the Contrast control, then adjust the value
with the LEFT and RIGHT arrow buttons.
16
HDMI 1 / BRI / numeric input 1
Select the HDMI 1 input.
Use with ALT to bring up the Brightness control, then adjust the
value with the LEFT and RIGHT arrow buttons.
17
TEST / SWAP / numeric input 0
Show a test pattern. Press again to show the next test pattern:
...Off, White, Black, Red, Green, Blue, CheckerBoard,
CrossHatch, V Burst, H Burst, ColorBar...
When PIP mode is on, use this button with ALT to swap the main and
sub images.
continues on next page...
Notes
Remote control
Pic Mute
OFF
ON
MENU
EXIT INFO
HDMI1
ALT
LENS
FOCUS ZOOM
IN
OUT
IN
OUT
SHIFT
21 3
HDMI2 DVI
DISPLAYPORT
HD-T 3GSDI
VGA COMP1 COMP2
BRI
TEST
CON GAMMA
R G B ALL
3D EYE PIP SWAP
4 5 6
7 8 9 0
ALT
ADDR
FREEZE
RE-SYNC
A B C D
USER PRESET
13
11
12
14
15
16
17
 Loading...


