page 8
Digital Projection E-Vision Laser 7500 & 8500 Series
Installation and Quick-Start Guide
REMOTE CONTROL
Rev B September 2016
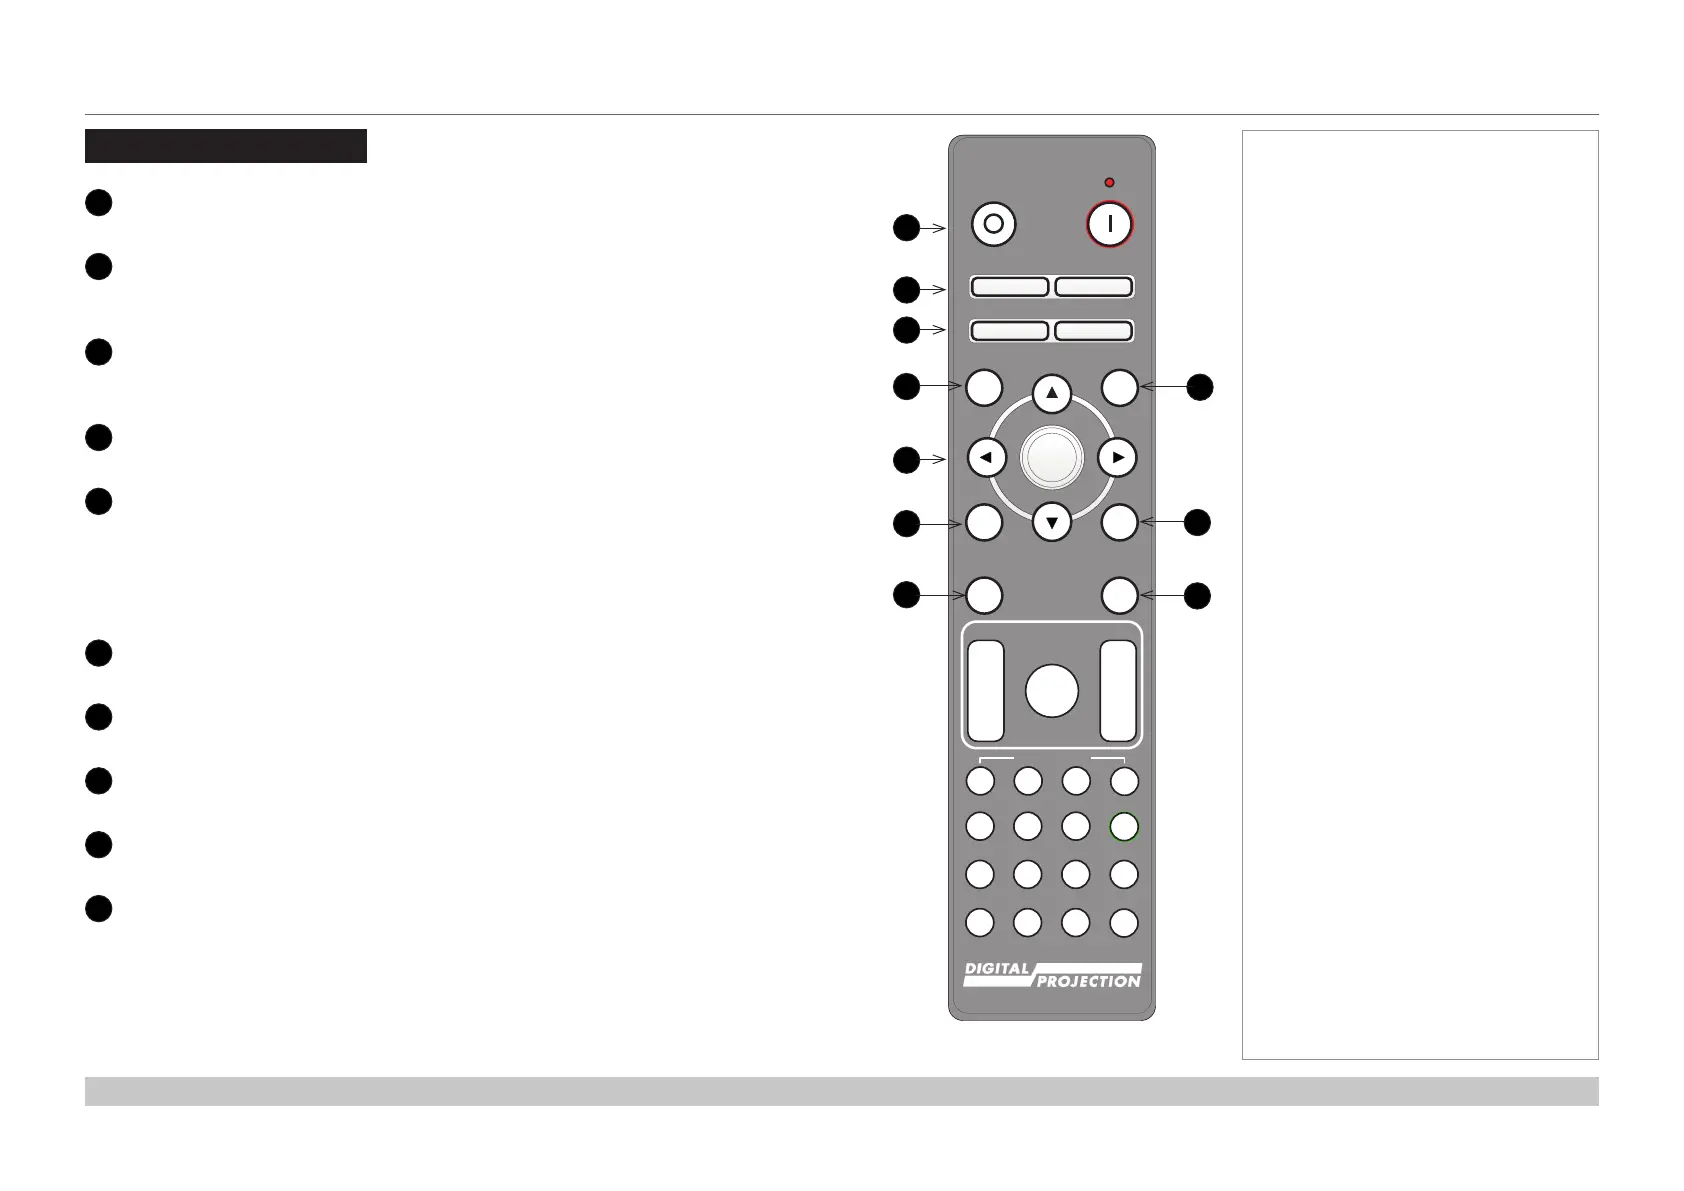
Remote Control
1
Power ON / OFF
Turns power on and off.
2
Pic Mute ON / OFF
Shows and hides the projected image.
When OFF, the light source is completely switched off and the screen is black.
2
OSD ON / OFF
Enable and disable screen timeout messages and control whether to show the OSD
during projection.
4
MENU
Access the OSD. If the OSD is open, press this button to go back to the previous menu.
5
Navigation (arrows and OK)
Navigate through the menus with the arrows, conrm your choice with OK.
In lens adjustment modes, the arrows are used to move, zoom or focus the lens. See 11
below.
In lens adjustment modes, or when the OSD is not showing, the OK button switches
between modes: Shift Adjustment and Zoom / Focus Adjustment.
6
EXIT
Go up one level in the OSD. When the top level is reached, press to close the OSD.
7
FREEZE
Freeze the current frame.
8
DEFAULT
When editing a parameter, press this button to restore the default value.
9
INFO
Access information about the projector.
10
RE-SYNC
Re-synchronise with the current input signal.
continues on next page...
Pic Mute
OFF
ON
MENU
EXIT INFO
HDMI1
OK
OFF ON
ALT
LENS
FOCUS ZOOM
IN
OUT
IN
OUT
SHIFT
21 3
HDMI2 DVI
DISPLAYPORT
HD-T 3GSDI
VGA COMP1 COMP2
BRI
TEST
CON GAMMA
R G B ALL
3D EYE PIP SWAP
4 5 6
7 8 9 0
ALT
ADDR
OSD
OFF
ON
DEFAULT
FREEZE
RE-SYNC
A B C D
USER PRESET
1
2
5
6
8
4
9
7
3
10
Notes
Remote control
 Loading...


