54
DS4+ FORD6
© 2017-12-13 Directed. All rights reserved.
Module programming - Using 2 Keys
Refer to "LED diagnostics and troubleshooting" on page 56 for more information and for troubleshooting purposes.
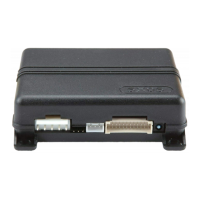
To connect the module:
1
Please ensure that the vehicle is in a safe location and cannot move forward during
programming. For vehicles equipped with a manual transmission, make sure the gearshift
lever is in the neutral position.
2
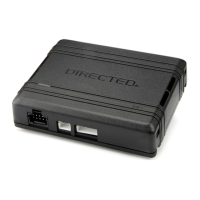
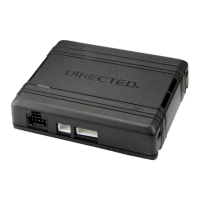
Connect all the harnesses to the DS4+, EXCEPT the 12-pin main power harness.
Connect all but the
12-pin harness
3
Connect the 12-pin main power harness, and wait until the LED turns ON solid red.
Note: To skip the transponder programming and use the convenience features only, press
the programming button 5 times. When the LED turns ON solid orange, proceed to step 4.
Must be
connected LAST
&
Solid
4
Insert the first key and turn it to the ON position, wait at least
3 seconds but no more than 10 seconds then remove it.
The LED flashes green.
& &
START
Key OUT
ON
OFF
START
Key IN
ON
OFF
START
Key IN
ON
OFF
START
Key IN
ON
OFF
START
Key OUT
ON
OFF
START
Key IN
ON
OFF
START
Key IN
ON
OFF
START
Key IN
ON
OFF
START
Key OUT
ON
OFF
START
Key IN
ON
OFF
START
Key IN
ON
OFF
START
Key IN
ON
OFF
START
1st Key OUT
ON
OFF
START
1st Key IN
ON
OFF
START
1st Key IN
ON
OFF
START
1st Key IN
ON
OFF
START
2nd Key OUT
ON
OFF
START
2nd Key IN
ON
OFF
START
2nd Key IN
ON
OFF
START
2nd Key IN
ON
OFF
1st
Key OUT
ON
OFF
START
Key IN
ON
OFF
START
Key IN
ON
OFF
START
Key IN
ON
OFF
START
Key OUT
ON
OFF
START
Key IN
ON
OFF
START
Key IN
ON
OFF
START
Key IN
ON
OFF
START
Key OUT
ON
OFF
START
Key IN
ON
OFF
START
Key IN
ON
OFF
START
Key IN
ON
OFF
START
1st Key OUT
ON
OFF
START
1st Key IN
ON
OFF
START
1st Key IN
ON
OFF
START
1st Key IN
ON
OFF
START
2nd Key OUT
ON
OFF
START
2nd Key IN
ON
OFF
START
2nd Key IN
ON
OFF
START
2nd Key IN
ON
OFF
1st
Key at ON Key out after 3-10 sec.
Flashes
5
Within 5 seconds, insert the second key and turn it to the ON position,
wait at least 3 seconds but no more than 10 seconds then remove it.
The LED now flashes orange, otherwise repeat steps 4 and 5.
Note: In some vehicles, it may be necessary to turn the key to the
ON position once more before proceeding to the next step.
Important! Proceed with the next step within 5 seconds.
& &
START
Key OUT
ON
OFF
START
Key IN
ON
OFF
START
Key IN
ON
OFF
START
Key IN
ON
OFF
START
Key OUT
ON
OFF
START
Key IN
ON
OFF
START
Key IN
ON
OFF
START
Key IN
ON
OFF
START
Key OUT
ON
OFF
START
Key IN
ON
OFF
START
Key IN
ON
OFF
START
Key IN
ON
OFF
START
1st Key OUT
ON
OFF
START
1st Key IN
ON
OFF
START
1st Key IN
ON
OFF
START
1st Key IN
ON
OFF
START
2nd Key OUT
ON
OFF
START
2nd Key IN
ON
OFF
START
2nd Key IN
ON
OFF
START
2nd Key IN
ON
OFF
2nd
Key OUT
ON
OFF
START
Key IN
ON
OFF
START
Key IN
ON
OFF
START
Key IN
ON
OFF
START
Key OUT
ON
OFF
START
Key IN
ON
OFF
START
Key IN
ON
OFF
START
Key IN
ON
OFF
START
Key OUT
ON
OFF
START
Key IN
ON
OFF
START
Key IN
ON
OFF
START
Key IN
ON
OFF
START
1st Key OUT
ON
OFF
START
1st Key IN
ON
OFF
START
1st Key IN
ON
OFF
START
1st Key IN
ON
OFF
START
2nd Key OUT
ON
OFF
START
2nd Key IN
ON
OFF
START
2nd Key IN
ON
OFF
START
2nd Key IN
ON
OFF
2nd
Key at ON Key out after 3-10 sec.
Flashes
6
Wait for at least 3 seconds, but no more than 10 seconds, and press
and hold the programming button.The vehicle ignition turns ON.
The LED turns ON solid green for 3 seconds, then turns OFF.
Note: Release the Program button as soon as the orange LED goes out. If you wait too long
to release the programming button, you will have to start the programming over.
Press & Hold
Release
&
Solid Off
&
7
Pair remotes (if applicable). For information on how to pair a specific remote, please
refer to its corresponding owner documentation, which can be found inside the product
packaging of the complete system or on www.directechs.com.*
Pair
remotes*
8
By default, the tachometer is preprogrammed for the vehicle. For instructions on how to
program tach, see page 59.
Initialize
tachometer
* Your aftermarket remote may differ from the model shown in the illustrations.
You have successfully completed the module programming sequence.
 Loading...