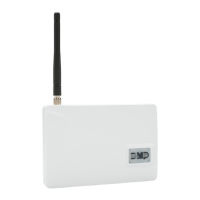
Digital Monitoring Products
CellCom‑LTE‑V
Programming and Installation Guide
2
Dialer Connection
Directly connect the Telco phone line (tip and ring) from the control panel to the terminalR(Ring) and one into
terminalT(Tip). See CID Dialer Connection.
Programming (PROG) Connection
A 4‑pin programming header is provided to connect a keypad when using a DMP Model330 programming cable.
This provides a quick and easy connection for programming the communicator. For 24VDC applications using the
communicator, connect the keypad using a Model330‑24 4‑wire programming harness with an in‑line resistor. After
programming is complete, remove the keypad.
Caution: If connecting to a 24VDC control panel, do not connect a keypad using a Model330 harness.
Tamper
The tamper is pressed when the cover of the communicator is secured onto the enclosure. When the cover is
removed, the communicator sends a tamper trouble message to the central station.
Reset Button
The reset button is located on the upper right side of the circuit board and is used to reset the communicator. After
resetting the communicator, begin programming within 30minutes. If you wait longer than 30minutes, reset the
communicator again.
Load Button
Firmware can be updated with the programming header. Firmware updates are available for download, free of charge,
on the DMP Dealer Direct website at DMP.com/Dealer_Direct.
Caution: Do not connect a Model400 to the communicator if using 24V power.
Performing a Firmware Update
To update the communicator with a new firmware version, complete the following steps at the protected premise:
399 Programming Cable
1. Connect a DMP 399 Cable from the programming header to the serial port of your PC operating RemoteLink
and containing the communicator RU file.
2. Start RemoteLink and create or open the account that matches the communicator to be updated.
3. Set the connection information type to direct with a baud rate of 38400 and choose the appropriate COM port.
4. Select Panel > Remote Update, then select the correct RU file for the communicator.
5. Press and hold the load button, then press and release the reset button.
6. Release the load button and select <Update> in Remote Link.
7. After the firmware update is completed, remove the 399 cable and press the reset button to resume normal
operation.
Model400 USB Flash Module
When loading the firmware RU file onto a USB drive, place the file in the root directory of the USB drive. The update
cannot be inside a folder. Format the USB drive as FAT32.
Place only one firmware file in the root directory. If more than one RU file exists on the USB drive, the communicator
will choose the RU file with the most recent date modified.
Caution: CellCom, iCOM, and XTL+ do not use the same RU files. Using the wrong RU file for the update will cause
the communicator to stop working until the correct RU file is used to flash the firmware.
1. Connect the USB flash drive to the Model400.
2. Press and hold the reset button on the communicator. You will continue to hold reset until step6.
3. Connect the assembly to the communicator’s programming header.
4. Press and release the button on the Model400.
5. With your finger still on RESET, press and hold the load button. Continue to hold LOAD until step8.
6. Release the reset button.
7. Press and release the button on the Model400.
8. When the green LED on the Model400 starts a slow flash, release the load button. The slow flash will last
5minutes, then the green LED will become steady, indicating the firmware version is updated.
Note: If the LED blinks rapidly, the update was unsuccessful. Press and release RESET. Begin again at step1.
9. Press and hold RESET. Remove the Model400, then release RESET to resume normal operation.
In the event the Model400 USB Flash Module is inadvertently removed from the communicator before the update
finishes, repeat steps1‑9.