15 - 7
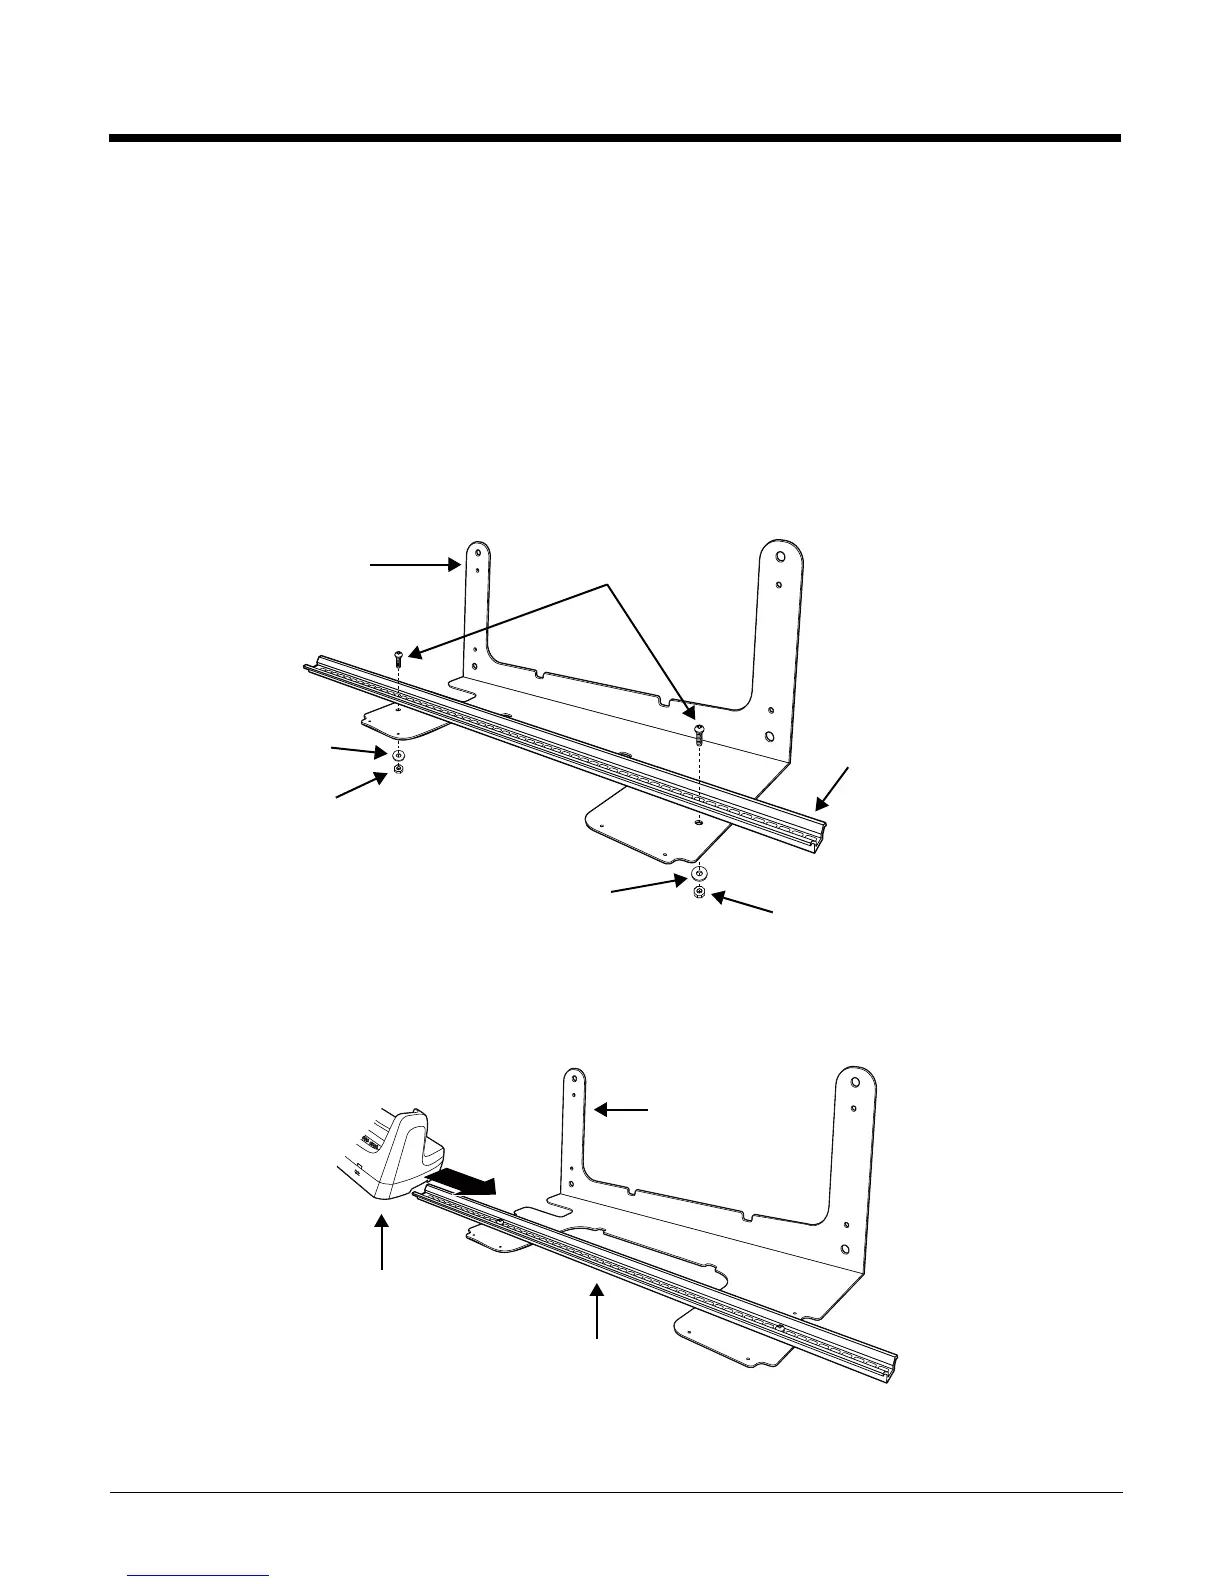
To secu re the b as e u sing th e o pt io nal DIN Ra il:
Hardware Required
•DIN Rail, Qty. 1
•3/16 in. dia x 5/8 in. long pan head screw, Qty. 2
•1/2 in. OD x 7/32 in. ID x 3/64 in. thick washer, Qty. 2
•3/16 in. dia nut, Qty. 2
1. Position the DIN Rail on the wall bracket, as shown below.
2. Slide the screw through the slot on the DIN Rail and the mounting hole in the bracket.
3. Slide the washer onto the screw and tighten the nut to secure the assembly.
4. Remove the rubber feet on the bottom of the ChargeBase.
5. Slide the base onto the DIN Rail using the slot on the bottom of the base.
Wall Bracket, Qty. 1
DIN Rail, Qty. 1
Washer, Qty. 1
Nut, Qty. 1
Screw, Qty. 2
Washer, Qty. 1
Nut, Qty. 1
Wall Bracket
Wall Bracket
DIN Rail