2
1
2
1
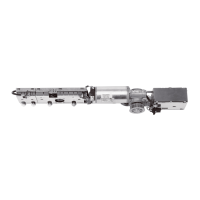
L1 N
57 57a
1 42
3
1 41
3
1
15
+ 24 V purple
Pulse white
0 V blue
0 V grey
3
3. Connect the receiver.
3. Connect the 230 V connecting cable.
4. Bend the cable end of the ground conductor to form an
eye and fasten it to the grounding screw.
Work on electrical equipment must be performed by
qualified electricians only.
5.4 Fastening the drive unit to the mounting plate
1. Remove the protective sheet from the thermally
conductive pads on the bottom side of the mains
adaptor.
The thermally conductive pads may not become soiled.
2. Feed the connecting cables through the housing and
place the drive unit onto the bolts on the base plate.
3. Push the drive unit until it clicks audibly into place.
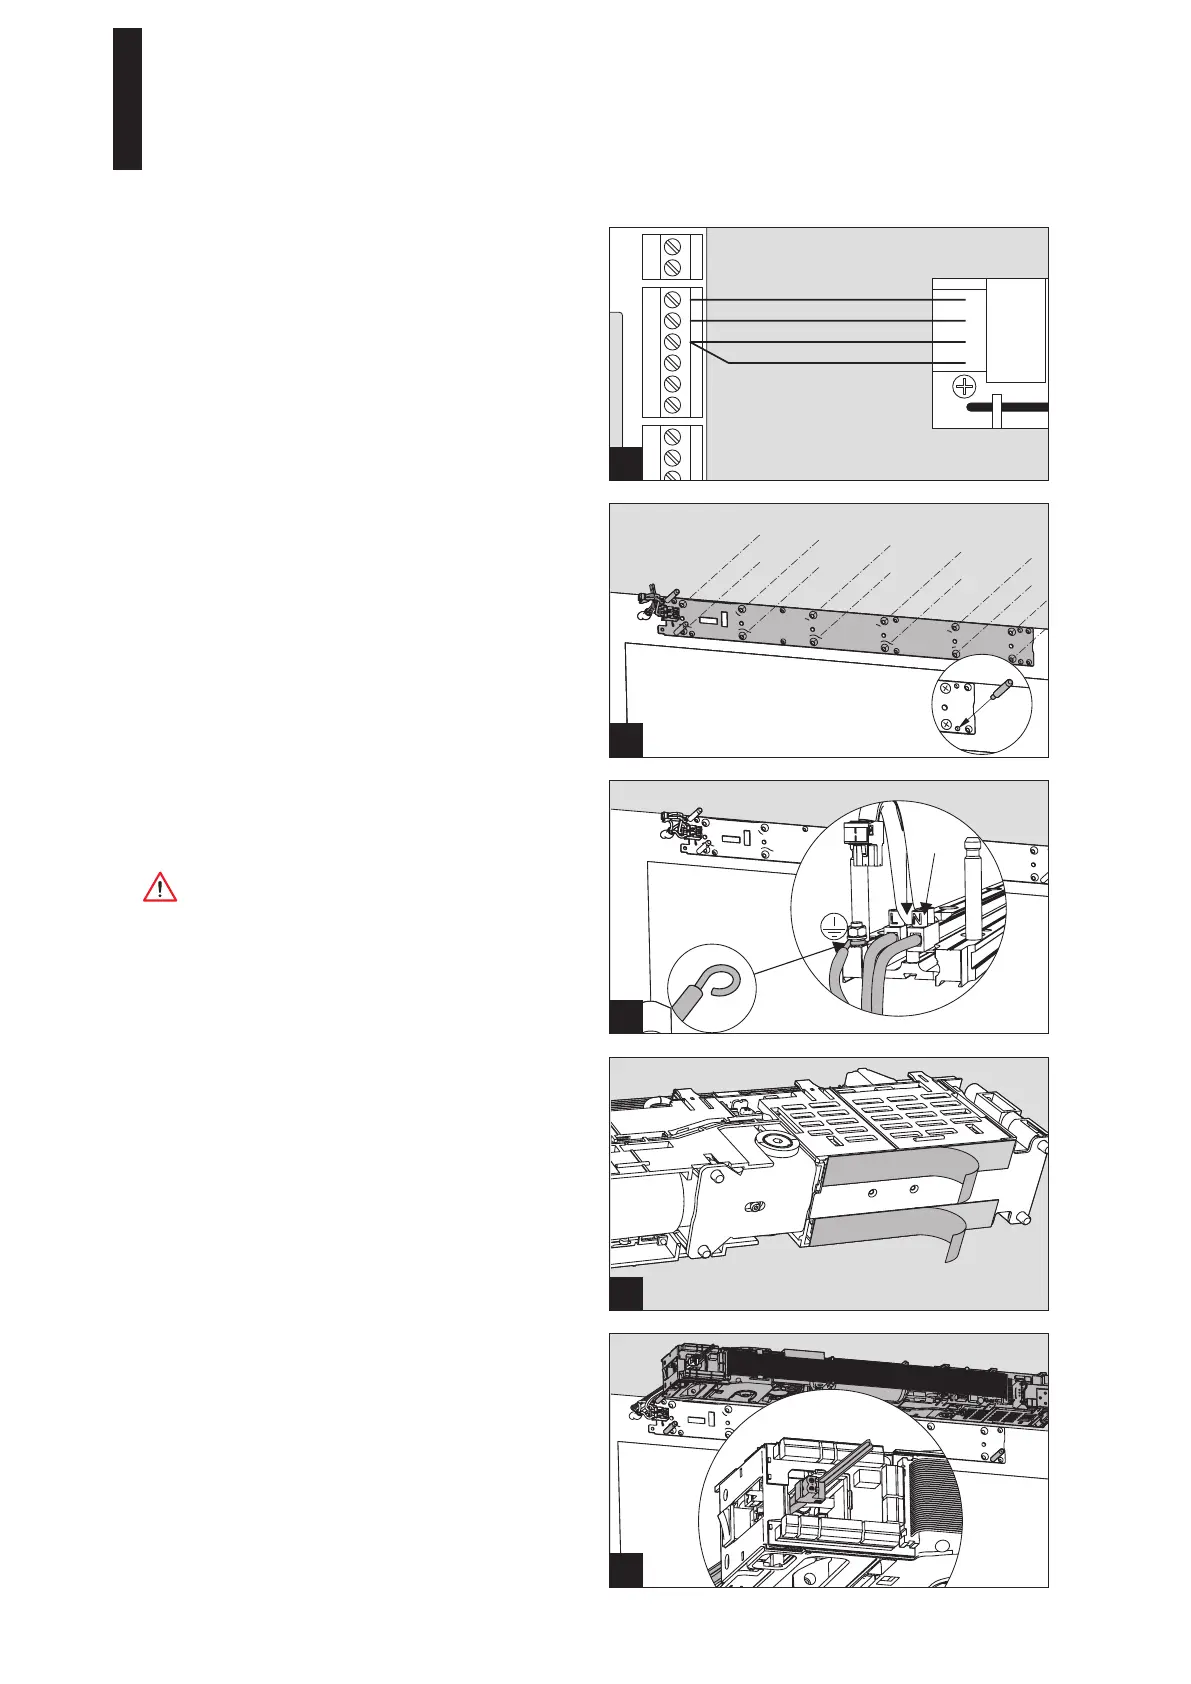
5.3 Mounting the mounting plate
1. Fasten the mounting plate with 12 screws into the
prepared holes.
For the fastening, use dowels and screws that match
the background.
2. Use a hammer to drive the supplied holding pin into
the lower one of the 2 holes.
ED 100, ED 250
—
20

 Loading...