2
3
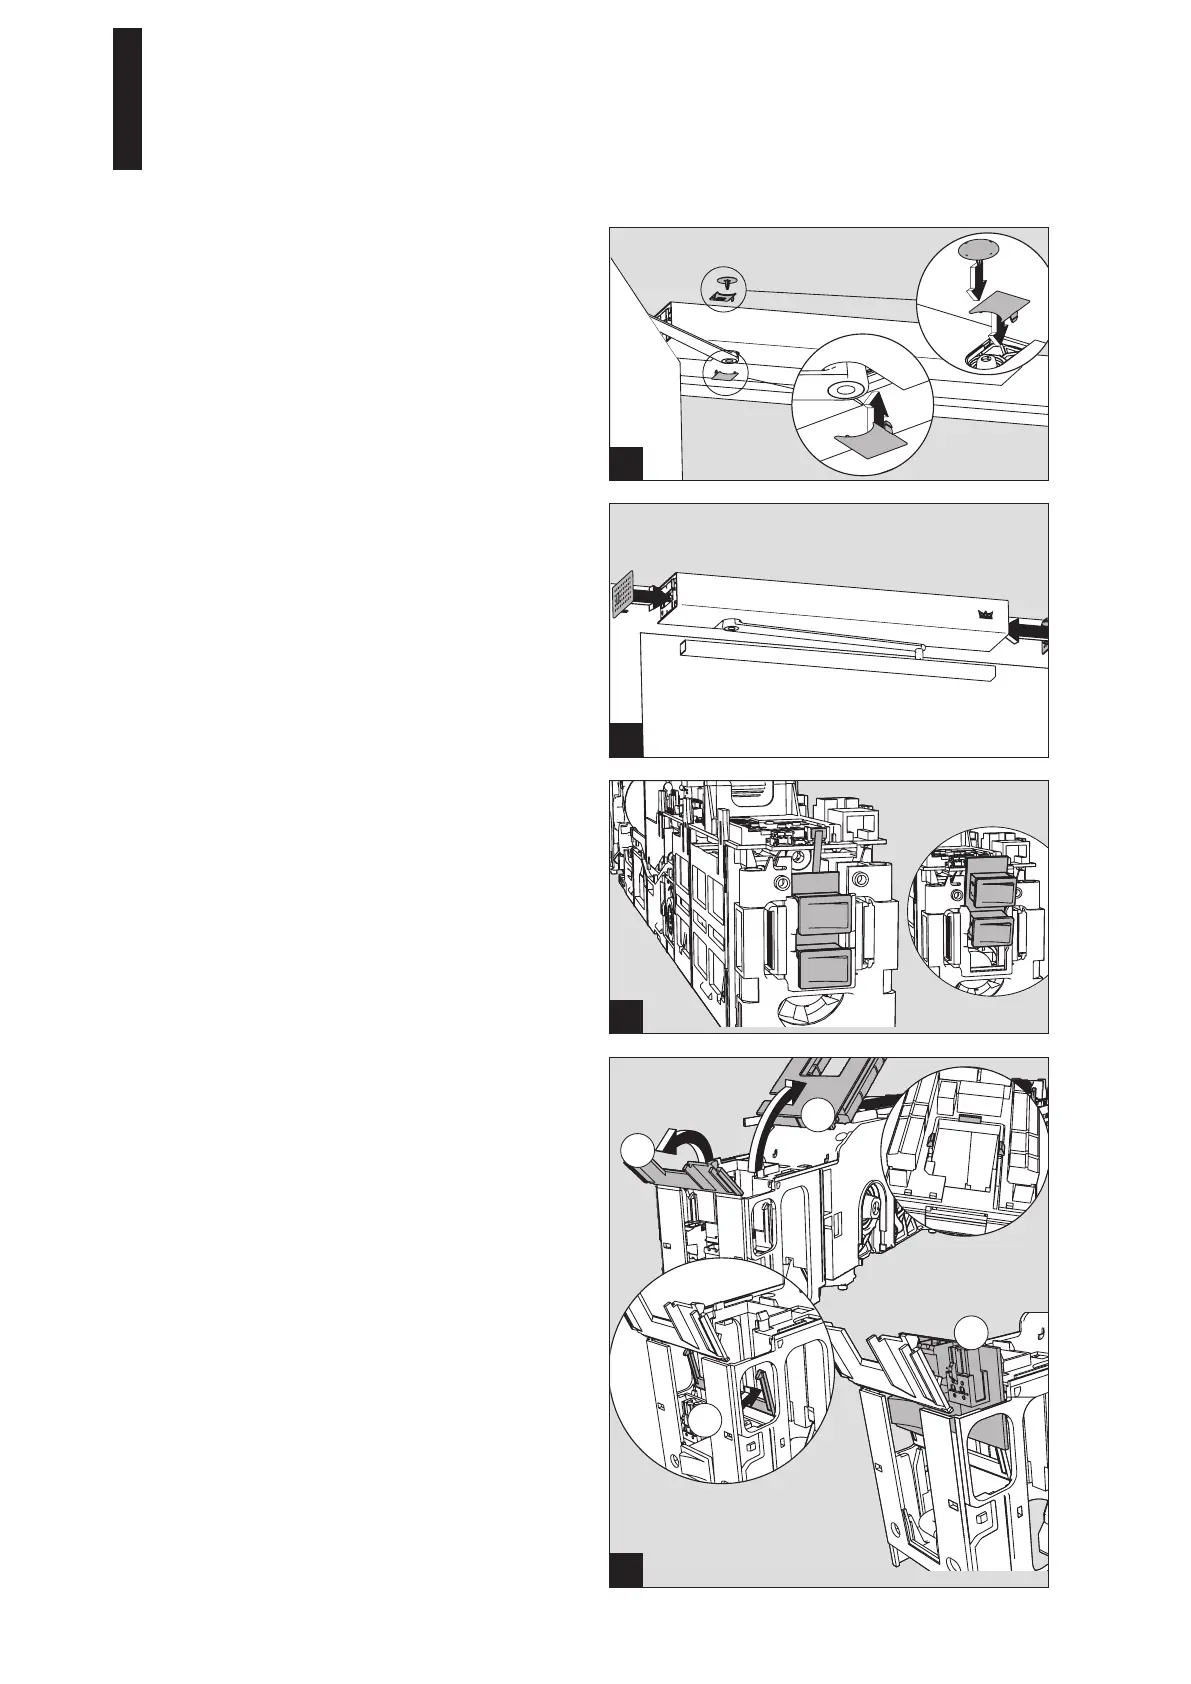
2. Attach the axis covers.
3. Attach the side covers.
On the side with the program switch, you can vary
the insertion depth using the notches in order to
compensate for slight differences in length of the
cover.
3.
4.
1.
2.
1
2
5.17 Installing the 2-panel door (optional)
Proceed as follows before mounting the drive units:
1. Disconnect the connecting cable on both drives.
2. Remove the boards with the internal program switches
upwards.
3 Press the 3 clamps on the drive unit, which is not
installed on the side of the mains connection, on the
connection board inward and remove the connection
board.
4 Open the 2 covers above the mains connection unit.
5. Unplug the connector.
6. Remove the mains connection unit.
7 Close the 2 covers and insert the connection board.
ED 100, ED 250
—
25

 Loading...