3
4
5a
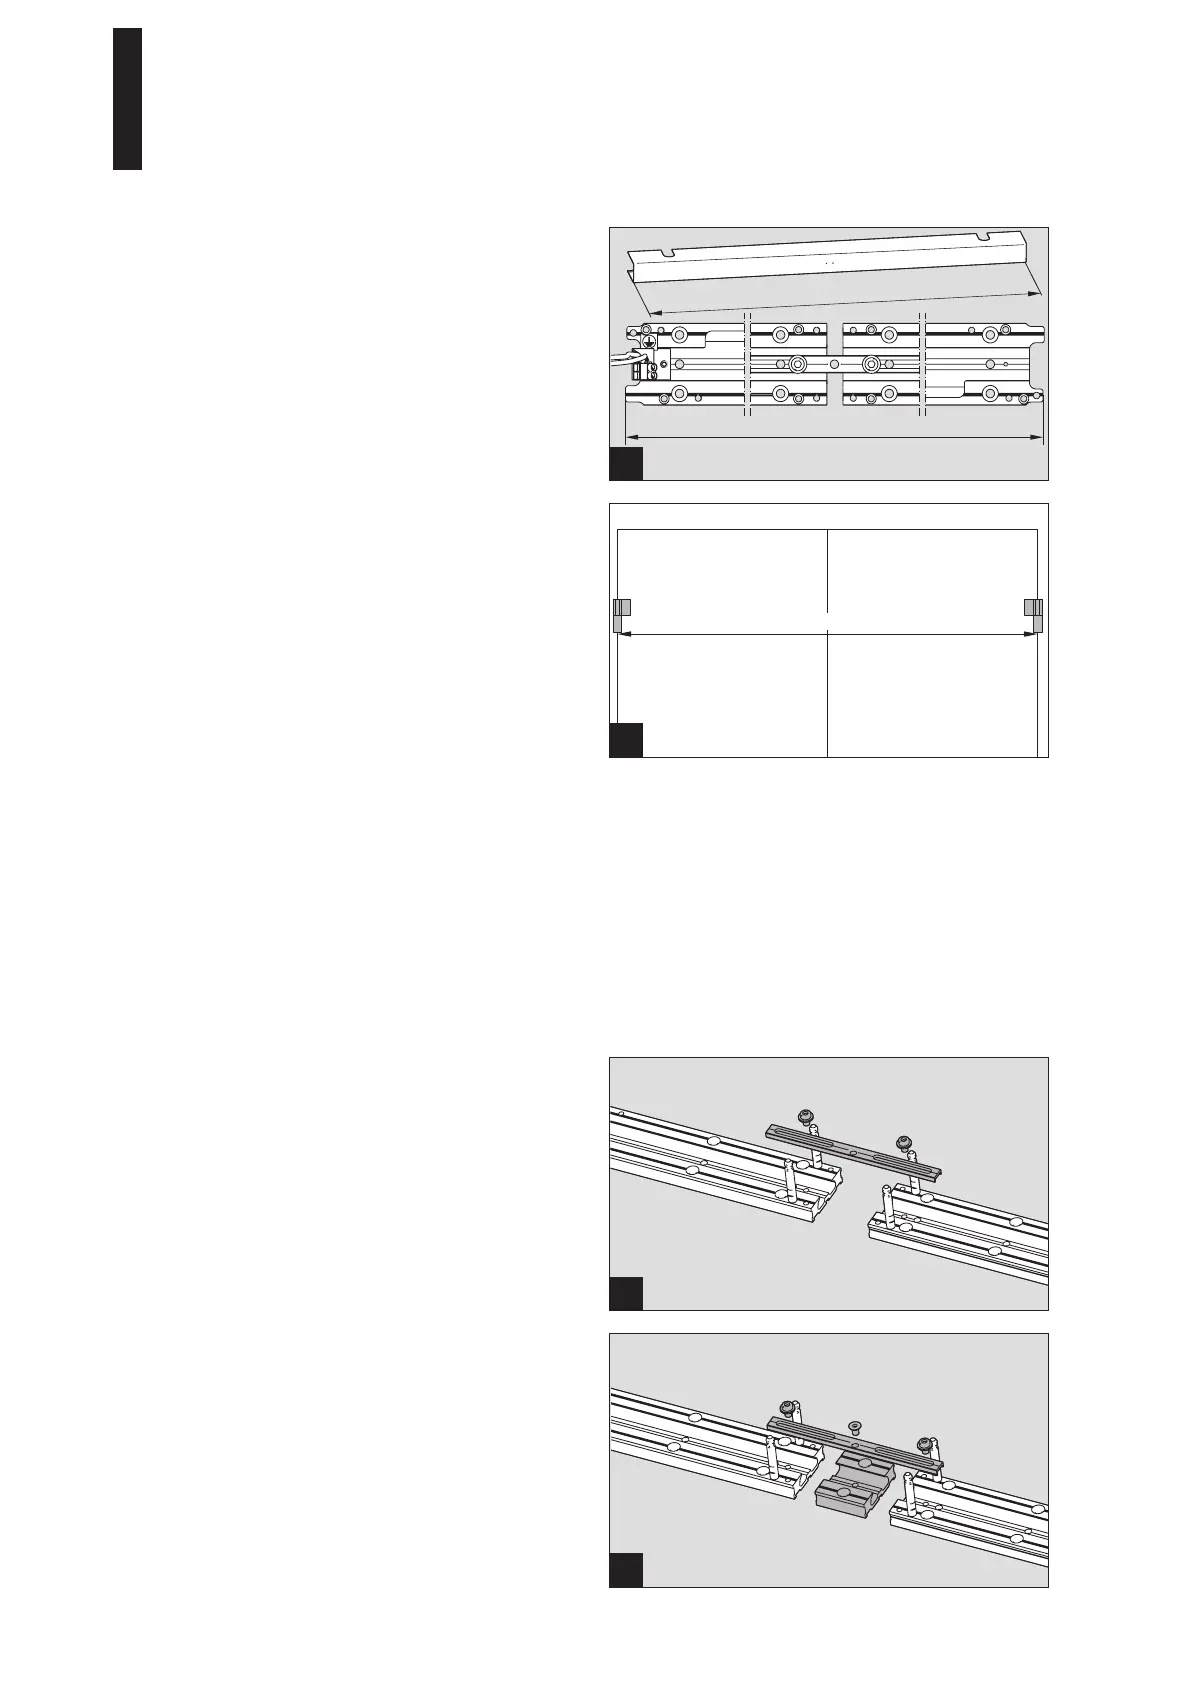
12. Connect the mounting plate
There are 3 options to connect the mounting plates. The
clearance determines which option is used.
Clearance 1,400 – 1,415 mm = connection “A“
Clearance 1,416 – 1,475 mm = connection “B“
Clearance larger than 1,476 mm = connection “C“
8 Place the mounting plates on an even base and align it
accurately.
9. Measure the length of the cover and use the formula
Cover length – 91 = X to calculate the length of the
assembled mounting plates.
10. Screw together the mounting plates.
Consider the information shown in figures 4 and
5a – 5c.
After the assembly of the mounting plates, attach the
drive units and check whether the casing fits.
11. Determine the clearance.
Connection “A“
Clearance 1,400–1,415 mm
12.1 Connect the mounting plates with the large connector.
Clearance
5b
Connection “B“
Clearance 1,416–1,475 mm
12.2 Connect the mounting plates with the large connector
and the smaller intermediate plate.
ED 100, ED 250
—
26

 Loading...