2
1
2
1
L1 N
57 57a
1 42
3
1 41
3
1
15
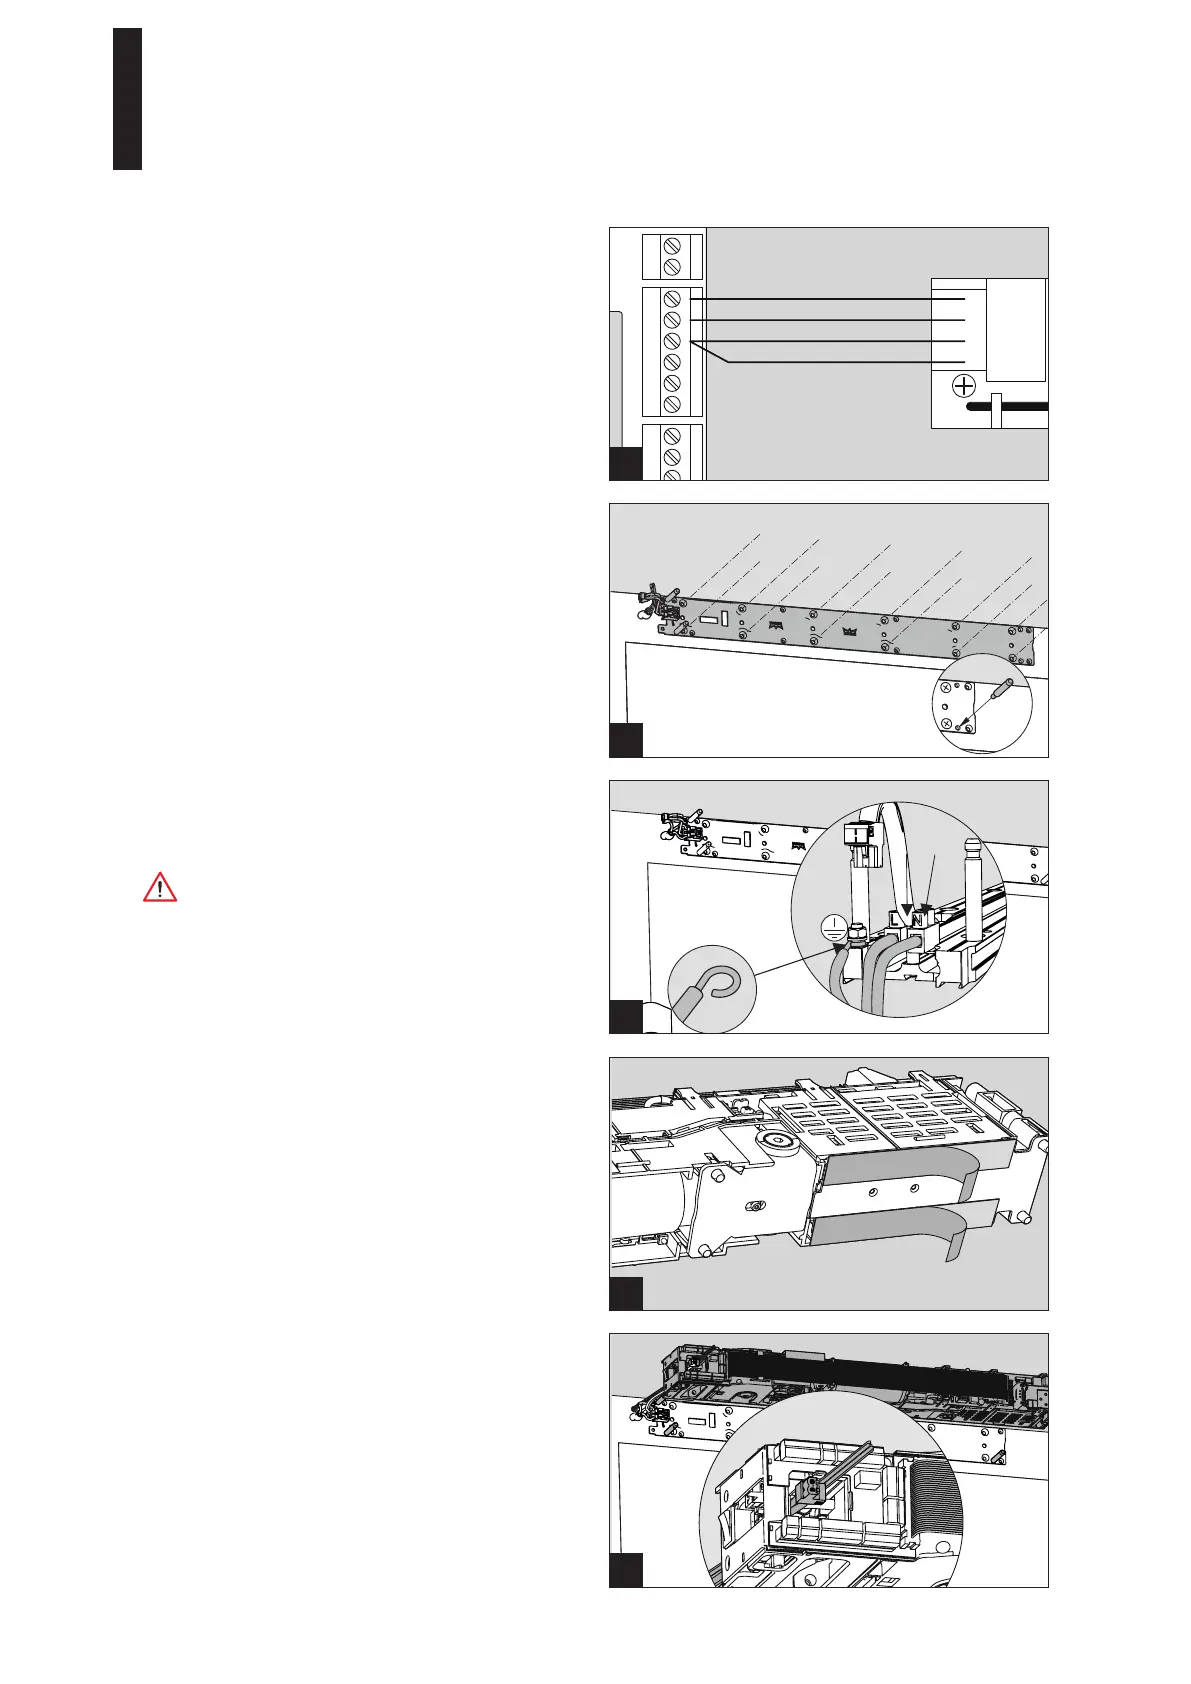
+ 24 V purple
Pulse white
0 V blue
0 V gray
3
3. Connect the radio receiver.
3. Connect the 230 V connection line.
4. Bend the cable end of the grounding line into an eyelet
and screw it down to the grounding screw.
Work on electrical equipment must be performed by
trained specialists (electricians) only.
5.4 Fixing the Drive to the Mounting Plate
1. Pull the protective film off the heat conductive pads on
the underside of the power supply unit.
The heat conductive pads must not get dirty.
2. Guide the connection lines through the housing and
attach the drive to the pins on the base plate.
3. Press on the drive until you hear it snap into place.
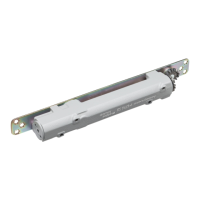
5.3 Installing the Mounting Plate
1. Screw the mounting plate down into the prepared holes
with 12 screws.
Use dowels and screws adapted to the substructure for
fixing.
2. Hammer the supplied retaining pins into the bottom of
the two holes with a hammer.
ED 100, ED 250
—
17DORMA