28 DR
ALL-TERRAIN
FIELD and BRUSH MOWER Safety & Operating Instructions
Removing and Replacing the Blade
Tools Needed:
■ 15/16" wrench or socket
■ Air wrench if available
■ Wear gloves
■ 2 x 4 to brace the blade
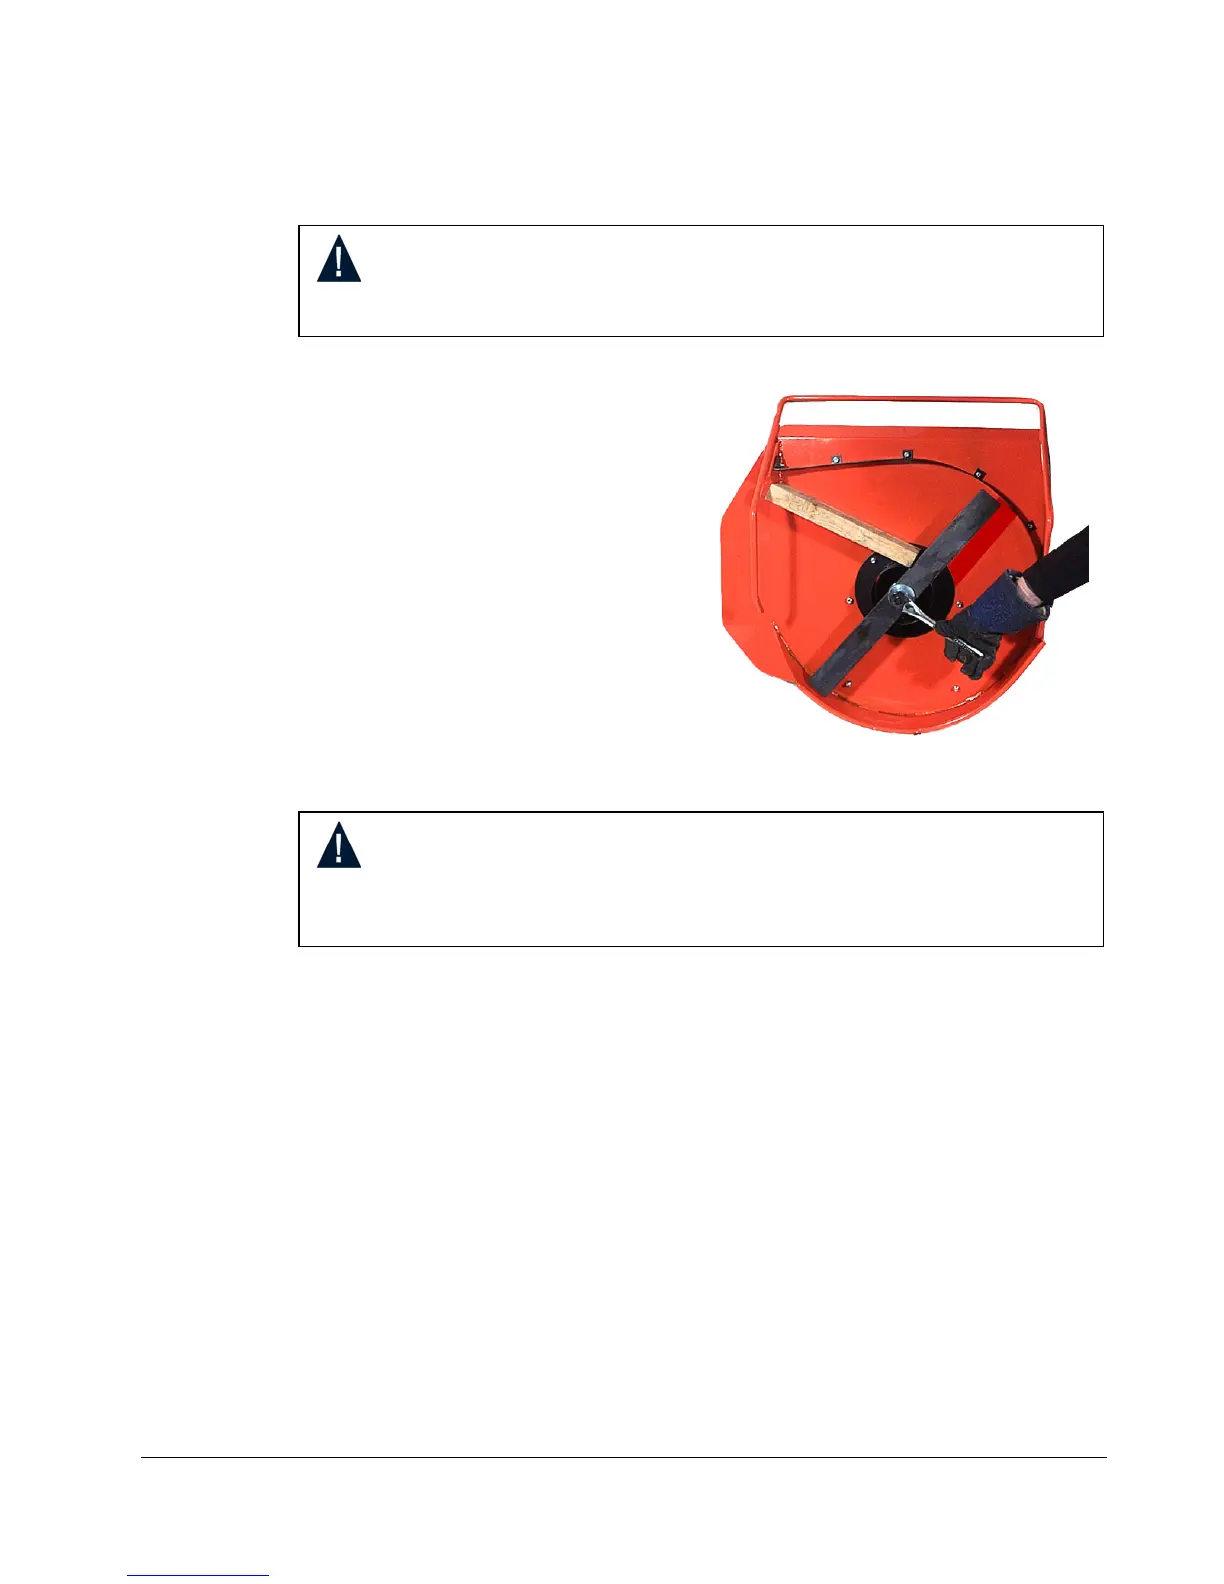
1. Block the blade with a piece of
wood between the blade and the
skid on the chute side of the deck
(Figure 19).
2. Remove the blade lock nut (right-
hand, regular thread) and washer.
3. Remove the blade.
4. Mount the new blade, washer and lock nut.
Note: Be sure the blade is seated completely over the small ridge in the spindle hub
before tightening the lock nut.
Figure 19
WARNING! Before performing any maintenance procedure, stop the
engine and disconnect the spark plug wire(s).
WARNING! Use caution when pushing or pulling the wrench next to
the blade. Wear gloves, if the wrench slips off the nut, you may be seriously
injured.