42 DR
®
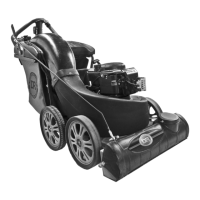
WALK-BEHIND LEAF & LAWN VACUUM
8. Carefully install the Master Chain Link (Figure 25 on page 41) in the reverse order of step 5.
9. Slide the Axle Bearing Mount toward the rear of the machine, to take up the slack of the Chain, and
loosely tighten the Bearing Mount Bolts just enough to hold it in place but leaving it movable.
10. Rotate the Left Rear Wheel to find the location where the Drive Chain is tightest, since there are
always slight variations in the sprockets that make the Chain tighter at certain places in its rotation.
11. At the point where the Chain is the tightest, slide the Axle Bearing Mount very slightly forward to
achieve a total slack (up and down travel) of 1/4" to 1/2" in the Chain when measured halfway
between the Axle Sprocket and the Transmission Sprocket, and then tighten the Axle Bearing
Mount Bolts.
12. Rotate the Left Rear Wheel several times and listen for a “popping” or “clacking” noise. This noise
indicates too much tension on the Chain. If this is the case, loosen the Axle Bearing Mount Bolts
and slide the Mount very slightly forward to loosen the Chain just a little, and then recheck it.
13. Retighten the Axle Bearing Mount Bolts and reinstall the Belt Cover.
14. Reconnect the Spark Plug Wire.
End of Season and Storage
• WHEN PERFORMING ANY MAINTENANCE, YOU MUST FIRST SHUT OFF THE ENGINE, WAIT FIVE
(5) MINUTES TO ALLOW PARTS TO COOL AND DISCONNECT THE SPARK PLUG WIRE, KEEPING IT
AWAY FROM THE SPARK PLUG.
• EMPTY THE DEBRIS BAG TO PREVENT SPONTANEOUS COMBUSTION DUE TO DECAYING MATERIAL.
NOTE: Please refer to the Engine Owner’s Manual for engine-specific procedures.
• Change the oil.
• If your DR WALK-BEHIND LEAF & LAWN VACUUM will be idle for more than 30 days, we
recommend using a gas stabilizer. This will prevent sediment from gumming up the carburetor. If
there is dirt or moisture in the gas or tank, remove it by draining the tank. Completely fill the tank
with fresh, unleaded gas and add the appropriate amount of stabilizer or gasoline additive. Run
the engine for a short time to allow the additive to circulate.
• Remove the spark plug and pour about 1 ounce of motor oil into the cylinder hole. Replace the
plug and pull the recoil starter rope until you feel strong resistance. This will coat the piston and
seat the valves to prevent moisture buildup.
• Clean or replace the air filter.
• Clean dirt and debris from the cylinder head cooling fins, impeller housing, debris screen, and
muffler area of the engine.
• Clean out residual debris from the Nozzle.
• Clean the Debris Bag. See page 28.
• For Electric-Start models, store the battery in a dry area that will not freeze. If you will not use the
machine over a long period, charge the battery every four to six weeks. See page 34.