CALL TOLL FREE 1-800-DR-OWNER 15
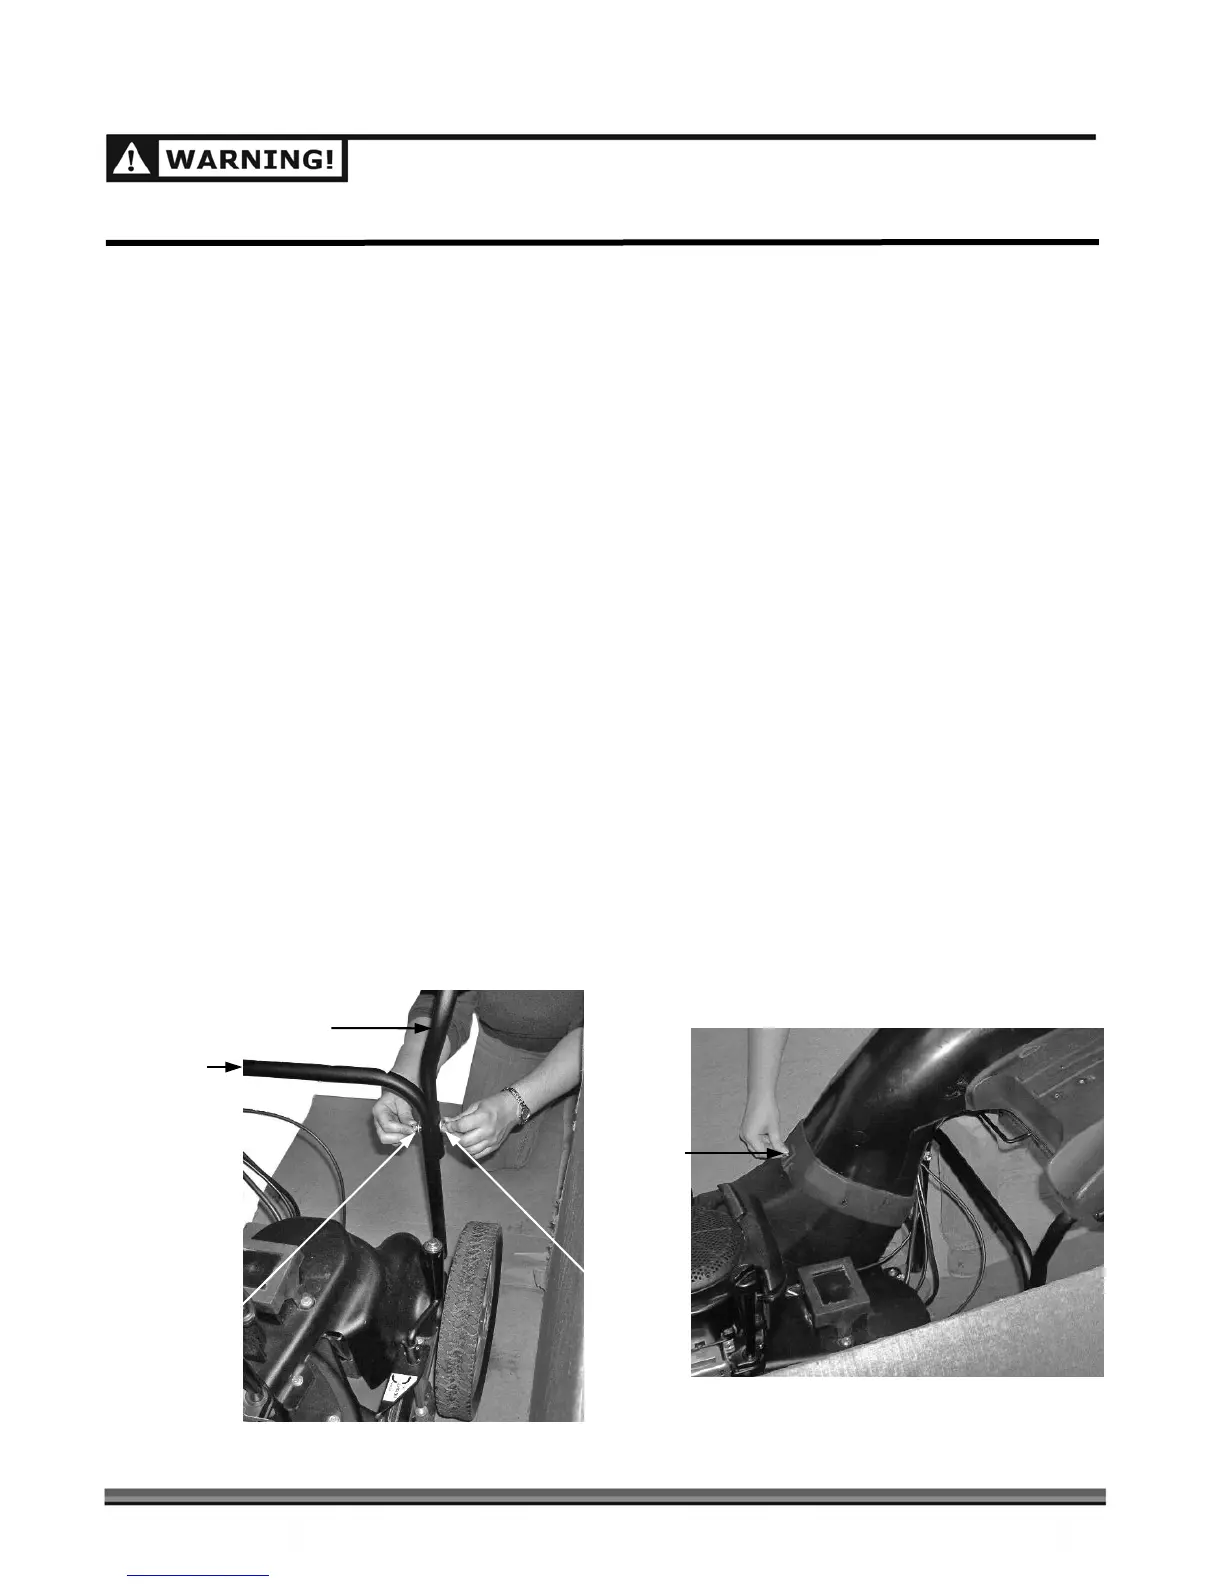
Figure 4a
Figure 4b
BEFORE PROCEEDING WITH THE ASSEMBLY, DISCONNECT THE SPARK PLUG WIRE TO PREVENT
ACCIDENTAL STARTING.
Attaching the Top Shield/Upper Handle Assembly
Tools Needed:
• (2) 7/16" Wrench or Socket
• (2) 1/2" Wrench or Socket
NOTE: Reference the previous page for a description of the hardware.
Tip: For ease of assembly, you may want to remove the Debris Bag prior to attaching the Top Shield/Upper
Handle Assembly by releasing the two (2) Rubber Flexible Latches and sliding the Debris Bag out of
the Top Shield Assembly Channel (reference Figure 8, in the reverse order, on page 18).
NOTE: The hardware required for the next steps is shipped already installed in the Lower Handle Brace. Remove
this hardware, noting the orientation, before proceeding.
1. Place the Top Shield/Upper Handle Assembly on the Lower Housing (Figure 4b) and then place the Left
Upper Handle Brace (Figure 4a) against the outside of the Left Lower Handle Brace and line up the
mounting holes.
2. Install a 5/16"-18 x 1-3/4" Bolt with a 5/16" Flat Washer through the Upper and Lower Handle Braces
from the outside (Figure 4a).
3. Attach the Right Upper Handle Brace to the Right Lower Handle Brace at this time. This will hold the
Handle Assembly in place.
4. Install a 5/16" Flat Washer followed by a 5/16"-18 Lock Nut to each of the Left and Right 5/16" Bolts
(Figure 4a) and only finger tighten at this time.
5. Install a 1/4"-20 Bolt with a 1/4" Flat Washer through the front mounting hole in the Top Shield. Thread
the Bolt into the Captive Nut in the Lower Housing (Figure 4b). Do not tighten at this time.
6. Now you can safely roll the machine out of the shipping carton.
Left Upper
Handle Brace
Left Lower
Handle Brace
5/16" Washer and
5/16"-18 Lock Nut
5/16"-18 x
1-3/4" Bolt
and 5/16"
Washer
Top Shield/Upper
Handle Assembly
Lower Housing
1/4"-20 Bolt
and Washer