CALL TOLL FREE 1-800-DR-OWNER 17
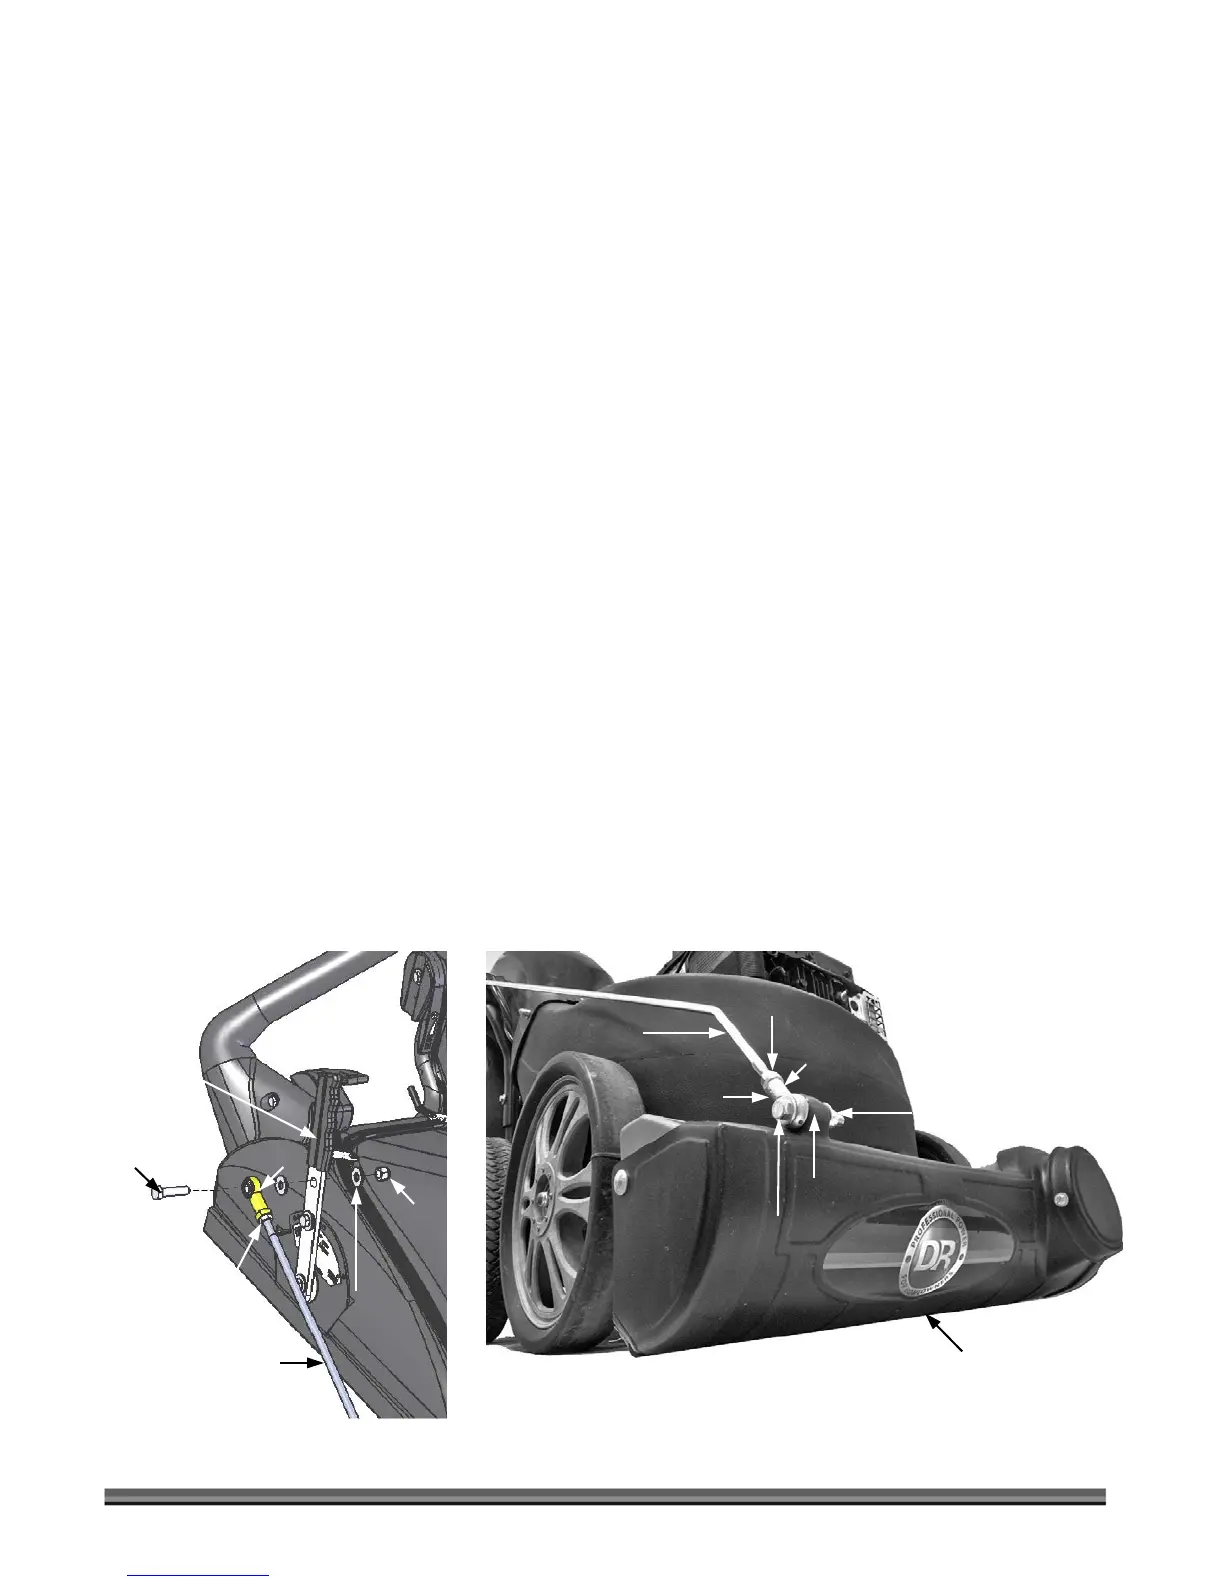
Attaching the Nozzle Door Rod
Tools Needed:
• (2) 9/16" Wrench or Socket
NOTE: Reference page 14 for a description of the hardware.
1. Locate the Nozzle Door Rod and two (2) Ball-Joints.
2. Thread a Ball Joint on each end of the Nozzle Door Rod, but do not tighten at this time.
3. Insert a 3/8"-16 x 1-1/2" Bolt with a 3/8" Flat Washer through the Ball-Joint at the straight end of
the Nozzle Door Rod (Figure 6).
4. Insert the Bolt from step 3 through the Mounting Hole in the Nozzle Door Lever (Figure 6).
5. Install a 3/8" Flat Washer followed by a 3/8"-16 Lock Nut on the Bolt from step 4 (Figure 6) and
tighten with 9/16" Wrenches or Sockets.
NOTE: Do not over tighten. Tighten until snug and then back off 1/2 a turn.
6. Insert a 3/8"-16 x 2-1/2" Bolt with a 3/8" Flat Washer through the Ball-Joint at the other end
(angled end) of the Nozzle Door Rod (Figure 7).
7. Insert the Bolt from step 6 through the mounting hole in the Nozzle Door (Figure 7) and install a
3/8" Flat Washer followed by a 3/8"-16 Lock Nut. Do not tighten at this time.
8. Using the Nozzle Door Lever, make sure the Nozzle Door opens and closes all the way. Reference
“Vacuum Nozzle Door Operation” on page 27. Make any adjustments by screwing the Ball-Joint
End in or out at the Nozzle Door connection (Figure 7).
9. After assuring proper Nozzle Door operation, tighten the hardware with 9/16" Wrenches or Sockets.
NOTE: Do not over tighten. Tighten until snug and then back off 1/2 a turn. However, you may now tighten
the Retaining Nuts (Figures 6
&
7) up against the Ball-Joints on the Nozzle Door Rod to prevent
rotation.
Figure 7
Figure 6
Nozzle Door
Lever
Nozzle Door
Mounting Hole
ngled End of
Nozzle Rod
Adjust Ball-
Joint here
Retaining Nut
Retaining
Nut
Ball-Joint
Ball-Joint
Nozzle Door Rod
3/8"-16 x 1-1/2"
Bolt
3/8"-16
Lock Nut
3/8" Flat
Washer,
2 places
3/8"-16 x 2-1/2" Bolt
w/Washer
3/8"-16 Lock Nut
w/Washer