CALL TOLL FREE 1-800-DR-OWNER 25
Tools Needed:
• 7/16" wrench or socket
• 1/2" wrench or socket
• Gloves
1. Drain the gas and oil.
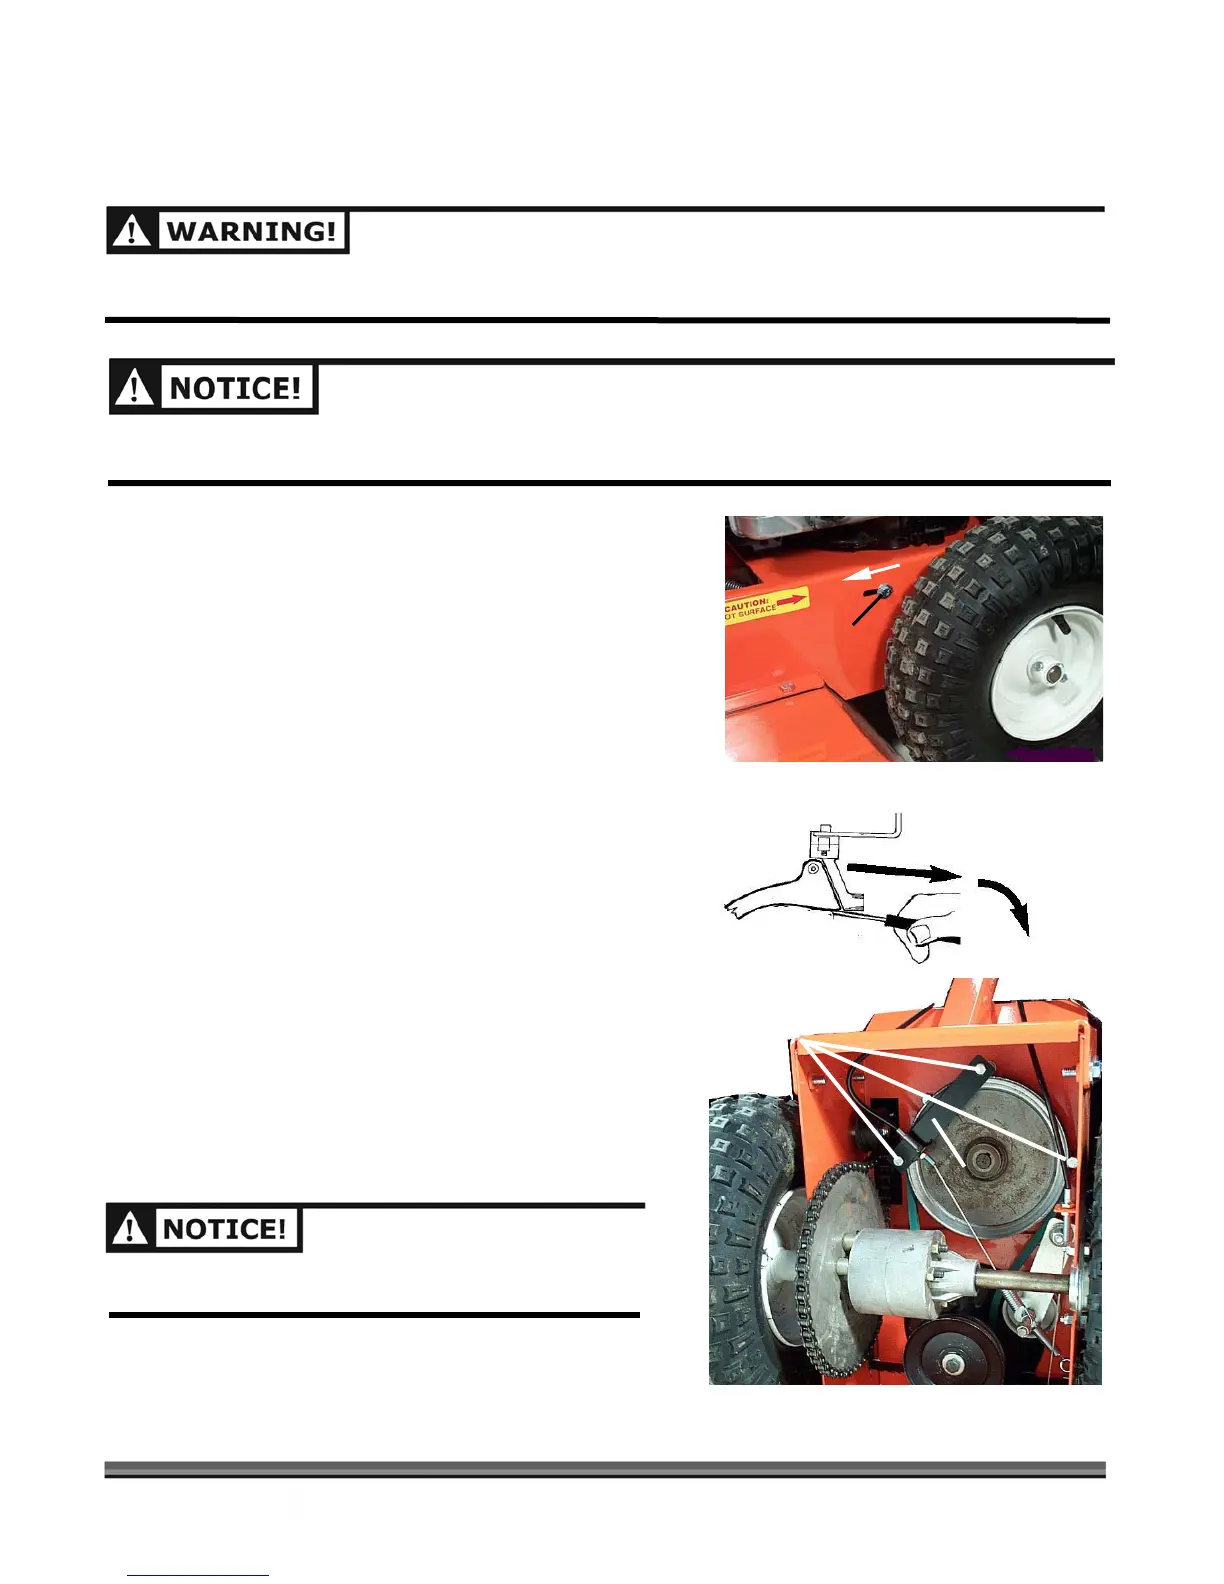
2. Loosen the two outside Belt Retainer Bolts on the
right and left side of the machine near the wheels
and slide them forward (Figure 13).
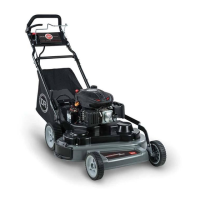
3. Release the Clutch Control Cable from the handle by
pulling back and down (Figure 14).
4. Remove the Blade Belt following the instructions as
outlined on the previous page.
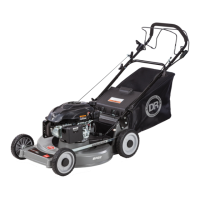
5. With the machine on its side, remove the two (2)
Bolts and the Clutch Cable Bracket and the third Belt
Guide Bolt to the right of the Pulley (Figure 15).
6. Remove the Belt from the Pulleys and re-install the
new Belt by reversing the above procedure.
7. Check the Wheel Clutch Adjustment; see page 27.
To Replace the Drive Belt
BEFORE PERFORMING ANY MAINTENANCE PROCEDURE, STOP THE ENGINE AND DISCONNECT THE
SPARK PLUG WIRE.
USE ONLY DR BELTS ON YOUR MACHINE. THEY HAVE BEEN THOROUGHLY TESTED AND PROVEN FOR
MANY HOURS OF USE.
Bracket
Figure 13
Figure 14
Figure 15
Belt Retainer Bolt(s)
Remove Bolts
BE CERTAIN TO FILL THE ENGINE WITH OIL BEFORE
STARTING THE ENGINE
SEE PAGE 14.