26 DR
®
SCOUT
FIELD and BRUSH MOWER
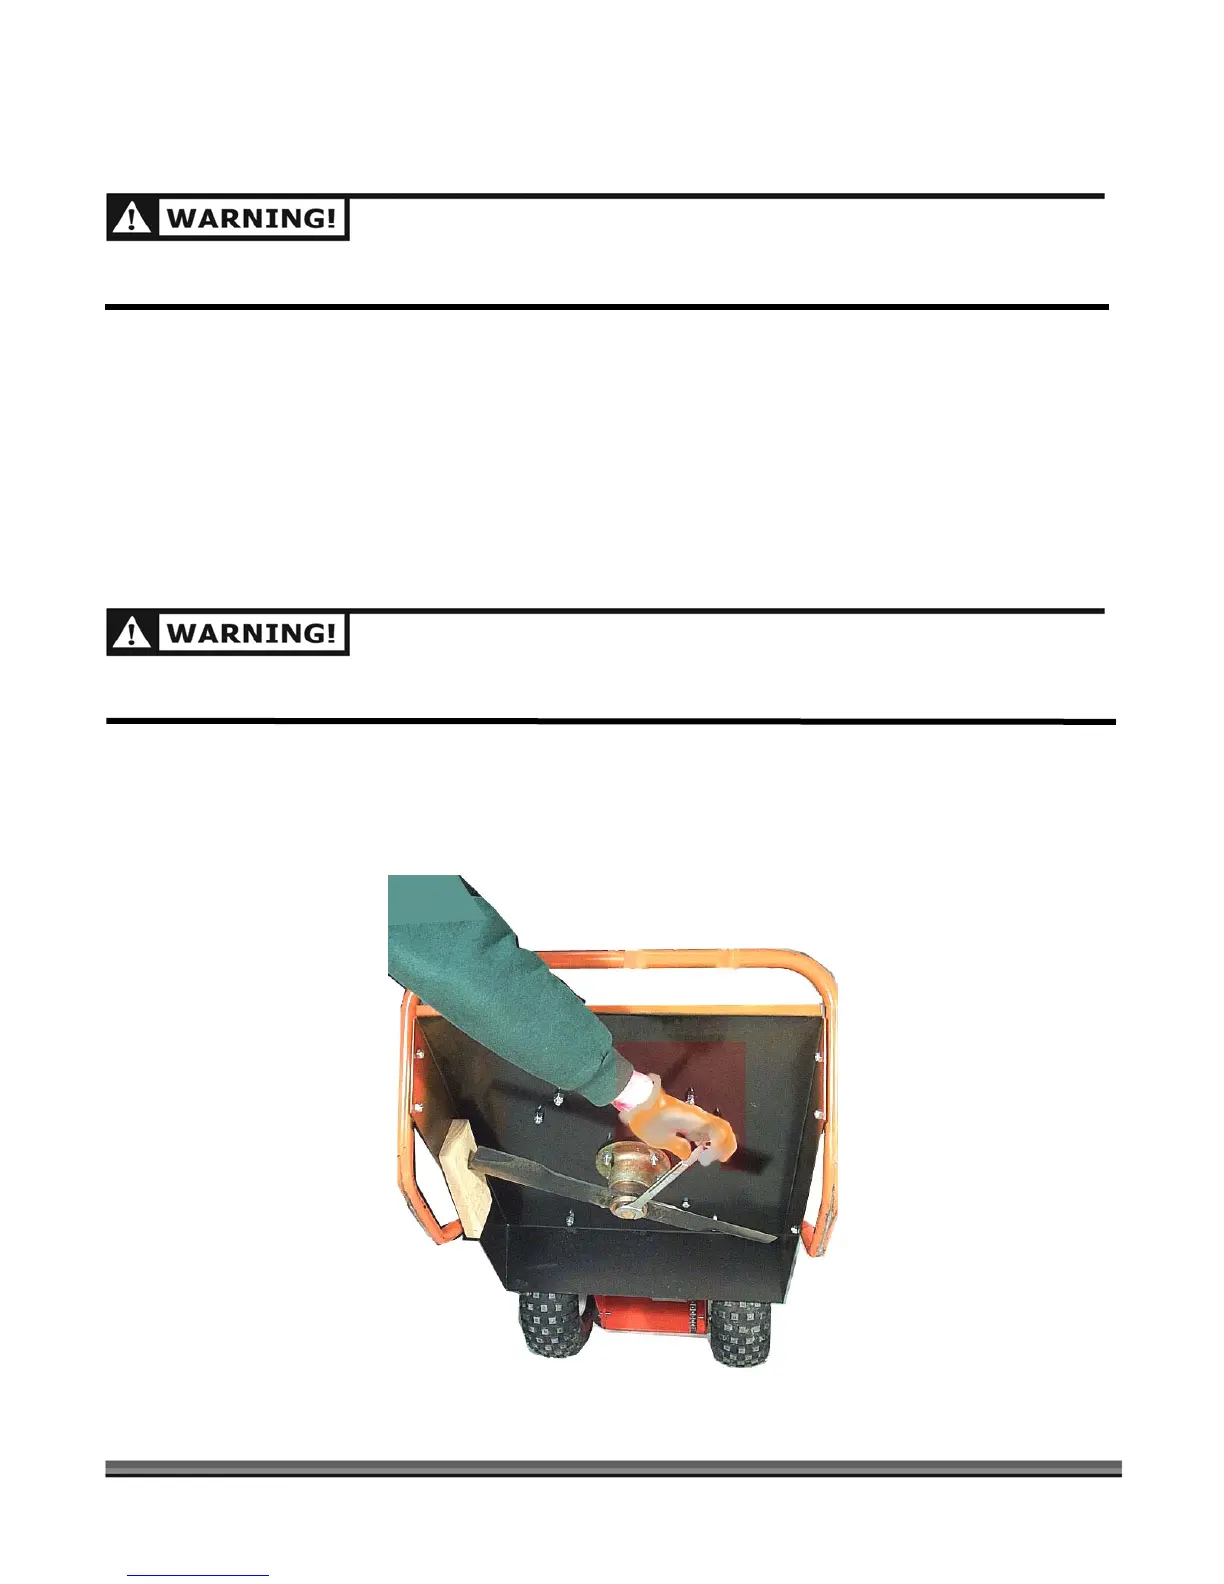
Removing and Replacing the Blade
BEFORE PERFORMING ANY MAINTENANCE PROCEDURE, STOP THE ENGINE AND DISCONNECT THE
SPARK PLUG WIRE.
Tools and Supplies Needed:
• 15/16" wrench or socket
• Gloves
• 2" x 4" to brace the blade
1. Block the Blade with a piece of wood between the Blade and the skid on the chute side of the deck
(Figure 16).
2. Remove the Blade Bolt (right-hand, regular thread) and washer.
USE CAUTION WHEN PUSHING OR PULLING THE WRENCH NEXT TO THE BLADE. WEAR GLOVES; IF THE
WRENCH SLIPS OFF THE BOLT, YOU MAY BE SERIOUSLY INJURED.
3. Remove the blade.
4. Mount the new Blade, washer and Bolt.
NOTE: Be sure the blade is seated completely over the small ridge in the spindle hub before tightening the
Bolt.
Figure 16