Maintenance
Page 22 of 40
9023744 - 3rd edition - October 2005
Ex-sensor Replacement
Transmitter Polytron Ex
– Use only Dräger
Sensors listed in the Order List page 31.
— If the Ex-sensor is not to be replaced by a Ex-sensor with the same sensor current
or sensor voltage (see page 25), the procedure to be employed is described in
the section entitled “Installing Ex-sensor in the Transmitter”, page 13.
— The procedure outlined below may only be employed if sensor current resp. sen-
sor voltage tally:
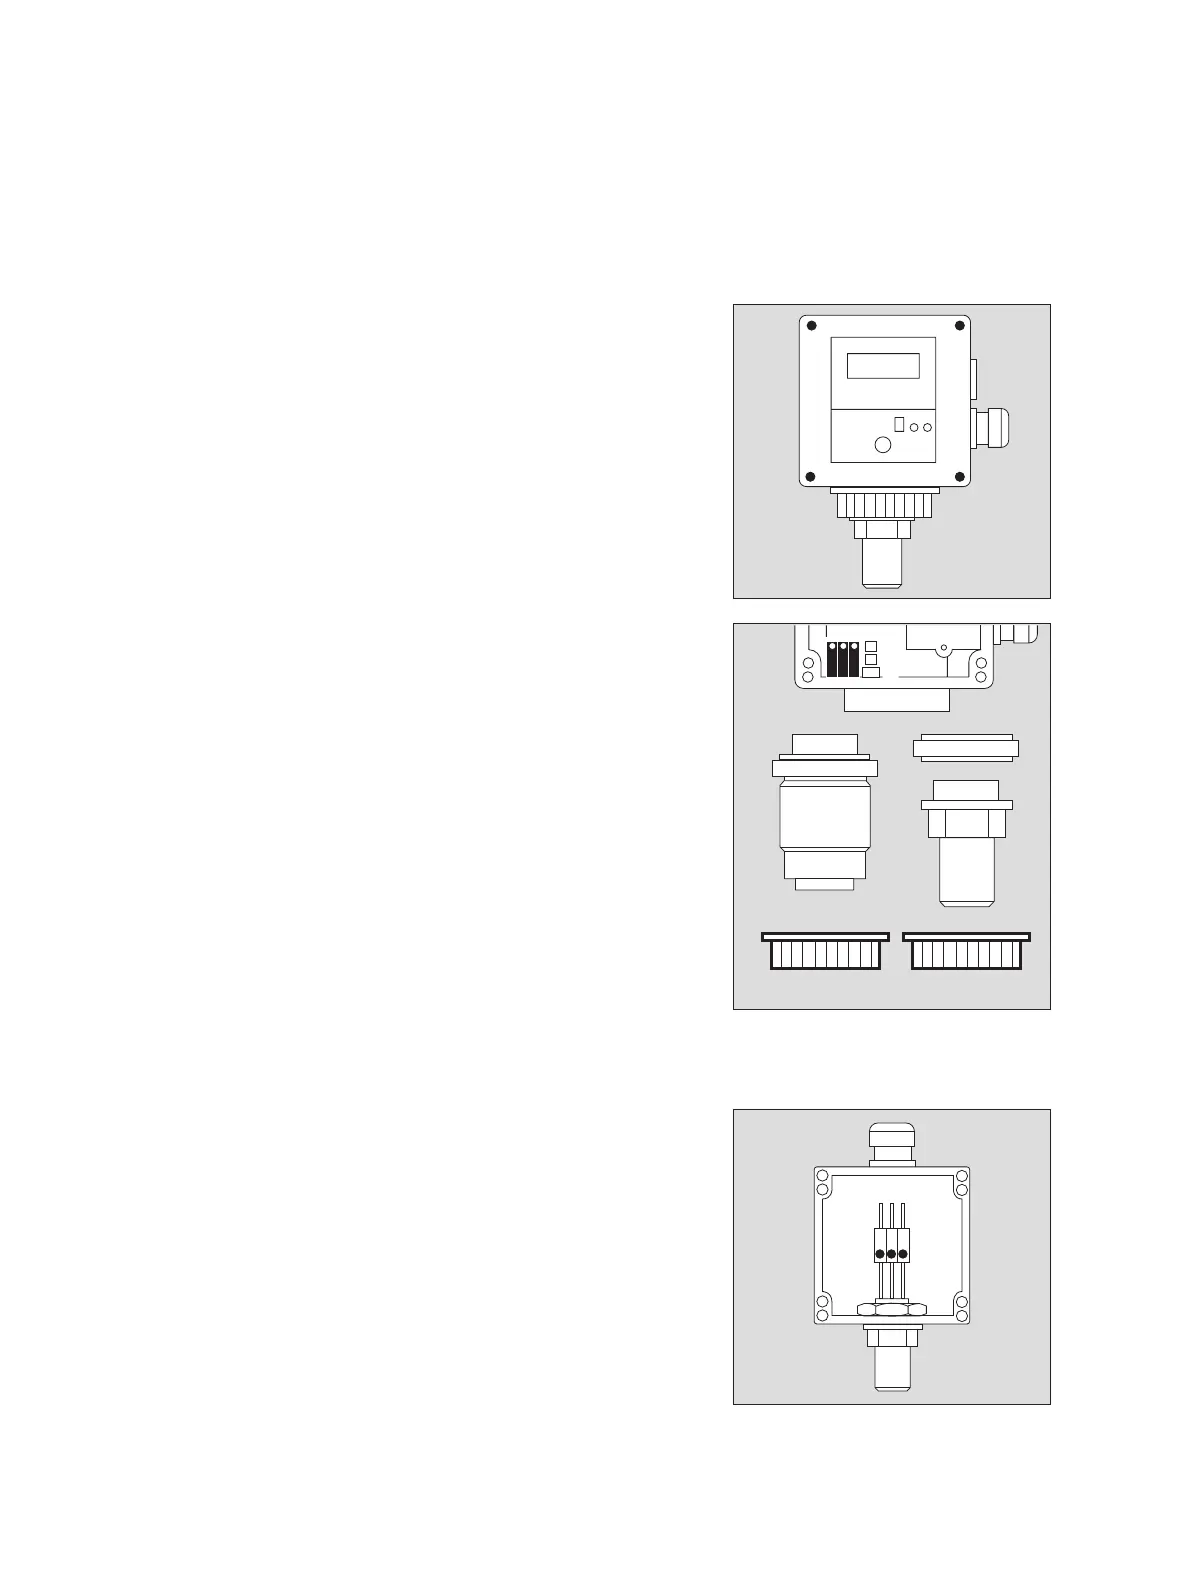
1 Loosen hexagon socket-head bolts on upper side and remove top section.
2 Disconnect cable of old Ex-sensor and
3 unscrew bayonet ring – remove Ex-sensor.
4 Remove Ex-sensor from packaging, screw it into the adapter plate of the transmit-
ter, observe gasket and lock with bayonet ring.
● Make sure to use such Ex-sensors only that are specified in the Order List,
page 25.
3 Mount Ex-sensor to the transmitter, observe gasket and lock with bayonet ring.
2 Connect cable of Ex-sensor.
1 Screw upper section onto housing using hexagon socket-head bolts.
— The sensor replacement can be carried out without interrupting supply voltage in
explosion-hazard areas, since the sensor circuit is intrinsically safe.
● The transmitter must be calibrated following sensor replacement (see page 15).
● Allow 10 minutes for new Ex-sensor to warm up.
Transmitter Polytron Ex R
– Use only Dräger Sensors resp. sensing heads listed in the Order List page 25.
— If the sensing head is not to be replaced by a sensing head with the same sensor
current or sensor voltage (see page 25), the procedure to be employed is descri-
bed in the section entitled “Connection between transmitter Polytron Ex R and
sensing head SE Ex”.
— The procedure outlined below may only be employed if sensor current resp. sen-
sor voltage tally:
● Loosen screws on top of sensing head and remove top section.
1 Loosen sensor leads from terminals.
2 Keep hold of the hexagon nut by means of a suitable tool and screw the sensor
out of the nut.
3 Remove old Ex-sensor from housing – fit new Ex-sensor
2 Keep hold of the hexagon nut by means of a suitable tool and screw the sensor
into the nut.
1 Connect leads of Ex-sensor to terminals
brown to 1
yellow to 2
black to 3
● Screw on top section.
— The sensor replacement can be carried out without interrupting supply voltage in
explosion-hazard areas, since the sensor circuit is intrinsically safe.
● The transmitter must be calibrated following sensor replacement (see page 15).
● Allow 10 minutes for new Ex-sensor to warm up.
03523744_1.eps
1
03423744_1.eps
4
2
4
33
03623744_1.eps
1
2
3
123