Programming a JOB
62
-2%&XW6OLW
6(7
ڸ
ڸ
ڸ
ڸ
'RQH
&DQQRWILQLVKFDUGZLWKLQ
IURPWKHWUDLOHGJH
1(;7
-2%&UHDVH
6(7
ڸ
ڸ
ڸ
ڸ
'RQH
&HQWHU
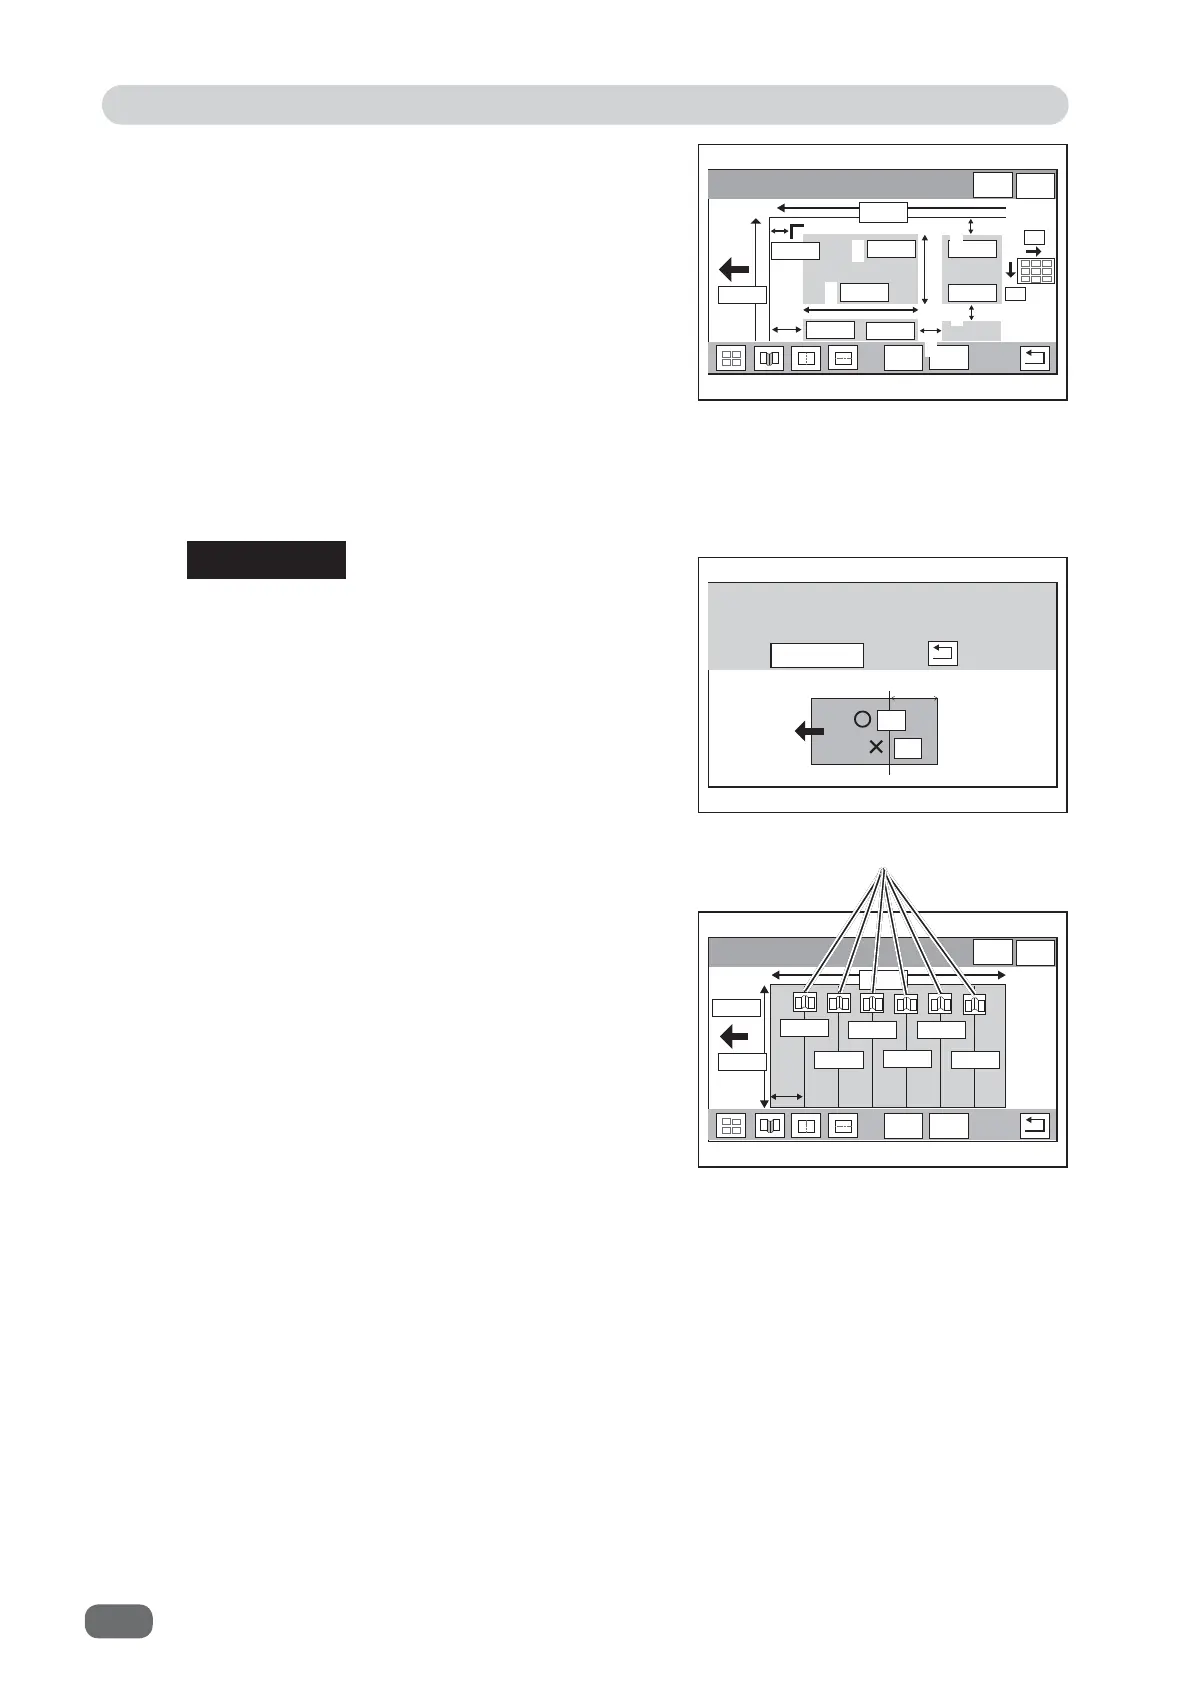
1. Width of the fi nished product
2. Length of the fi nished product
3. Lead cut
4. Gutter cut between the fi nished products
5. Right margin
6. Gutter slit between the fi nished products
7. REG mark position
8. Number of cards in lengthwise
9. Number of cards in widthwise
If the lead margin of the last fi nished product
is within 67 mm from the trail margin,
Cannot
fi nish card within 67 mm from the trail edge.
is
displayed.
Automatic trail cut is
ON
.
Next
: This moves to the next screen.
Back
: This returns to the setting screen. Rest the
settings.
●
Crease
Touch the value on the screen and enter each value
with the NUMERIC keys.
Touching
SET
highlights the next setting value.
If the creaser modules are set in slot 1 and slot 2,
touch the
creaser tool
icon and set the direction of
the
creaser tools
(upward/downward) as shown in
the fi gure on the right.
If only one creaser module is set, you can set
directions of all the creaser tools by setting one
creaser tool
icon.
REFERENCE
●
Cut Slit
Enter each value with the NUMERIC keys.
Touching
SET
highlights the next setting value.
3
4
5
6
7
8
9
1
2
Set a direction of the creaser tool.