A
alexandriapayneSep 7, 2025
How to resolve slitting issues on my Duplo Cutter?
- AamandareedSep 7, 2025
To resolve slitting issues on your Duplo Cutter, replace the slitter.
How to resolve slitting issues on my Duplo Cutter?
To resolve slitting issues on your Duplo Cutter, replace the slitter.
What to do if my Duplo Cutter has no power?
If your Duplo Cutter has no power, check the fuse, the power plug, and ensure that the power board has a 5V and 36V output.
Why is the top margin not even left and right on my Duplo Cutter?
If the top margin is not even left and right on your Duplo Cutter, adjust the side guide, making sure it is at a right angle to the first set of rollers.
What to do if my Duplo Cutter displays 'Check Waste Bin'?
If your Duplo Cutter displays 'Check Waste Bin', check the waste bin interlock switch.
What does it mean when my Duplo Cutter says 'Check Rear Cover'?
If your Duplo Cutter displays 'Check Rear Cover', examine the rear cover interlock switch.
What to do if my Duplo Cutter shows 'Check Top Cover'?
If your Duplo Cutter shows 'Check Top Cover', inspect the top cover interlock switch.
What to do if finish card is not clean and neat on Duplo Cutter?
If the finish card is not clean and neat on your Duplo Cutter, adjust the cutting knife guiding plate. If the problem persists, replace the cutting knife.
How to fix mark error on Duplo Cutter?
To fix a mark error on the Duplo Cutter, check the mark sensor voltage, ensuring it sees paper at 0.2V and a mark greater than 1.8V. You may also need to change the mark sensor and perform a top margin calibration.
What to do if the finish card length is uneven on my Duplo Cutter?
If the finish card length is uneven on your Duplo Cutter, adjust the cutter Assy. frame mounting screw on the side plates and check the driving belt tension.
What to do if there is a jam in Sensor 3 of my Duplo Cutter?
If there is a jam in Sensor 3 of your Duplo Cutter, you should check S3 and the detent torque of the transport motor. If there is no torque, consider replacing the driver board.
Information on the proper disposal of Waste Electrical and Electronic Equipment in Europe.
Defines symbols for substances, preparations, and components in WEEE.
Lists abbreviations for plastic categories used in the parts catalogue.
Lists all accessories provided with the DocuCutter CC-228 machine.
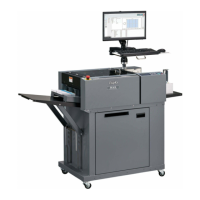
Identifies key components like Power Switch, Control Panel, and Feed Rollers.
Identifies additional components like Waste Bin, Stack Tray, and Slitter Module.
Details the keys and functions for both Simple and Advance control panels.
Explains the purpose of each key on the control panels.
Guides on inserting the waste bin and attaching the stacking tray.
Instructions for connecting the power cord and applying the control panel sticker.
Details how to adjust the paper width using the thumbscrew knob.
Explains paper preparation, loading, and adjusting tray pressure for different paper weights.
Presents 5 predefined jobs with descriptions, finished sizes, and layouts.
Illustrates the layout for business card and 3.5x5 card jobs.
Shows layouts for 8x4 and 7x5 card jobs, noting optional slitters.
Step-by-step guide on how to select a job using the control panel.
Explains how to use the batch count to automatically stop the machine.
How to enter program mode for user-defined jobs.
Steps to adjust finished length, top margin, and gutter length.
Explains the purpose and activation of the cut mark feature.
Details on using Turbo Mode and handling a full waste bin.
Instructions for resetting the counter and clearing paper jams.
Provides solutions for common error messages like 'Out of paper' and 'miss feed'.
Troubleshooting steps for cover, waste bin, and reset errors.
| Cutting Speed | Up to 40 cuts per minute |
|---|---|
| Power Supply | 120V, 60 Hz |
| Dimensions | 20.9" (L) x 17.3" (W) x 11.8" (H) |
| Weight | 44 lbs |
| Cutting Width | 228 mm |
| Maximum Cutting Width | 228 mm |
| Maximum Cutting Height | 15 sheets (80 g/m²) |