DocuCutter 545
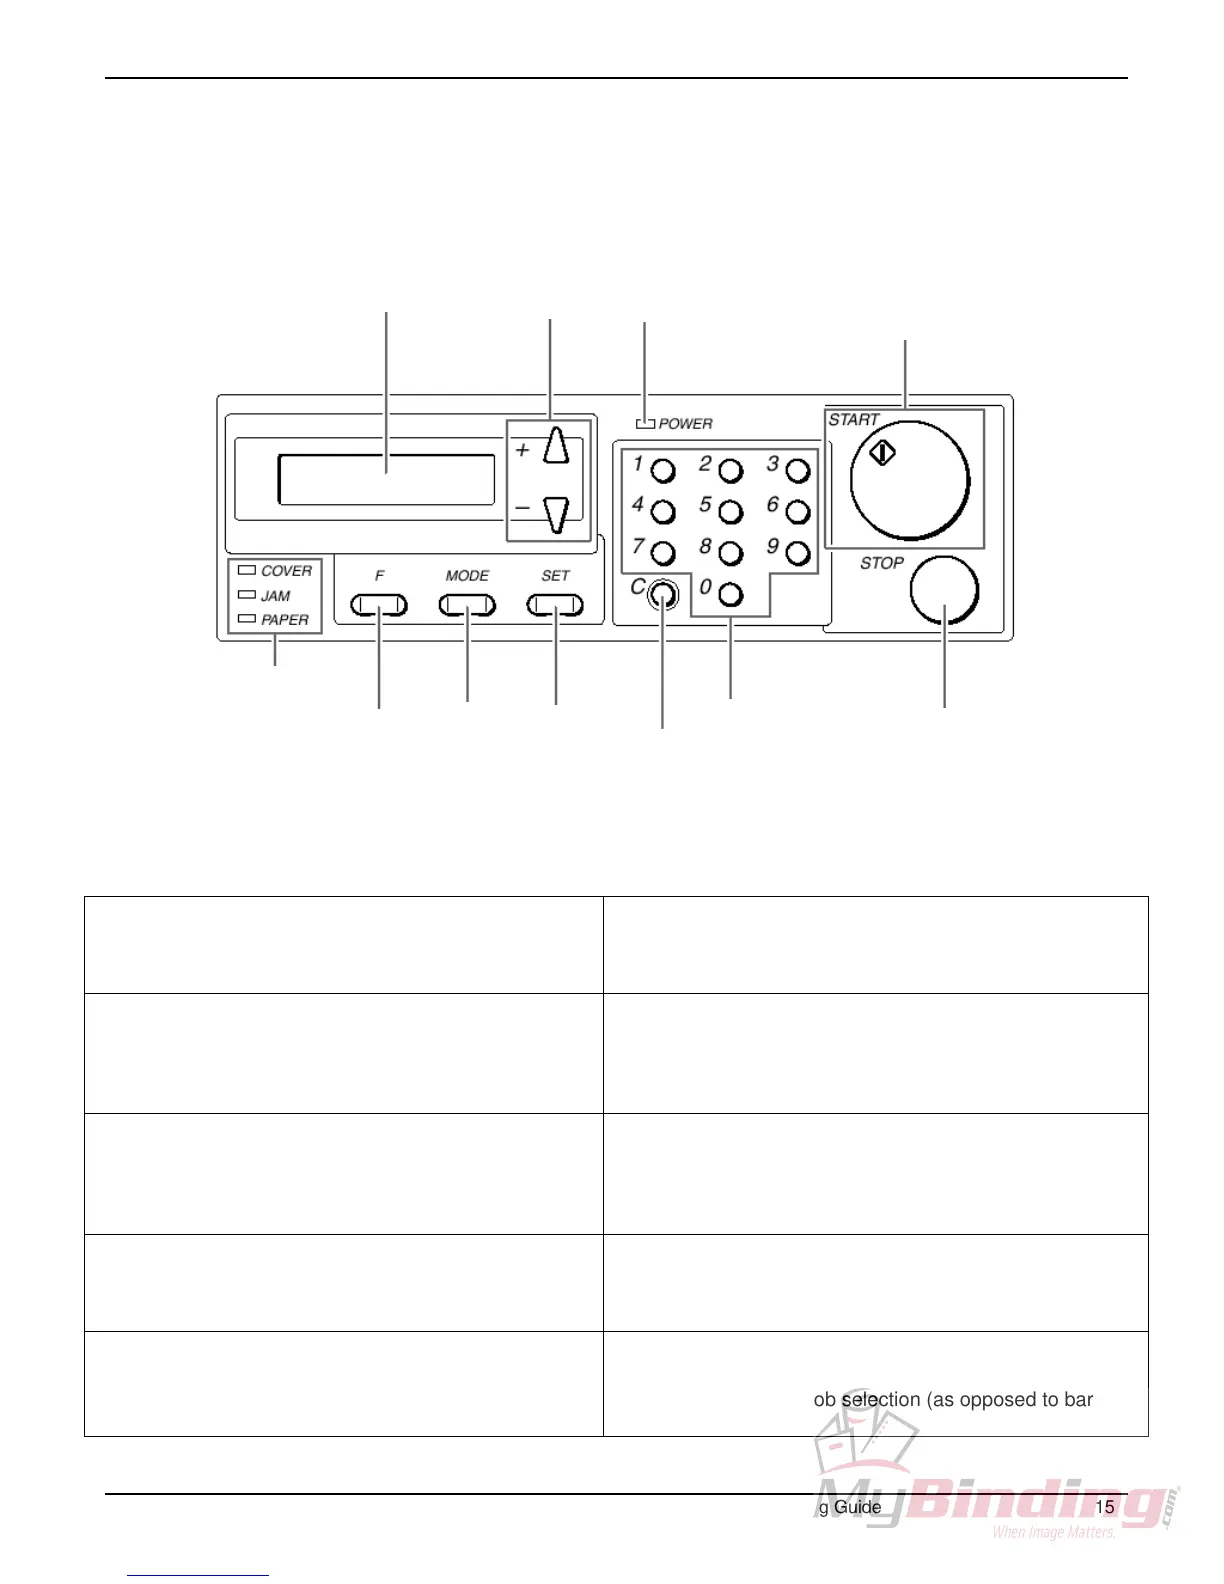
Each of the Control Panel areas is shown in Figure 8
below. The function of each area is described in the table
that follows.
Power Lamp
+ Button
- Button
Start Button
and Start
Lamp
LCD Panel
Cover Lamp
Jam Lamp
Paper Lamp
Numerical
Key Pad
Mode
Button
Set
Button
STOP
Button
F
Button
Clear
Button
Figure 8. The Control Panel
The Liquid Crystal Display (LCD) Panel displays the
status of the machine. Messages are displayed when
an error or paper jam occurs.
The STOP Button stops cutting after the current sheet is
complete. The STOP Button also clears jam indication
after the paper is cleared. While in the service menu the
STOP Button is used to exit various menus.
The <+> Button ejects the document from the
machine at the time of paper jam. In the service
mode, this button is used to advance through the
various menus and increment adjustment values in a
positive direction.
During programming, the Numerical Key Pad enters
preset program numbers and job data.
The< –> Button ejects the document from the
machine at the time of paper jam. In the service
mode, this button is used to advance through the
various menus and increment adjustment values in a
negative direction.
During programming, the CLEAR Button clears data
values. It is also used to clear the total sheets processed
counter.
The POWER Lamp lights up when the power is
switched on.
During programming mode, the SET Button enters data
values. In the HC configuration (AF-100 autofeeder
attached) the SET button is used to process only one
sheet for proofing purposes.
In the HC configuration, (AF-100 autofeeder attached)
the START Button is used to start processing.
While in the stand-alone configuration (DC-545 only,
no AF-100 autofeeder) the START button is not used.
The MODE Button changes the main menu functions.
[RUN] Ready for processing
[SELECT] Manual job selection (as opposed to bar
code)
© 2002, Duplo USA Corporation DocuCutter 545 Training Guide 15