EasyManuals Logo

DURKOPP ADLER 867 Additional Instructions

DURKOPP ADLER 867
20 pages
To Next Page IconTo Next Page
To Previous Page IconTo Previous Page
Page #13 background imageLoading...
Page #13 background image
Assembling the remaining thread monitor
Additional Instructions 867/867-M PREMIUM - 00.0 - 07/2018 11
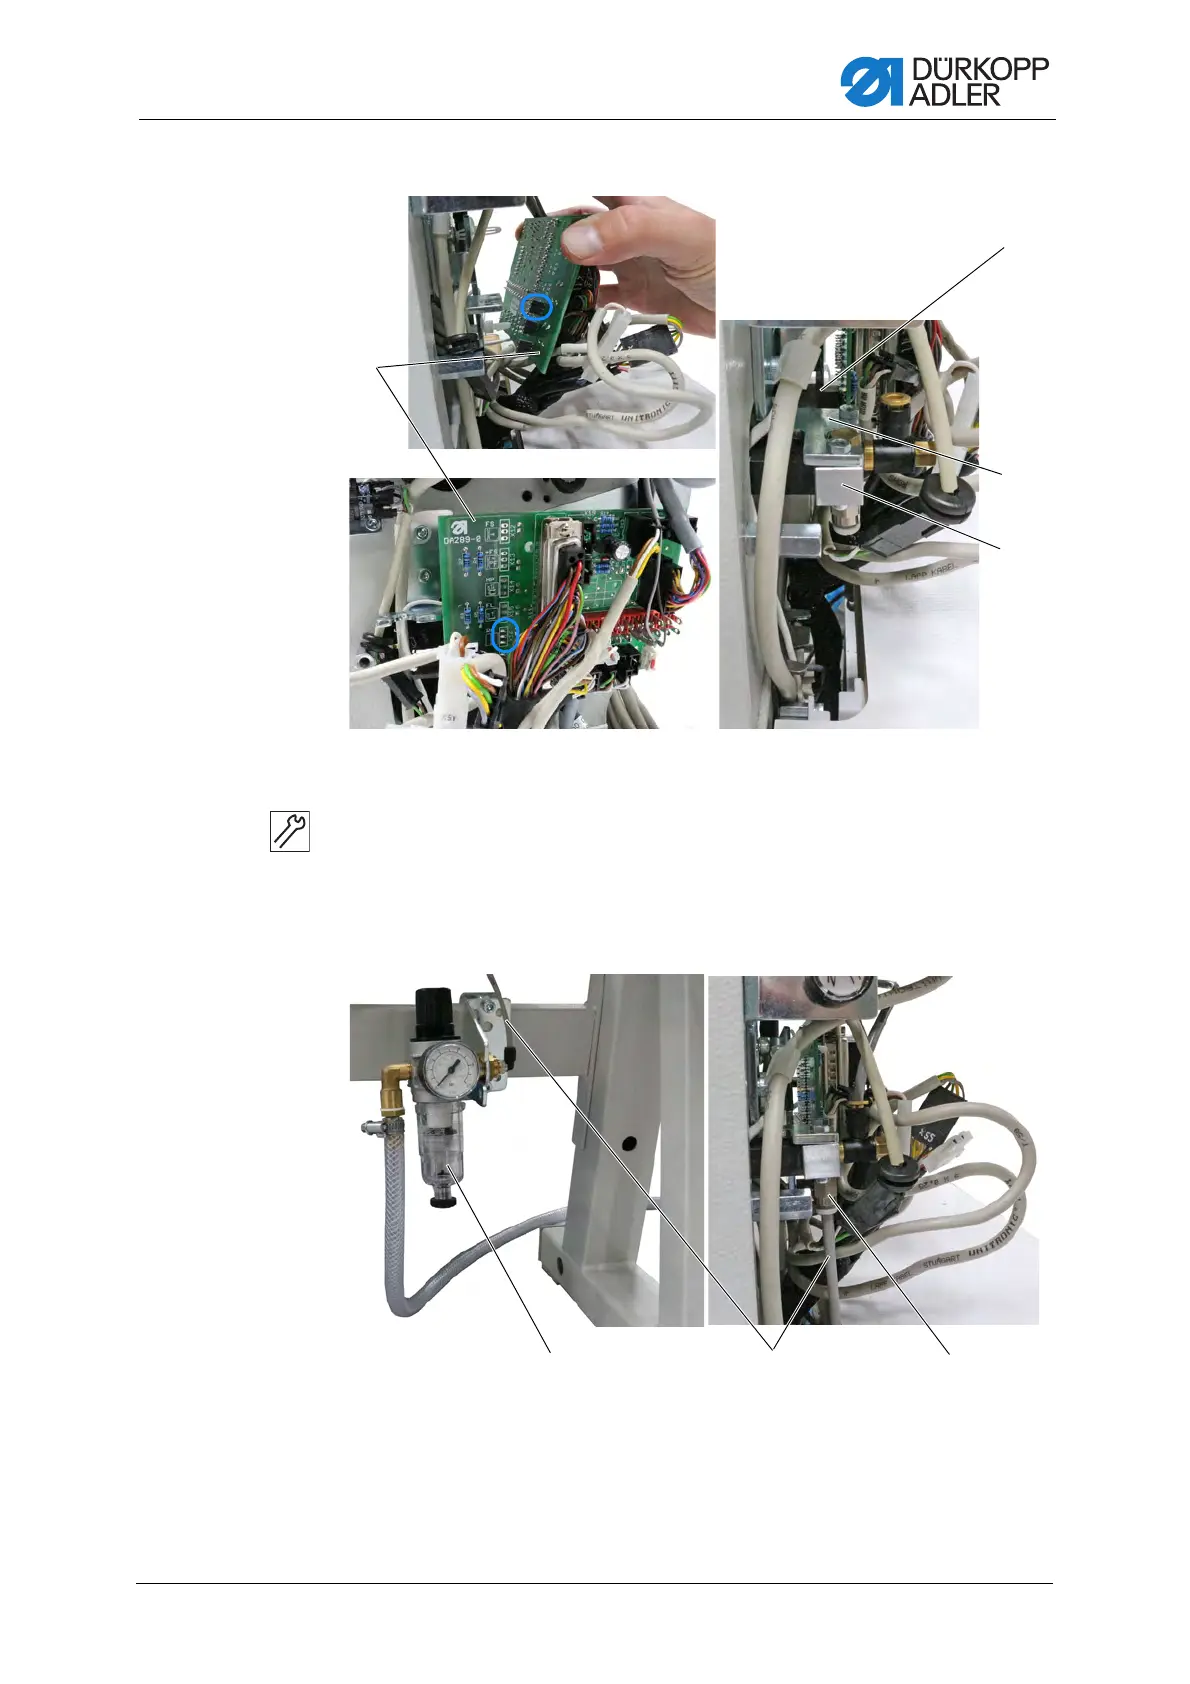
Fig. 7: Connecting the remaining thread monitor on PREMIUM machines (2)
3. Insert the magnet valve (2) into socket X16 on the circuit board (1).
If socket X16 is already occupied, use socket X17 or socket X18.
4. Assemble the circuit board (1).
5. Tighten the connection plate (4) on the holder (3).
Fig. 8: Connecting the remaining thread monitor on PREMIUM machines (3)
(1) - Circuit board
(2) - Magnet valve
(3) - Holder
(4) - Connection plate
(5) - Compressed air maintenance unit
(6) - Hose
(7) - Valve
⑤⑥

Other manuals for DURKOPP ADLER 867

Questions and Answers:

Question and Answer IconNeed help?

Do you have a question about the DURKOPP ADLER 867 and is the answer not in the manual?

DURKOPP ADLER 867 Specifications

General IconGeneral
Stitch TypeLockstitch
Max Stitch Length12 mm
Needle System134-35
Needle Thread TensionAdjustable
LubricationAutomatic
TypeIndustrial Sewing Machine
Max Sewing Speed3000 stitches per minute
Presser Foot Lift20 mm
Power Requirements230V/50Hz

Related product manuals