Assembling the remaining thread monitor
6 Additional Instructions 867/867-M PREMIUM - 00.0 - 07/2018
2 Assembling the remaining thread monitor
2.1 Assembling the remaining thread monitor
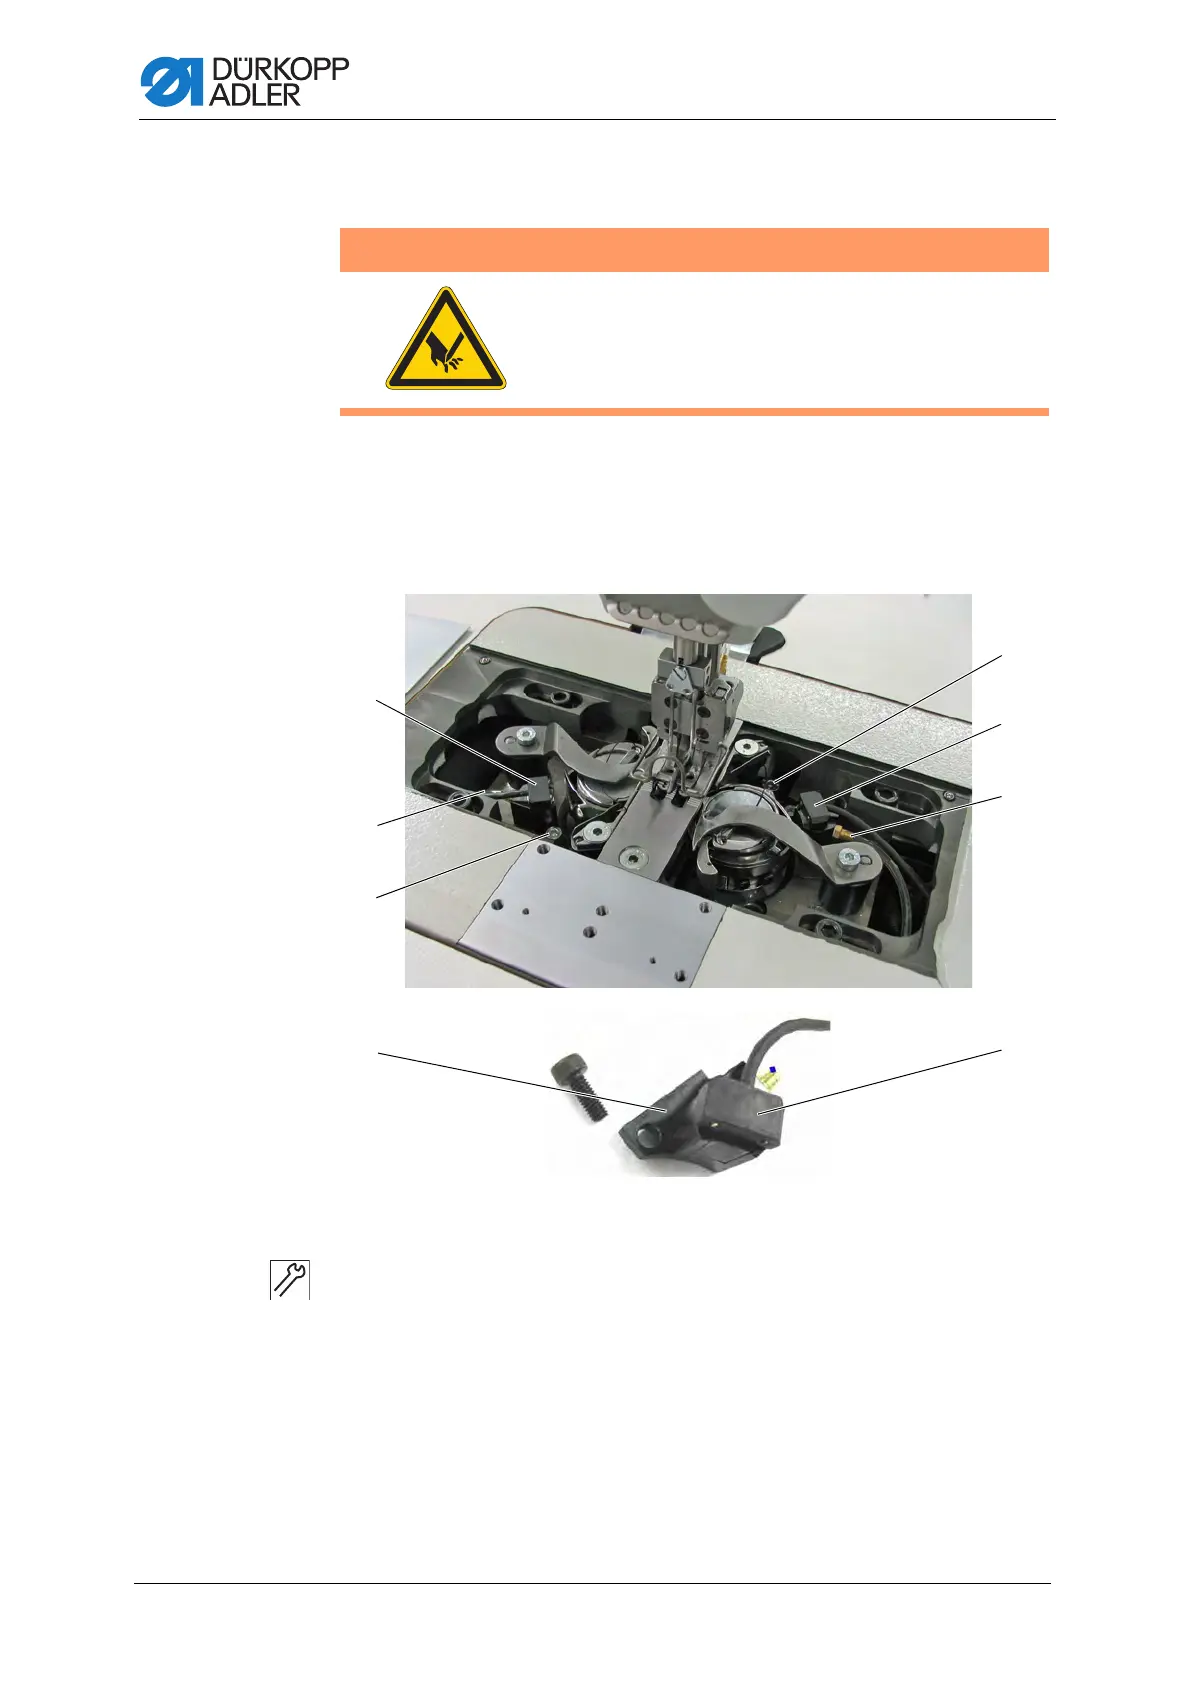
Fig. 1: Assembling the remaining thread monitor (1)
To assemble the remaining thread monitor:
1. Remove old bobbin case and replace it with the new bobbin case from
the kit.
2. Tighten the pre-assembled carriers (4) using the screws (3).
As a rule, the front edge of the remaining thread monitor (1) must be
assembled parallel to the front edge of the carrier (4).
3. Connect the hose (2) used for the blow-off.
WARNING
Risk of injury from sharp and moving parts!
Puncture or crushing possible.
Switch off the machine before assembling the
residual thread monitor.
(1) - Remaining thread monitor
(2) - Hose
(3) - Screws
(4) - Carrier

 Loading...


